Authentication and identity-based policy and monitoring
Function description
- Can support WEB authentication (SSO)
- Can identify the Starlink identity information of the authentication terminal, including: user, department
- Support policies based on identity information and statistics based on identity information
Starlink controller configuration
- Configure employee, department and other identity information for authentication
- Configure the SSO application of the Starlink controller as the authentication source
- Generate the access key of StarLink API, which is used to call StarLink API for identity synchronization (optional)
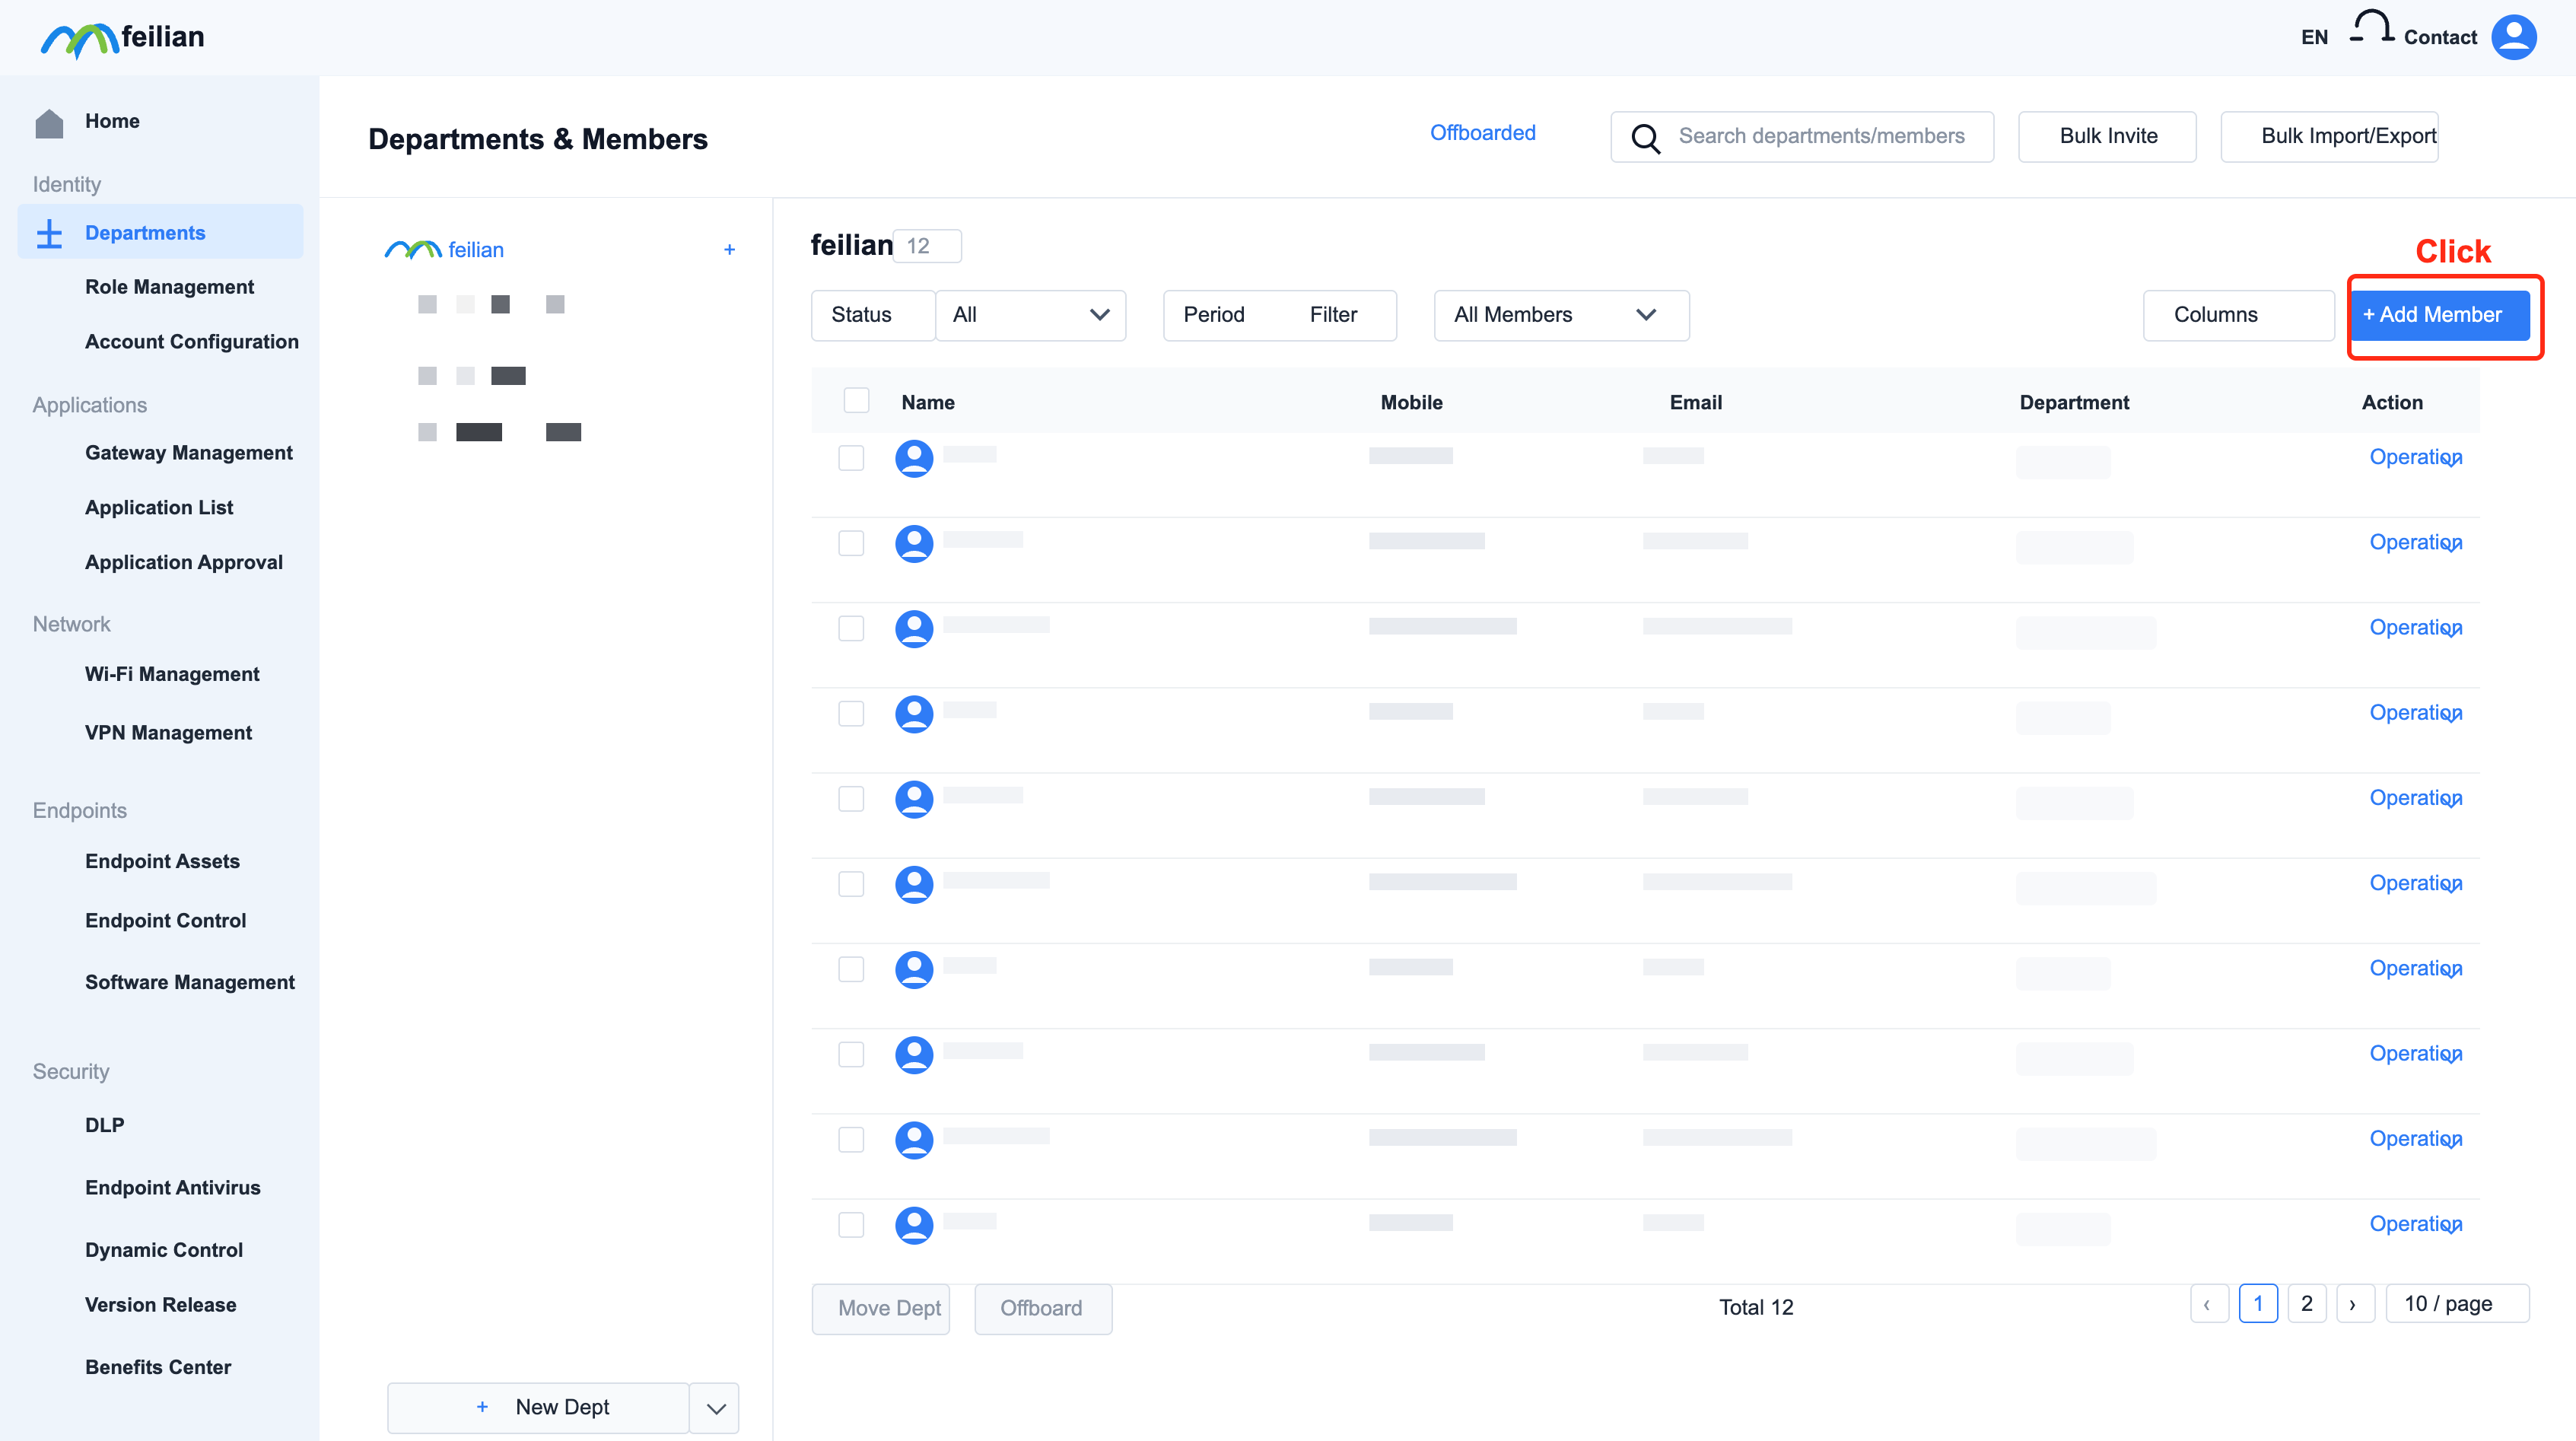
Configure employees and departments
Configuration path: departments and members
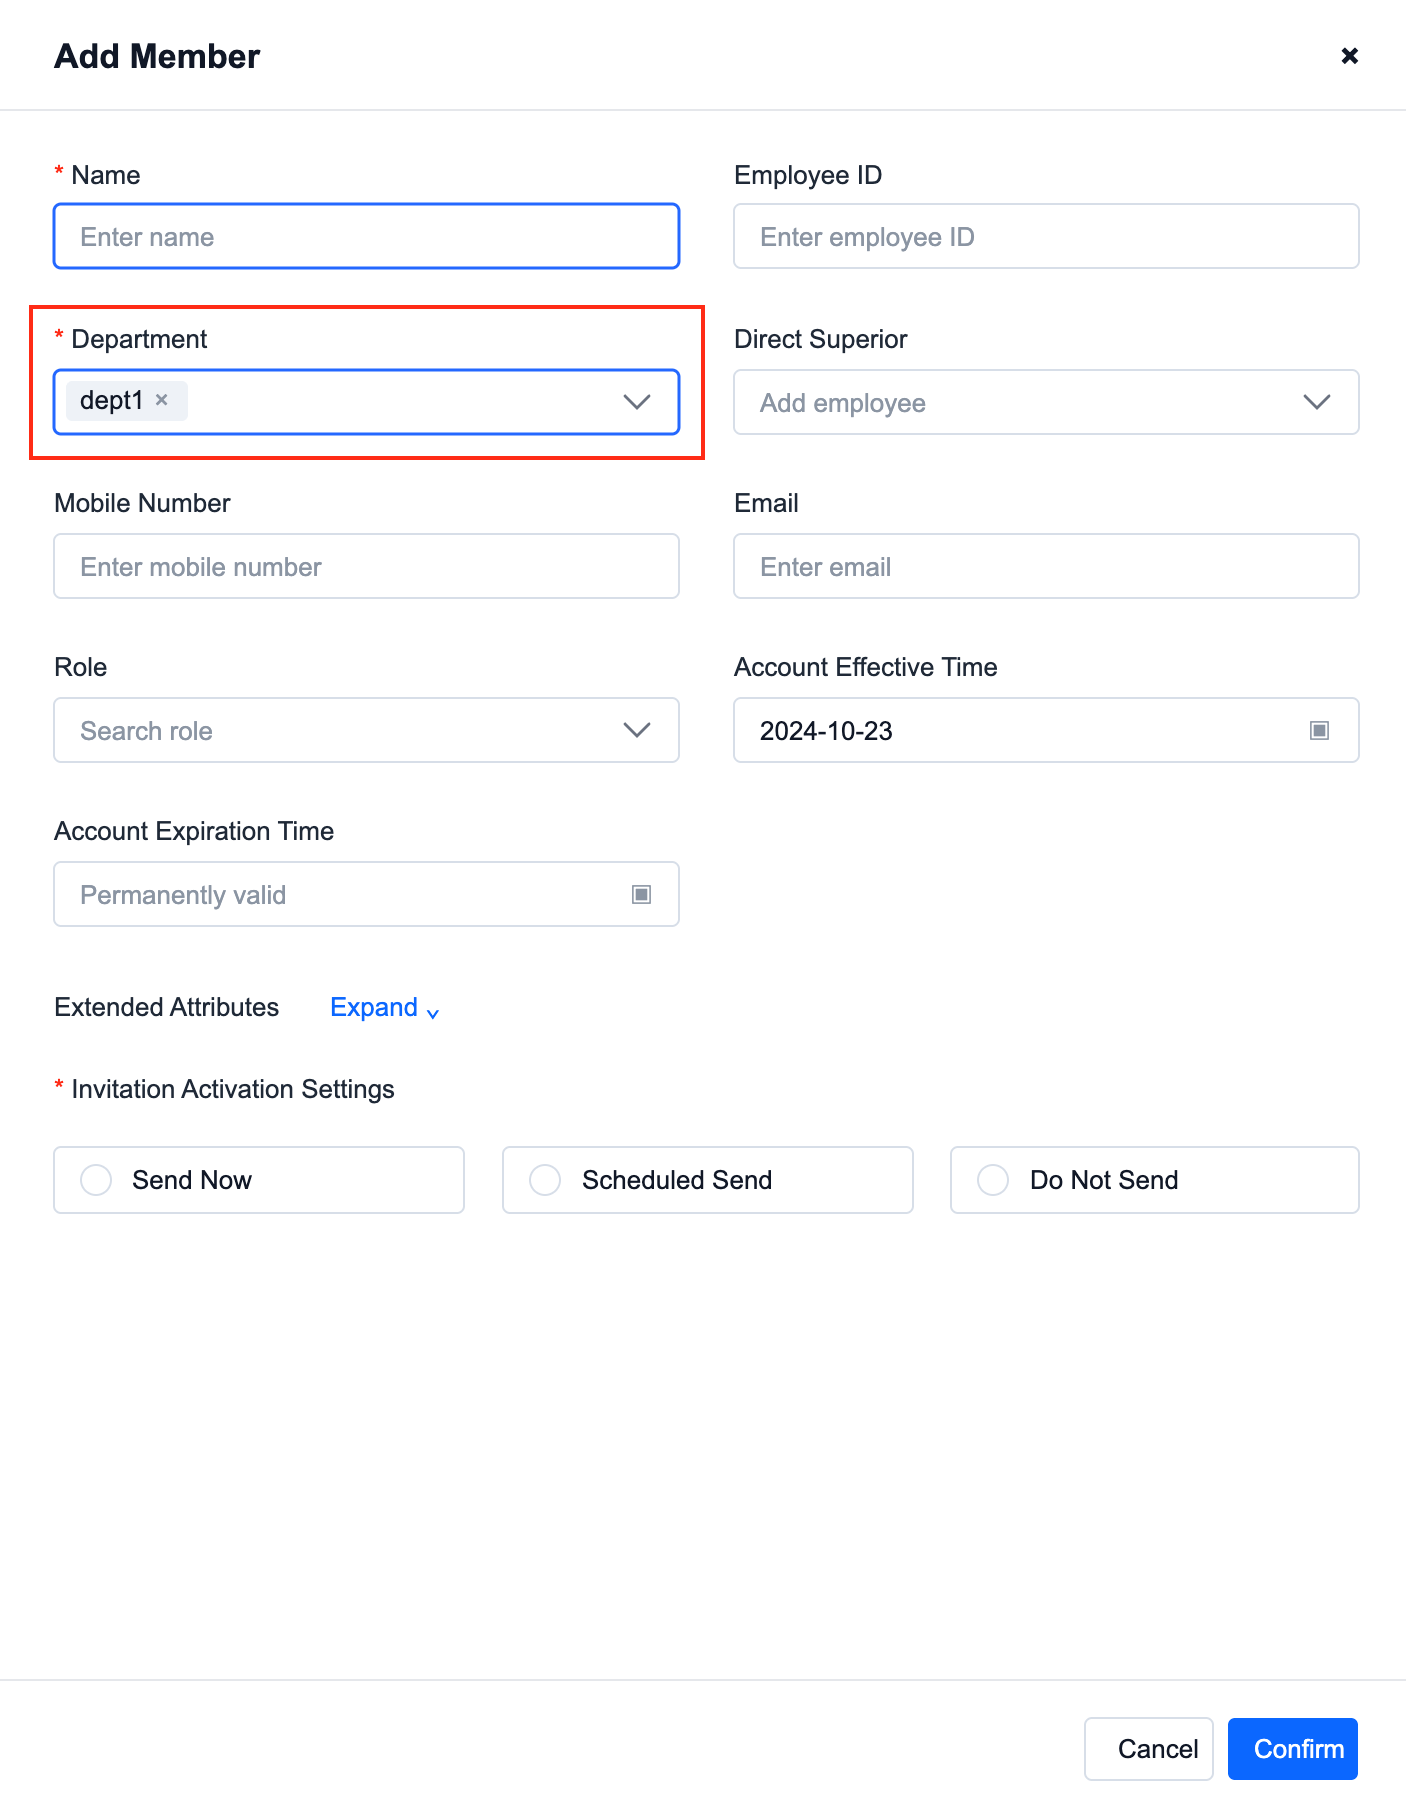
New employee
Click "Add Member"
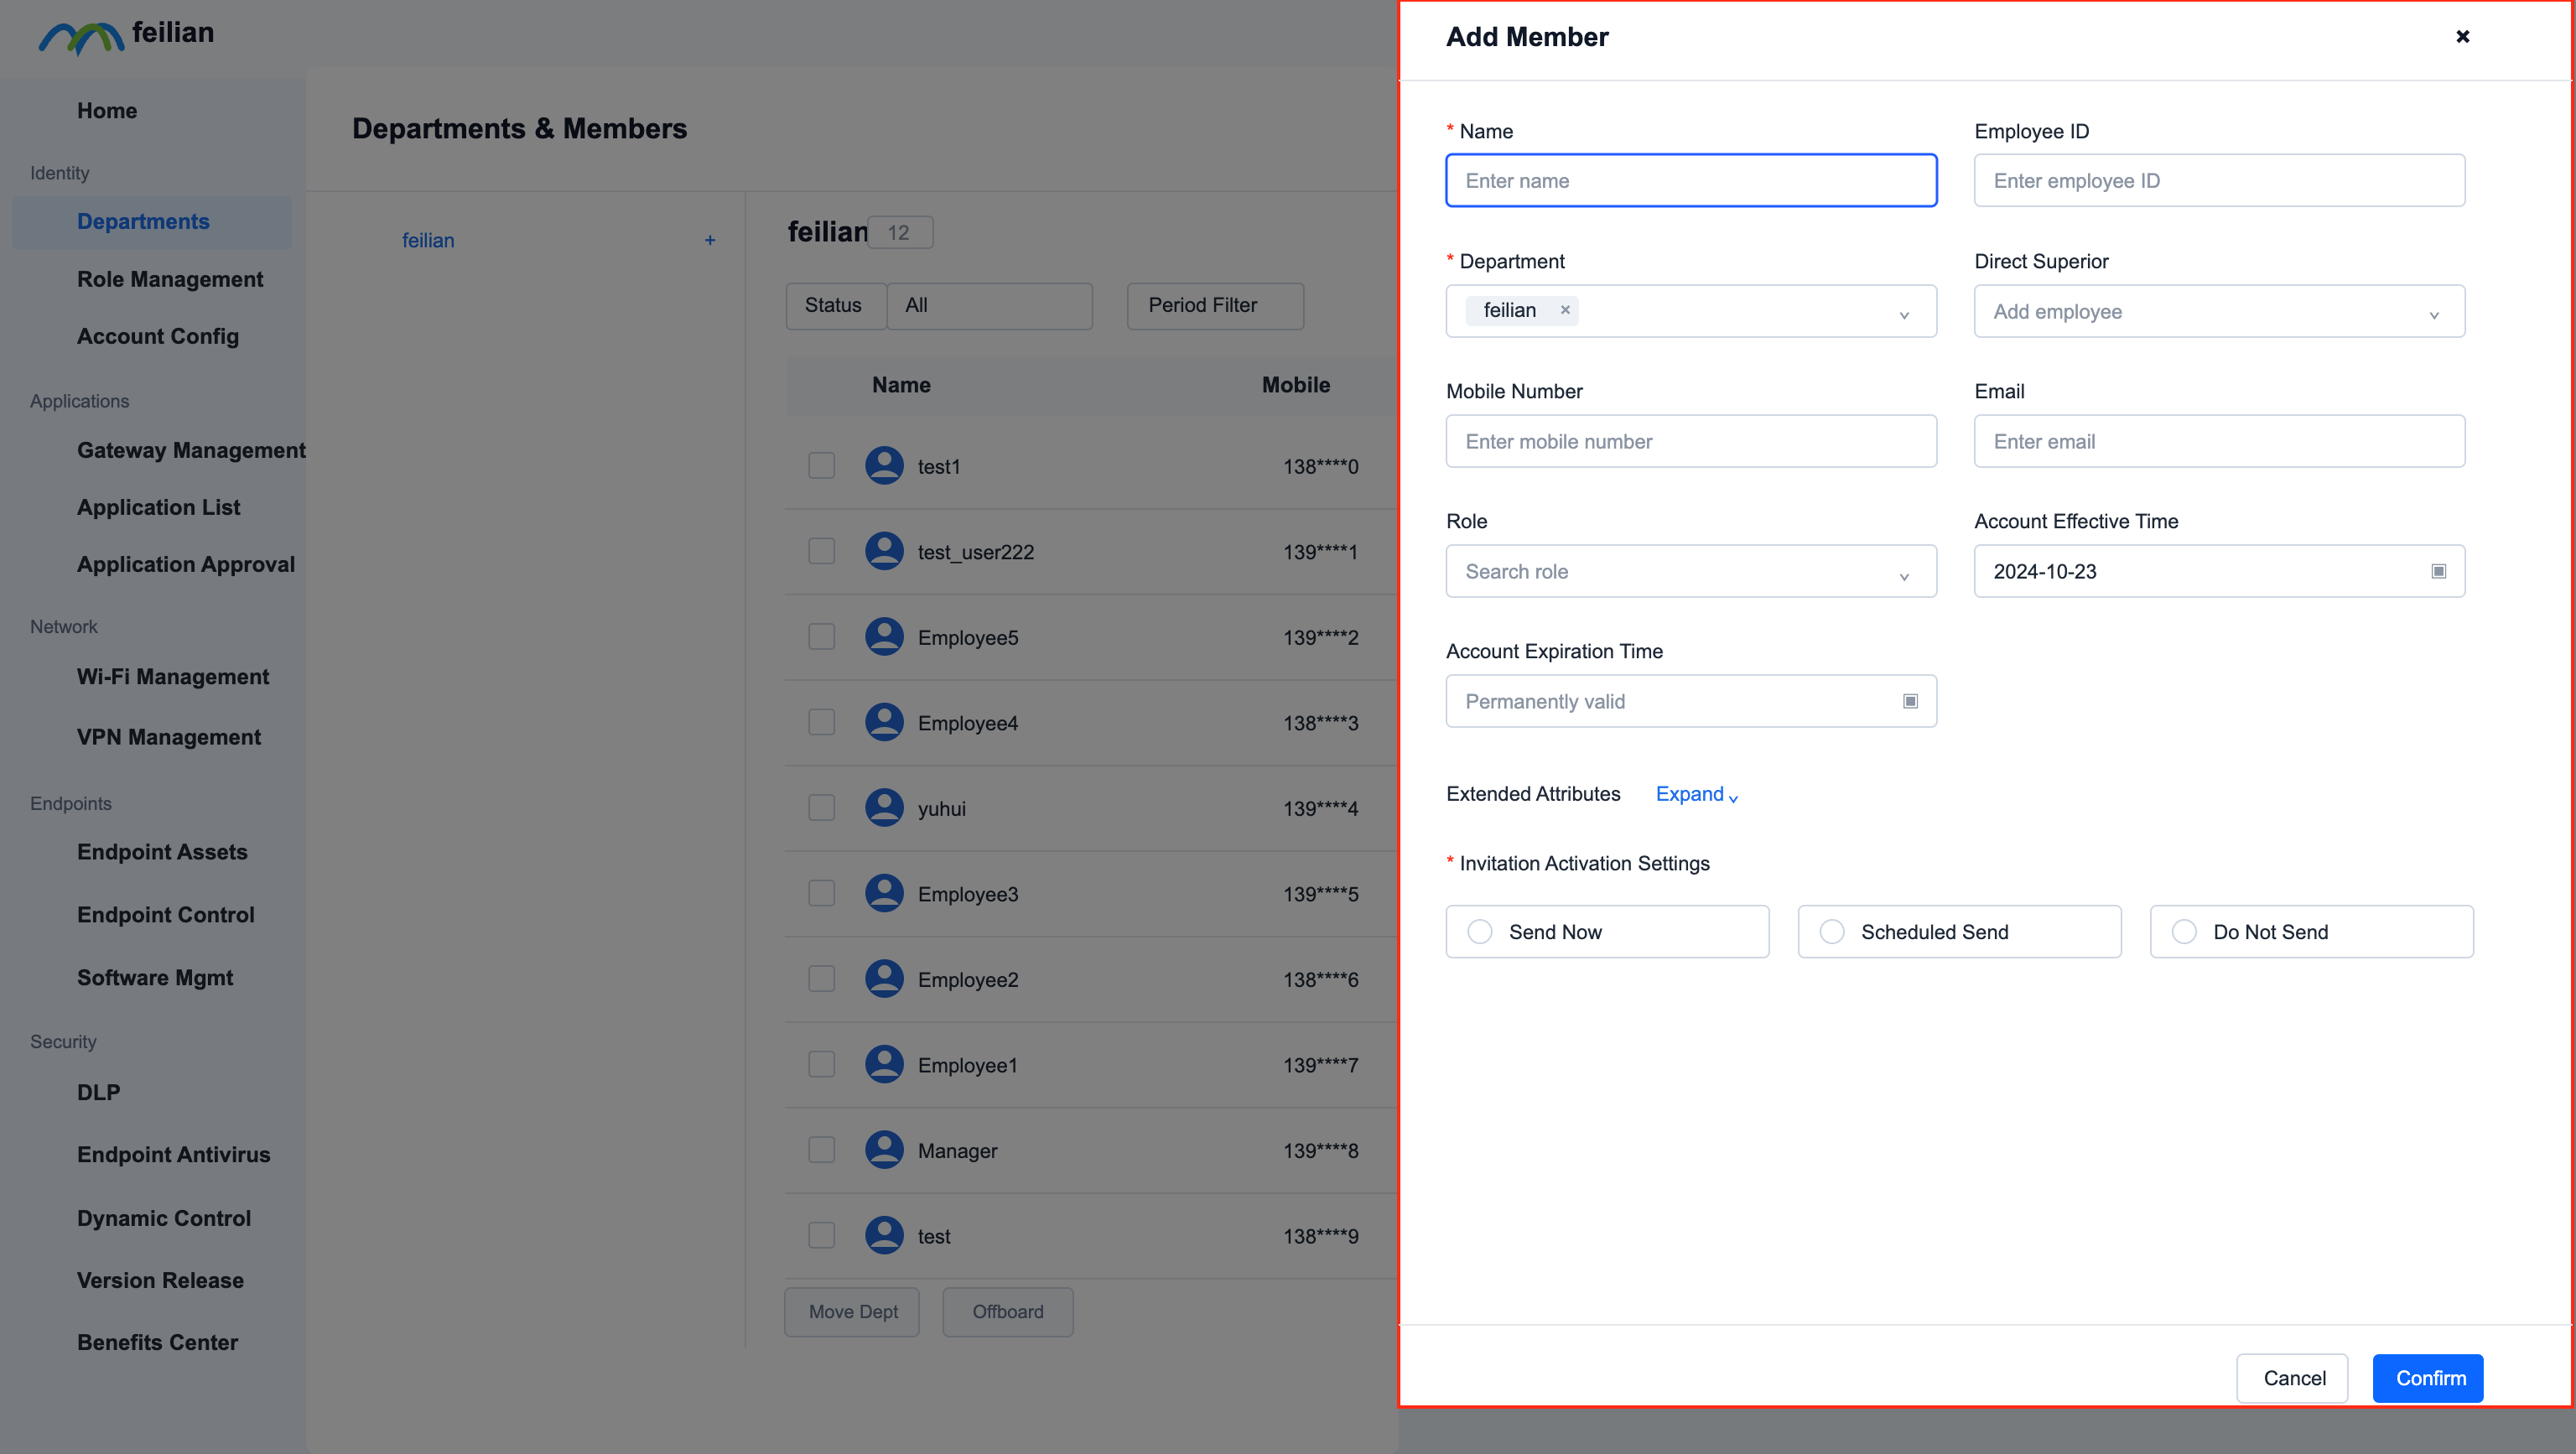
A pop-up window will appear, configure the corresponding parameters, and then click "Confirm"
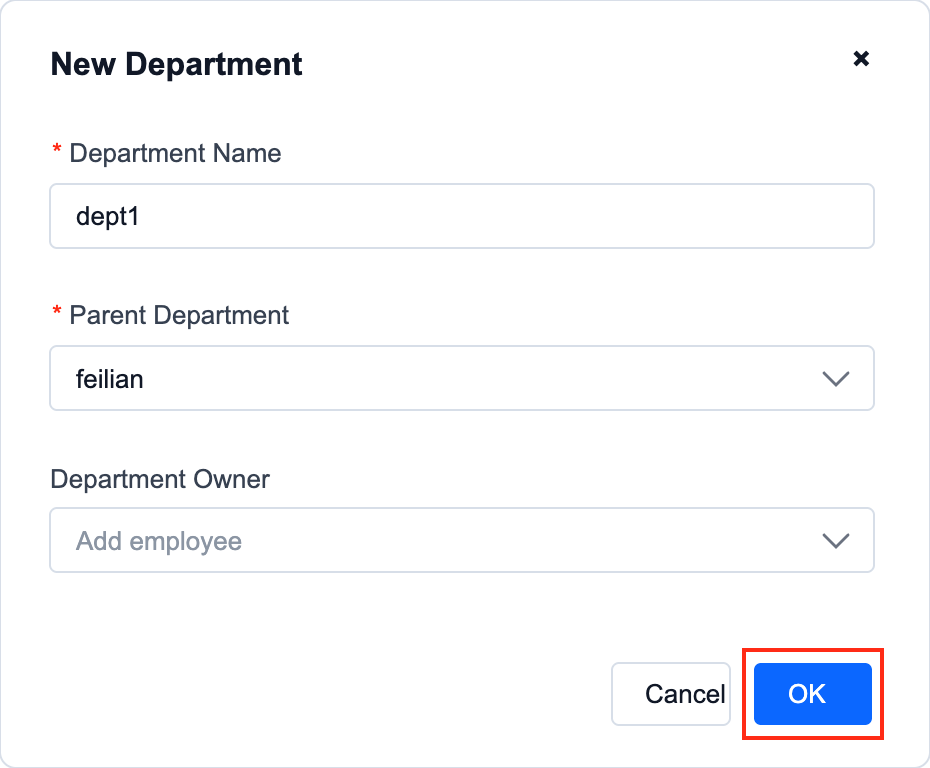
Create new department
Click the "+" in the upper left corner, a drop-down box will pop up, and select "New Sub-Department"
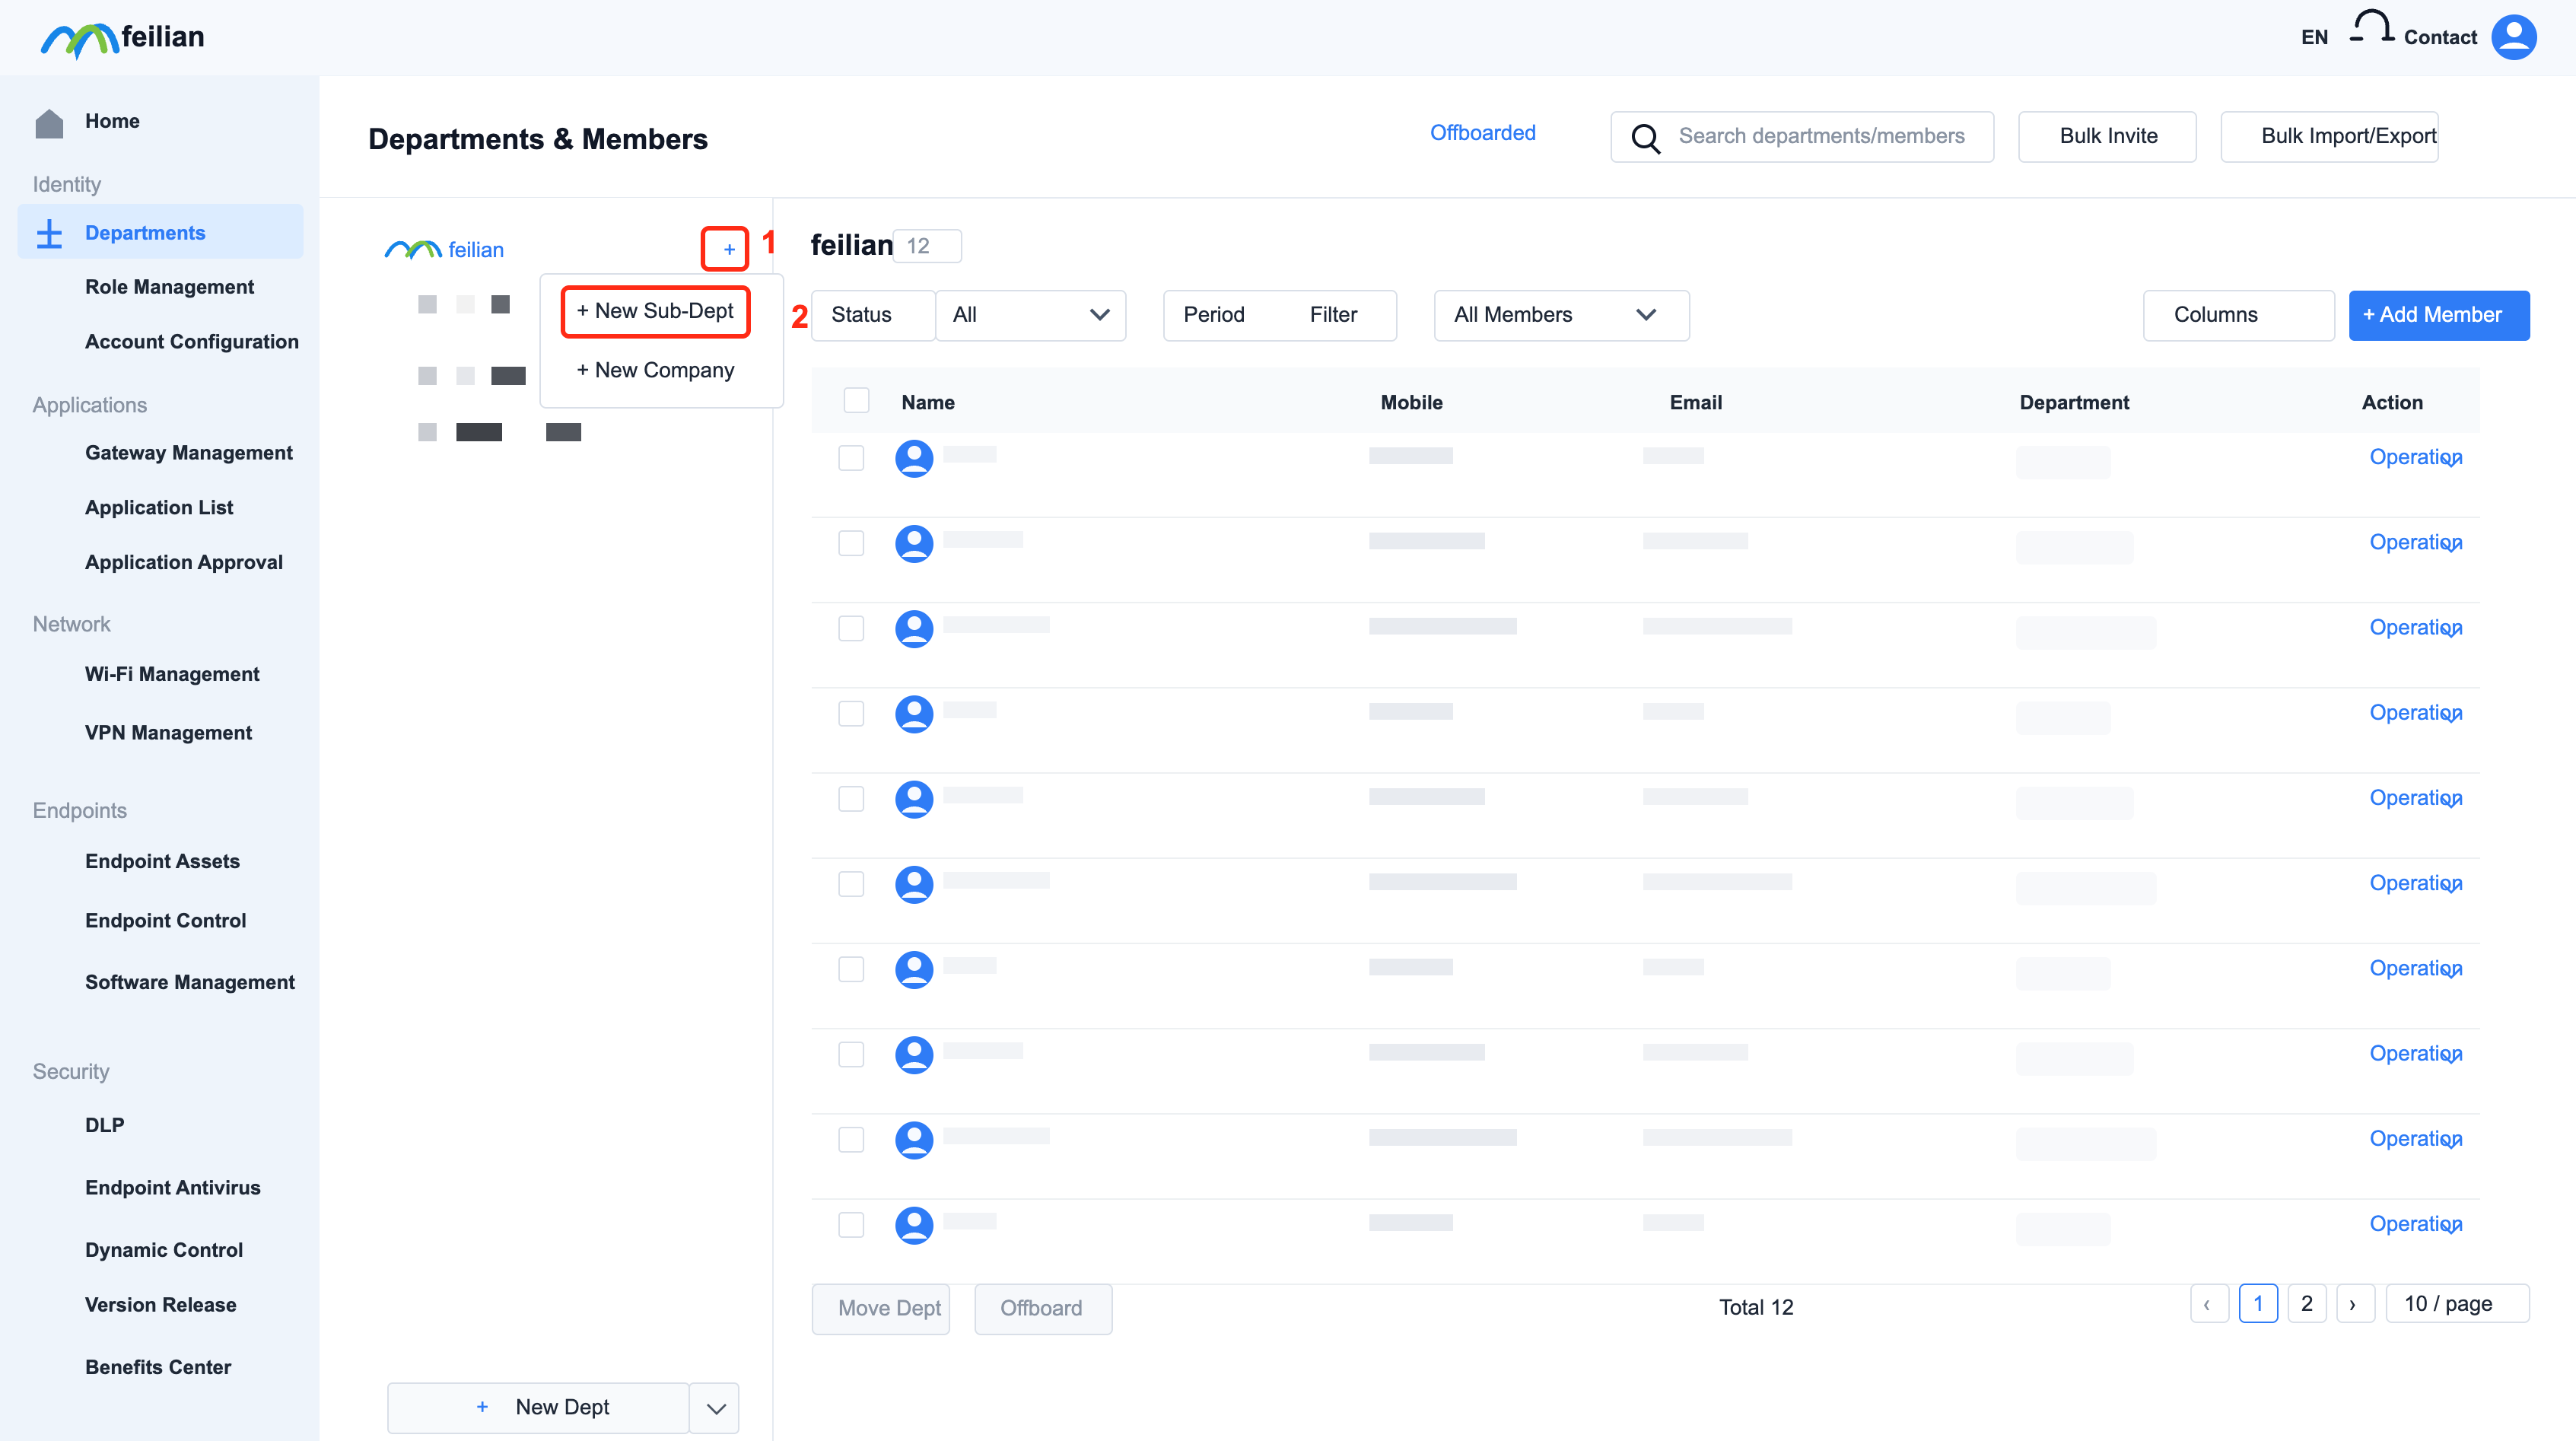
A pop-up window will appear, configure the corresponding parameters, and then click "OK"
Create new employees belonging to this department
Select the department and click "Add Members"
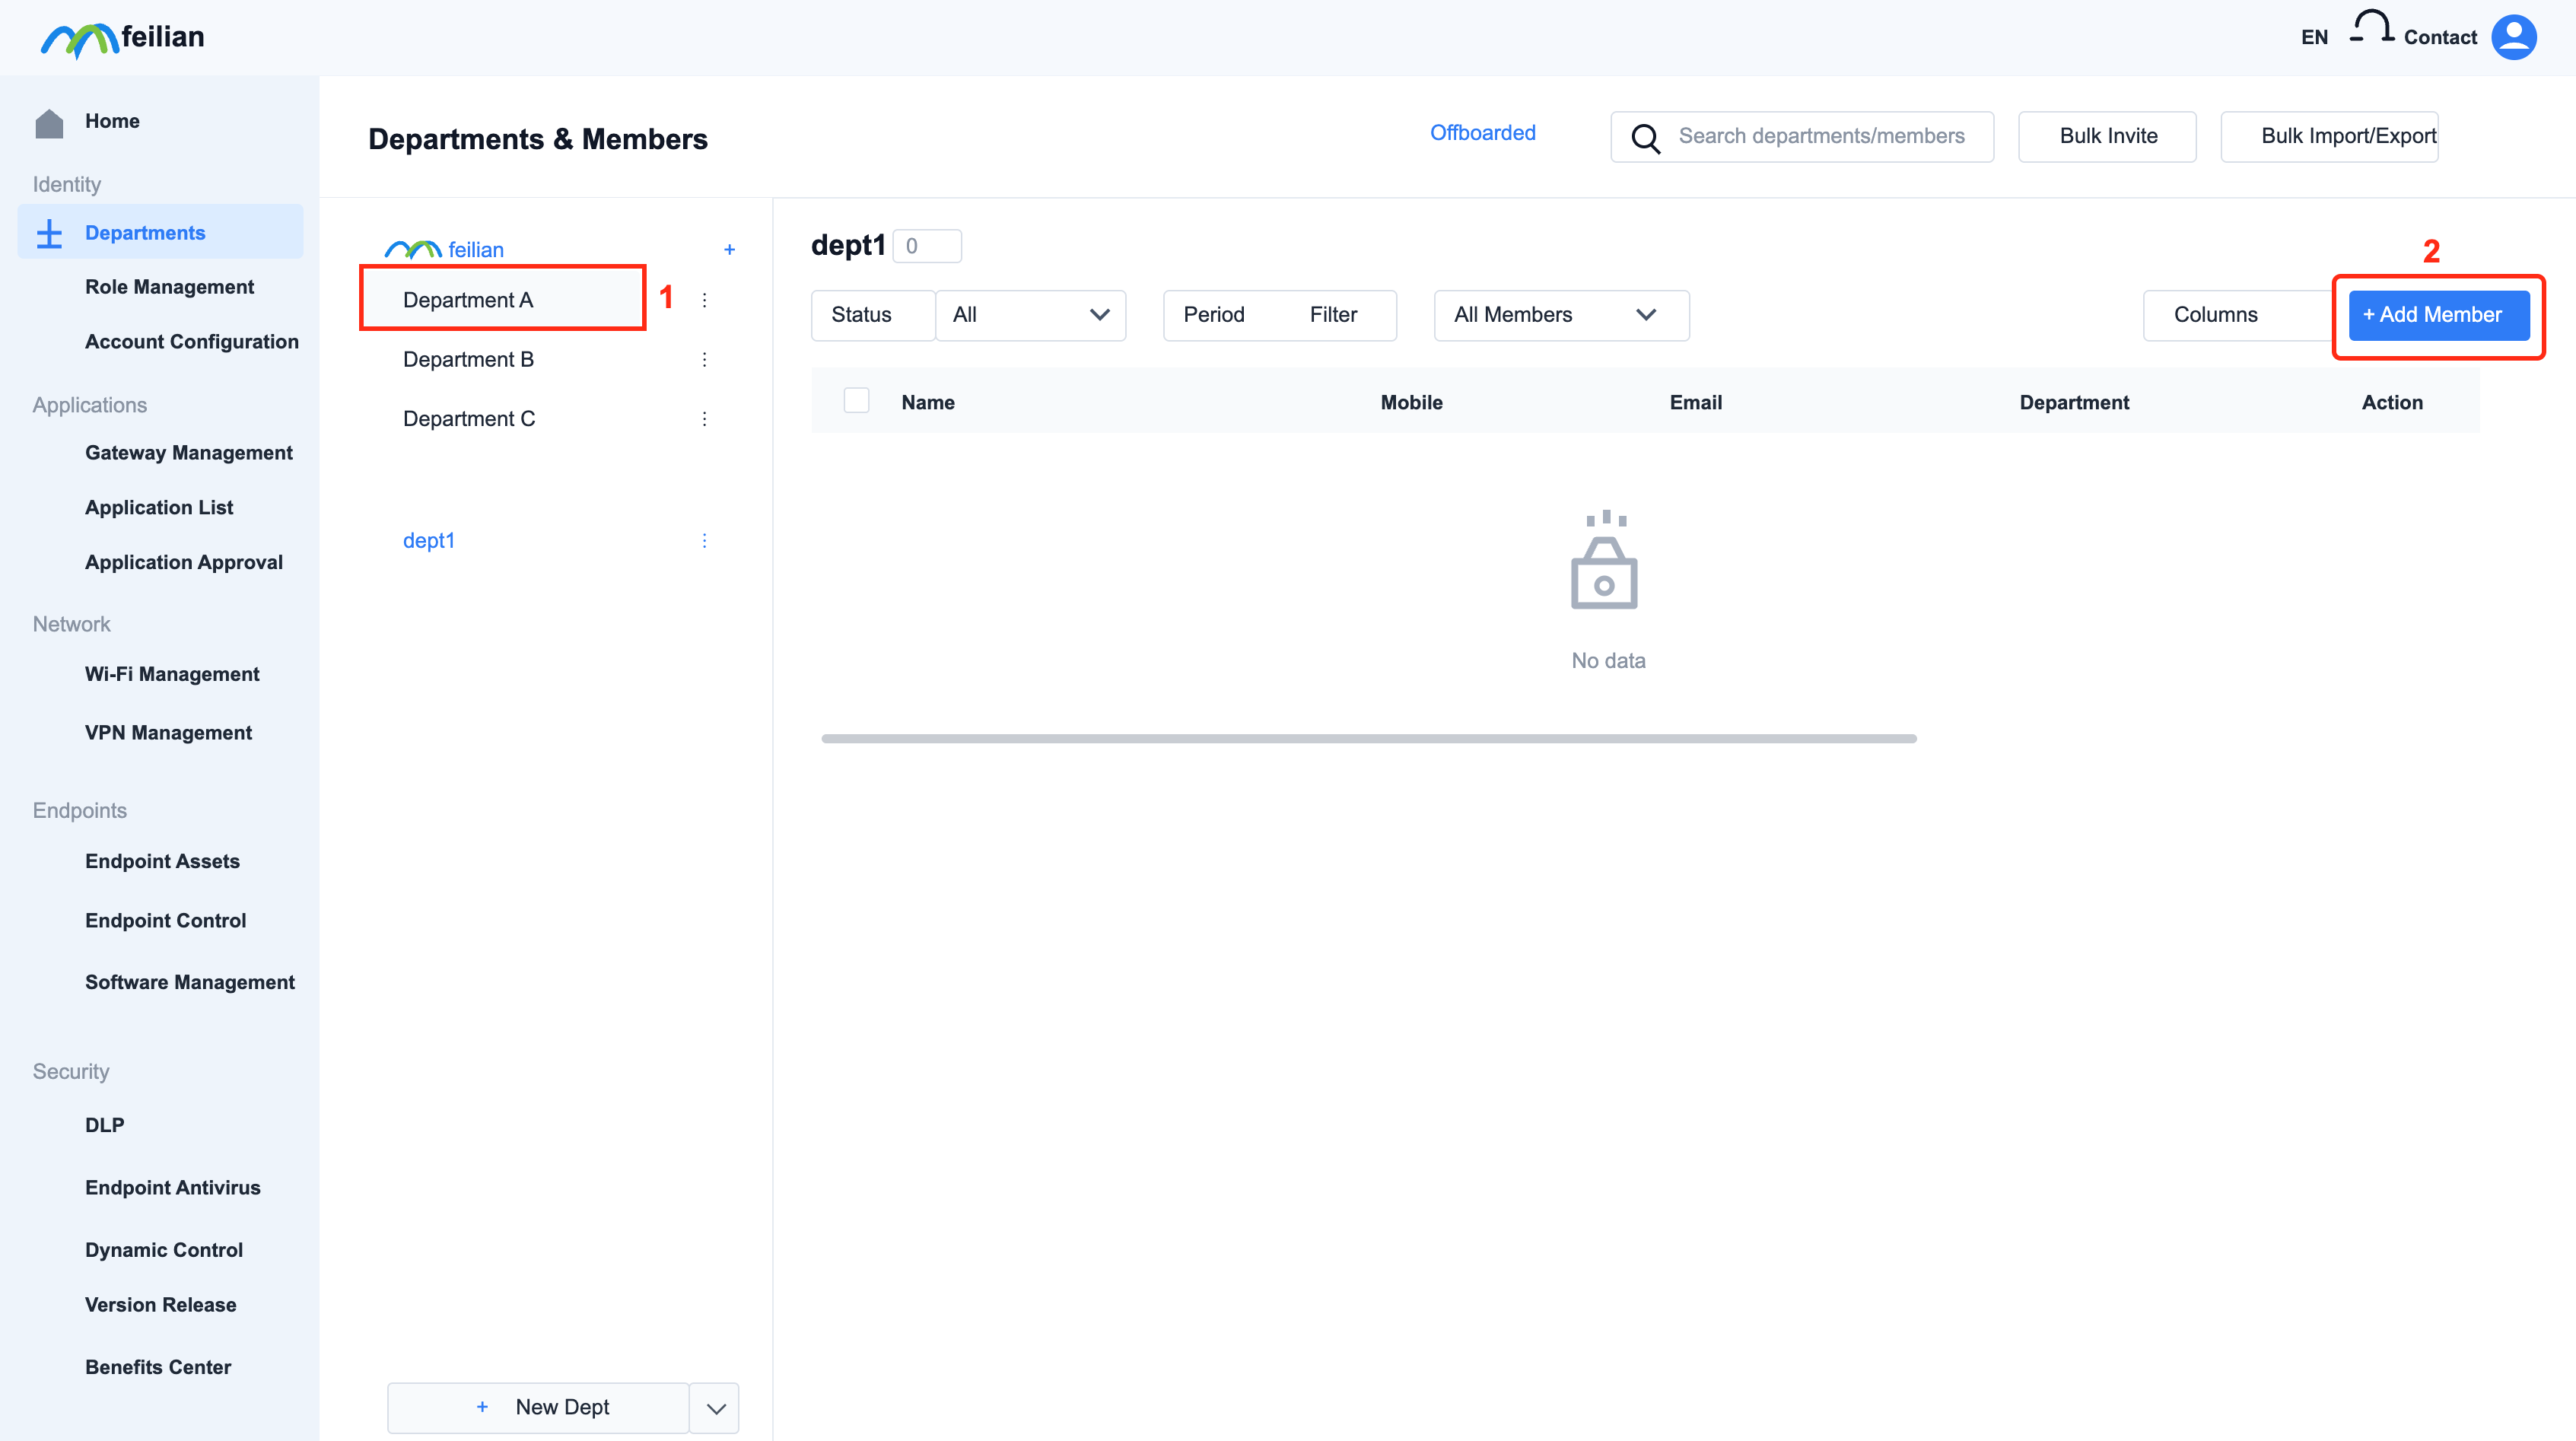
The value of department is the department, fill in other parameters and click "Confirm"
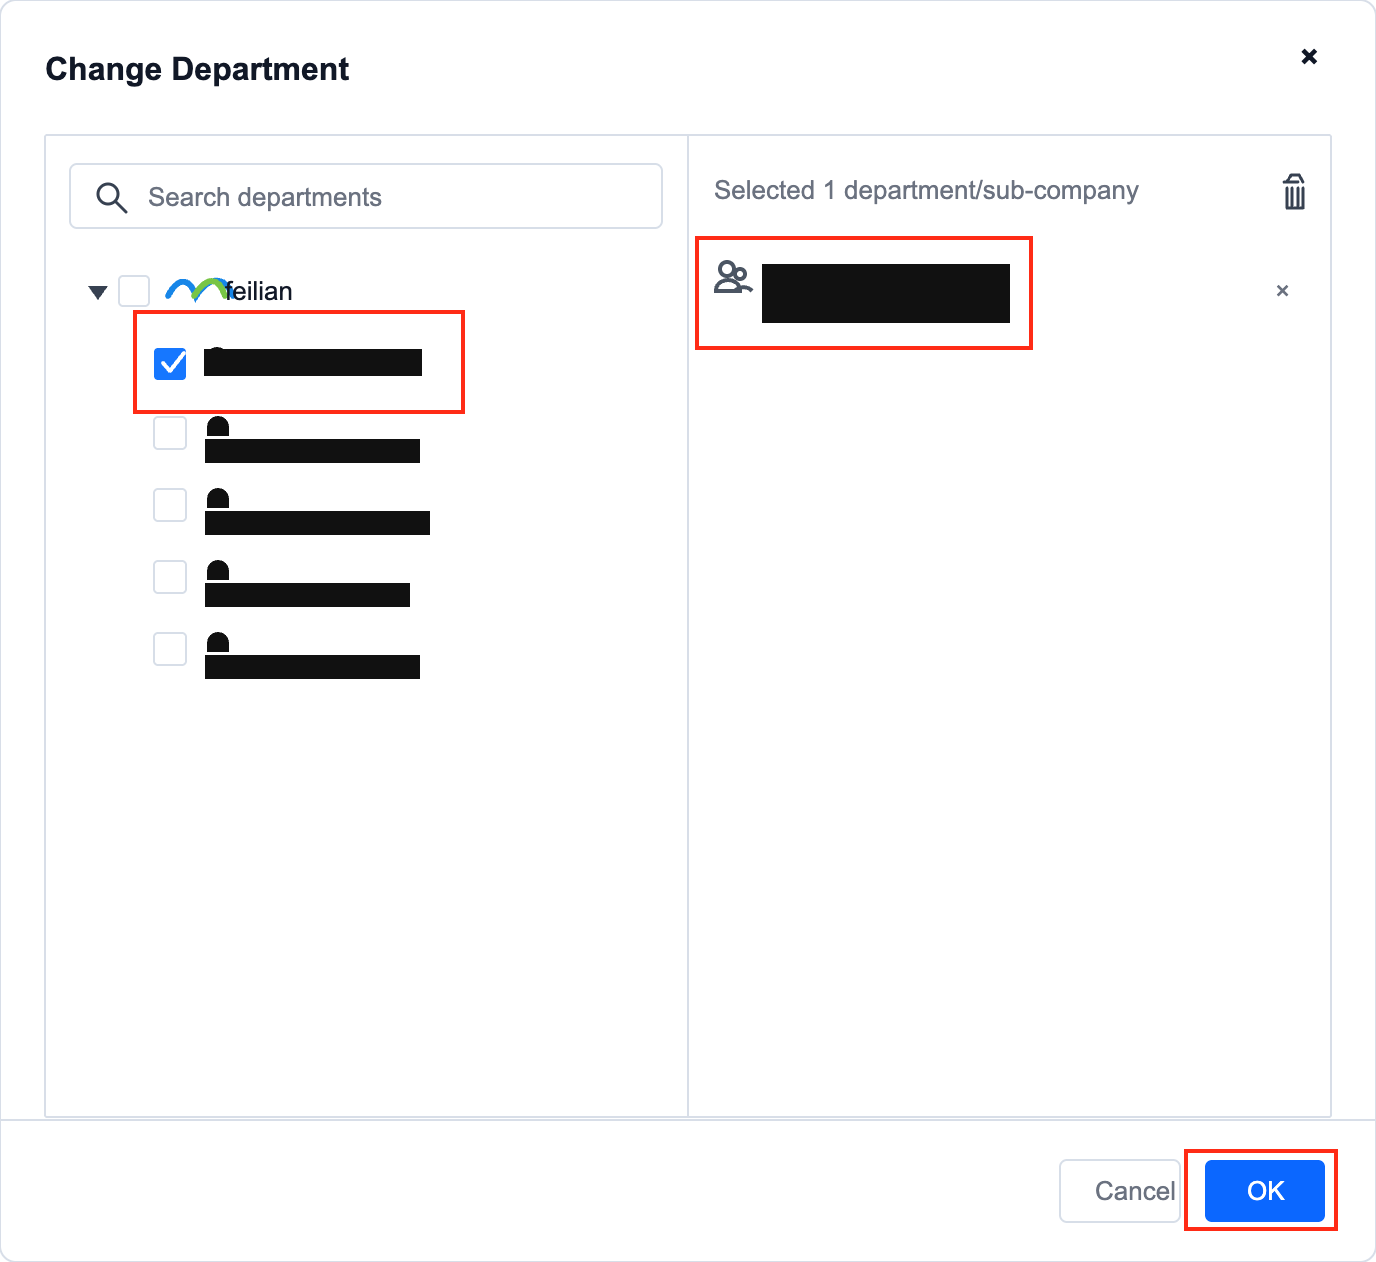
Change employee department
In the employee's operation column, click "Operation", and the drop-down box will pop up and click "Change Department"
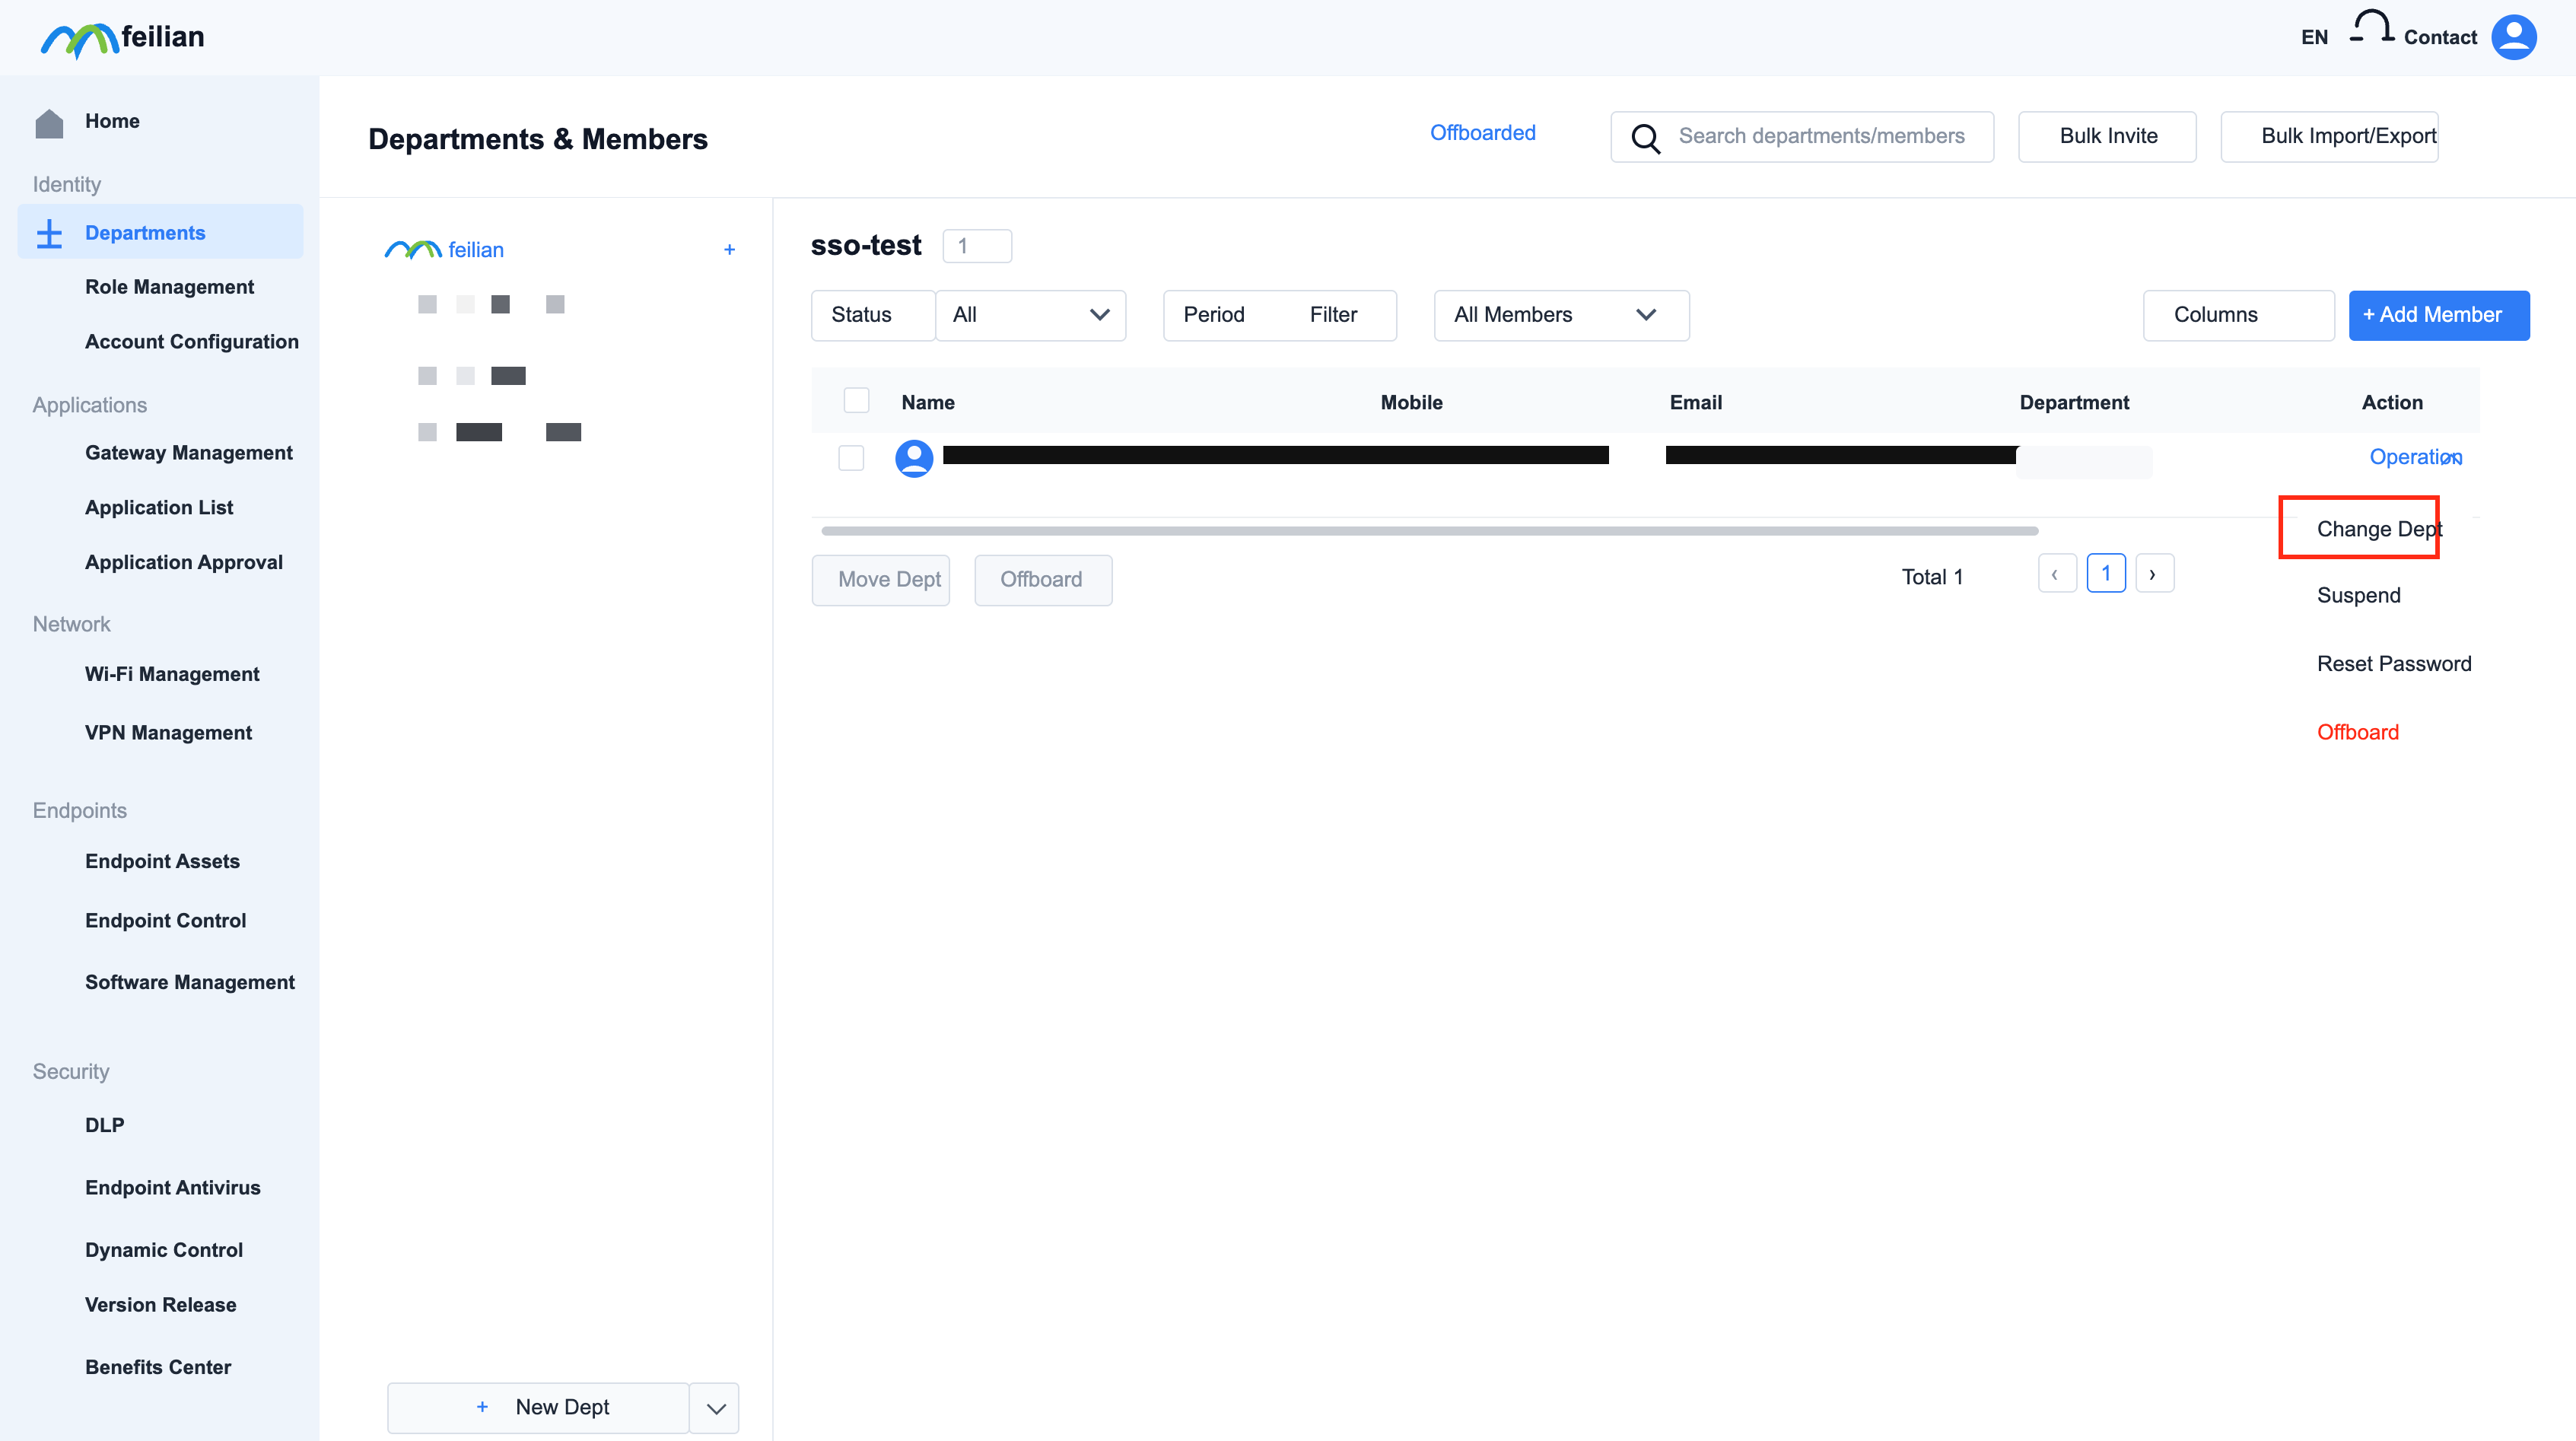
Select the department you want to add and click "OK"
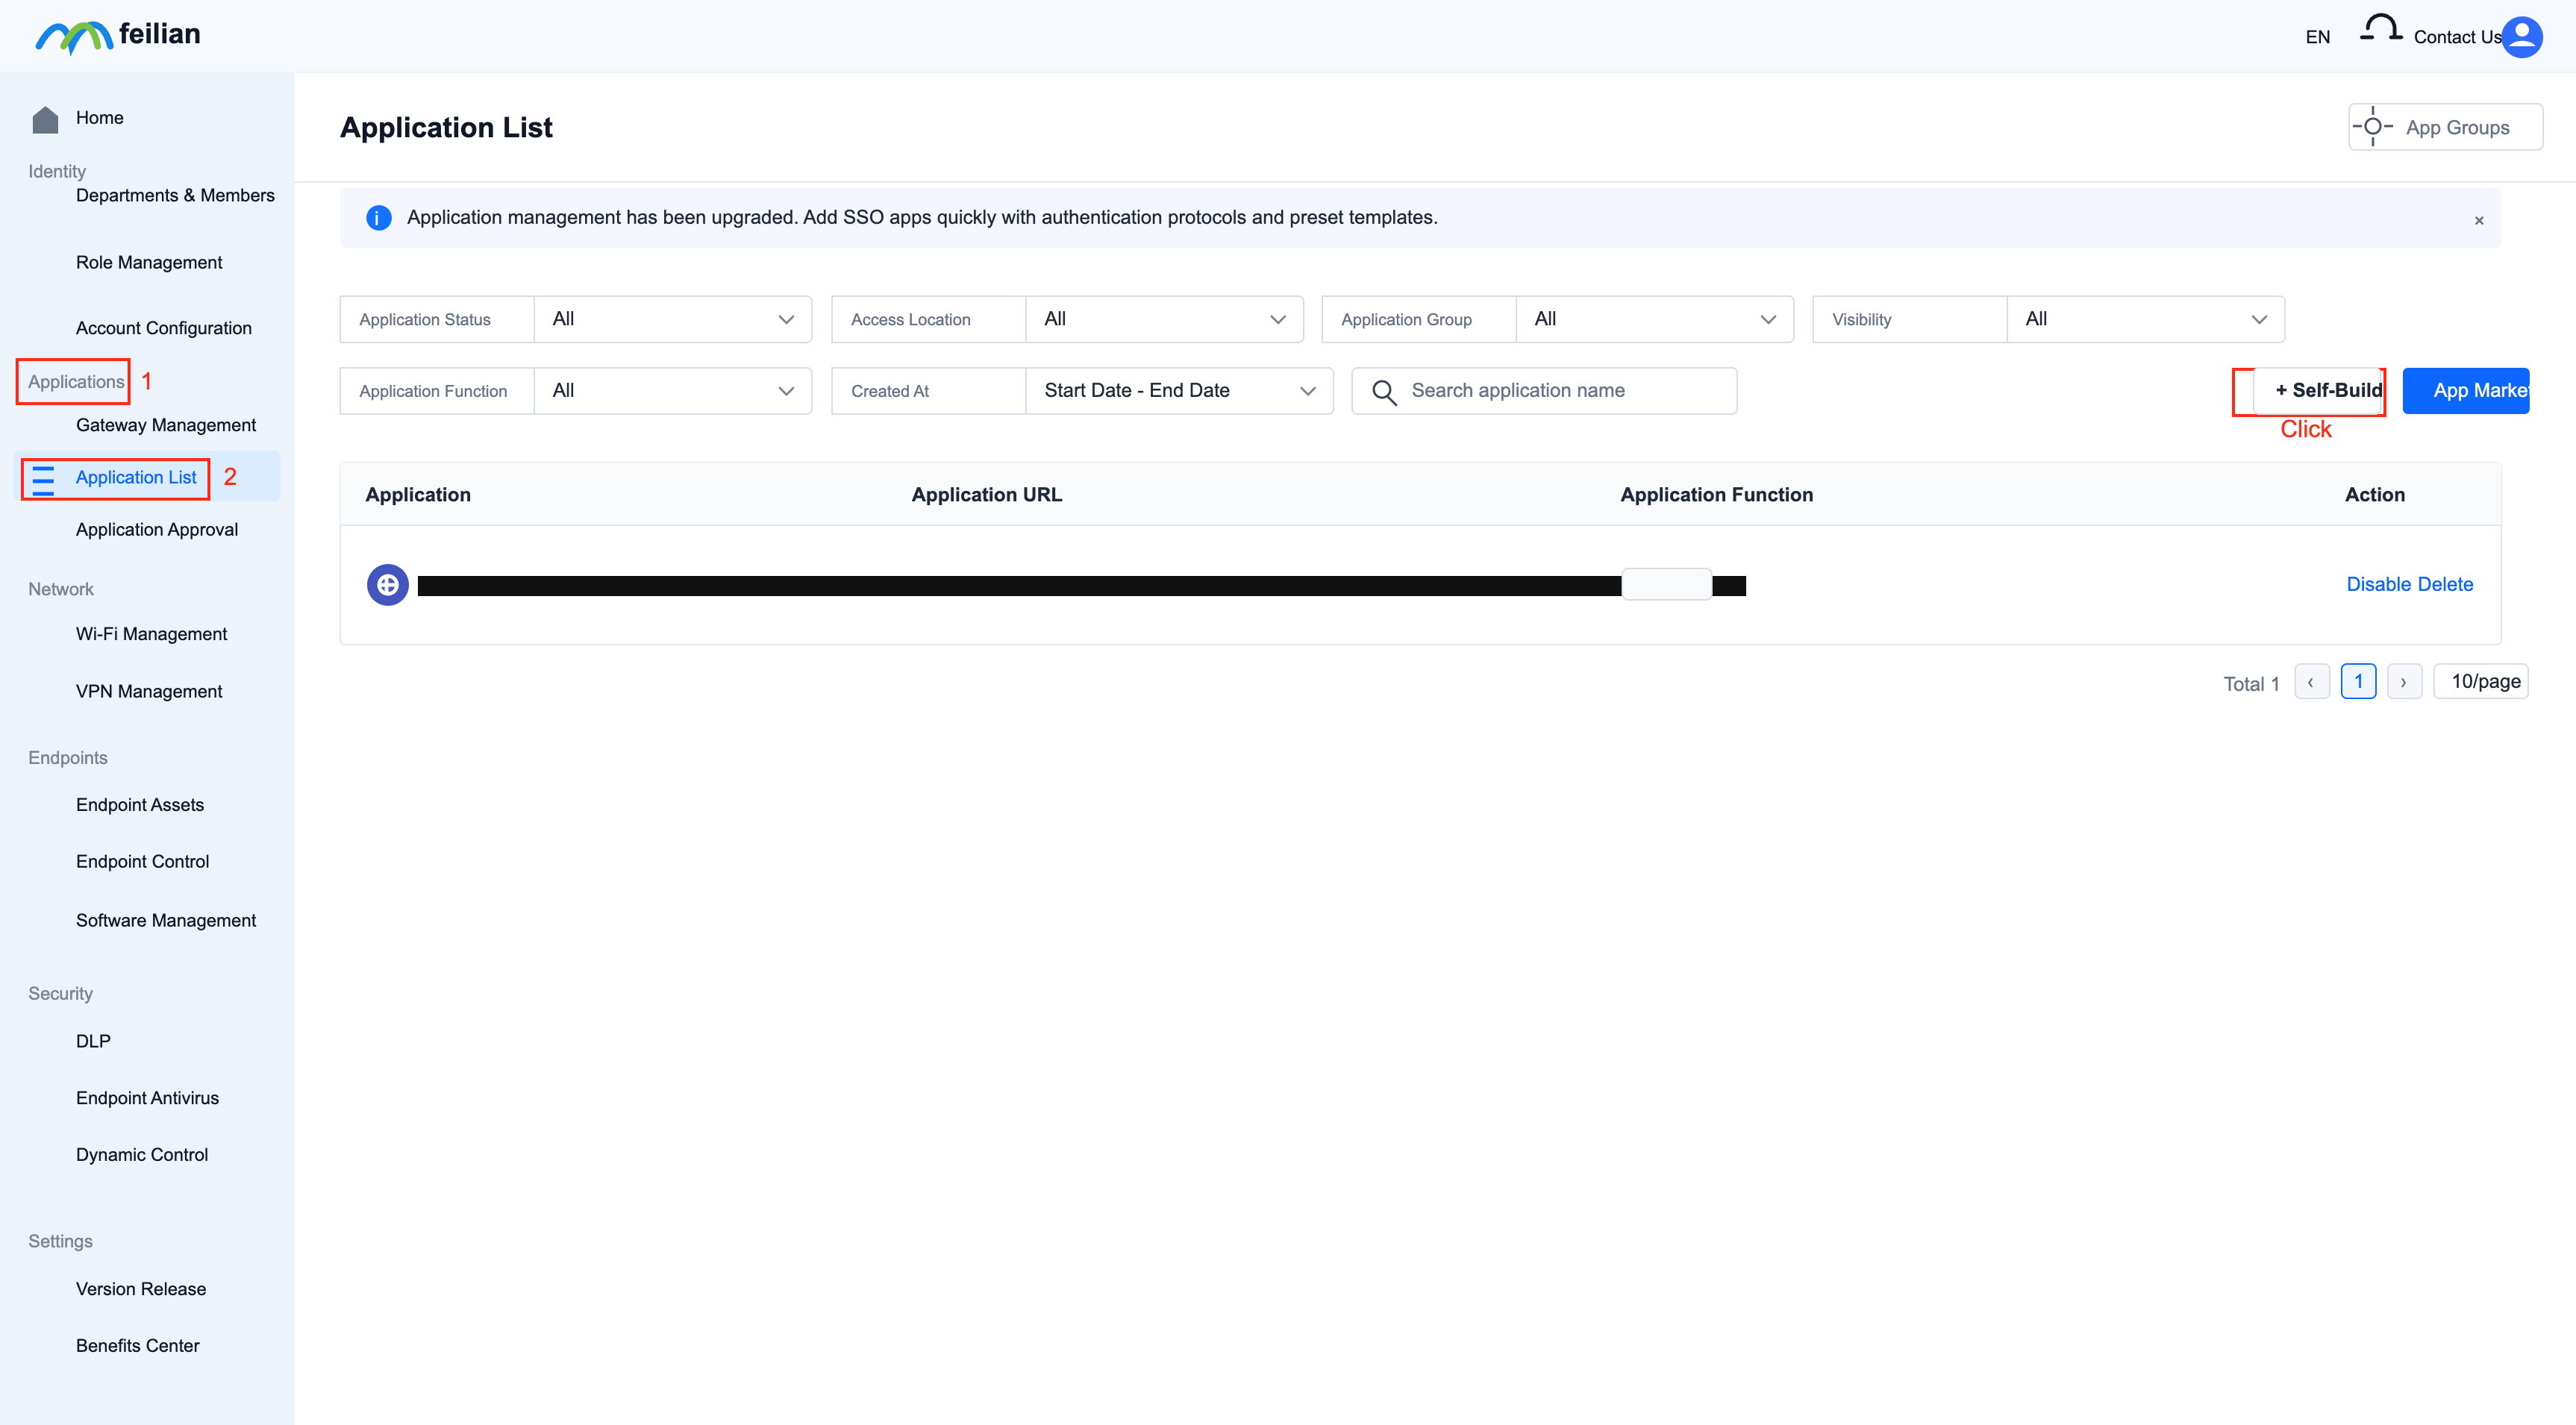
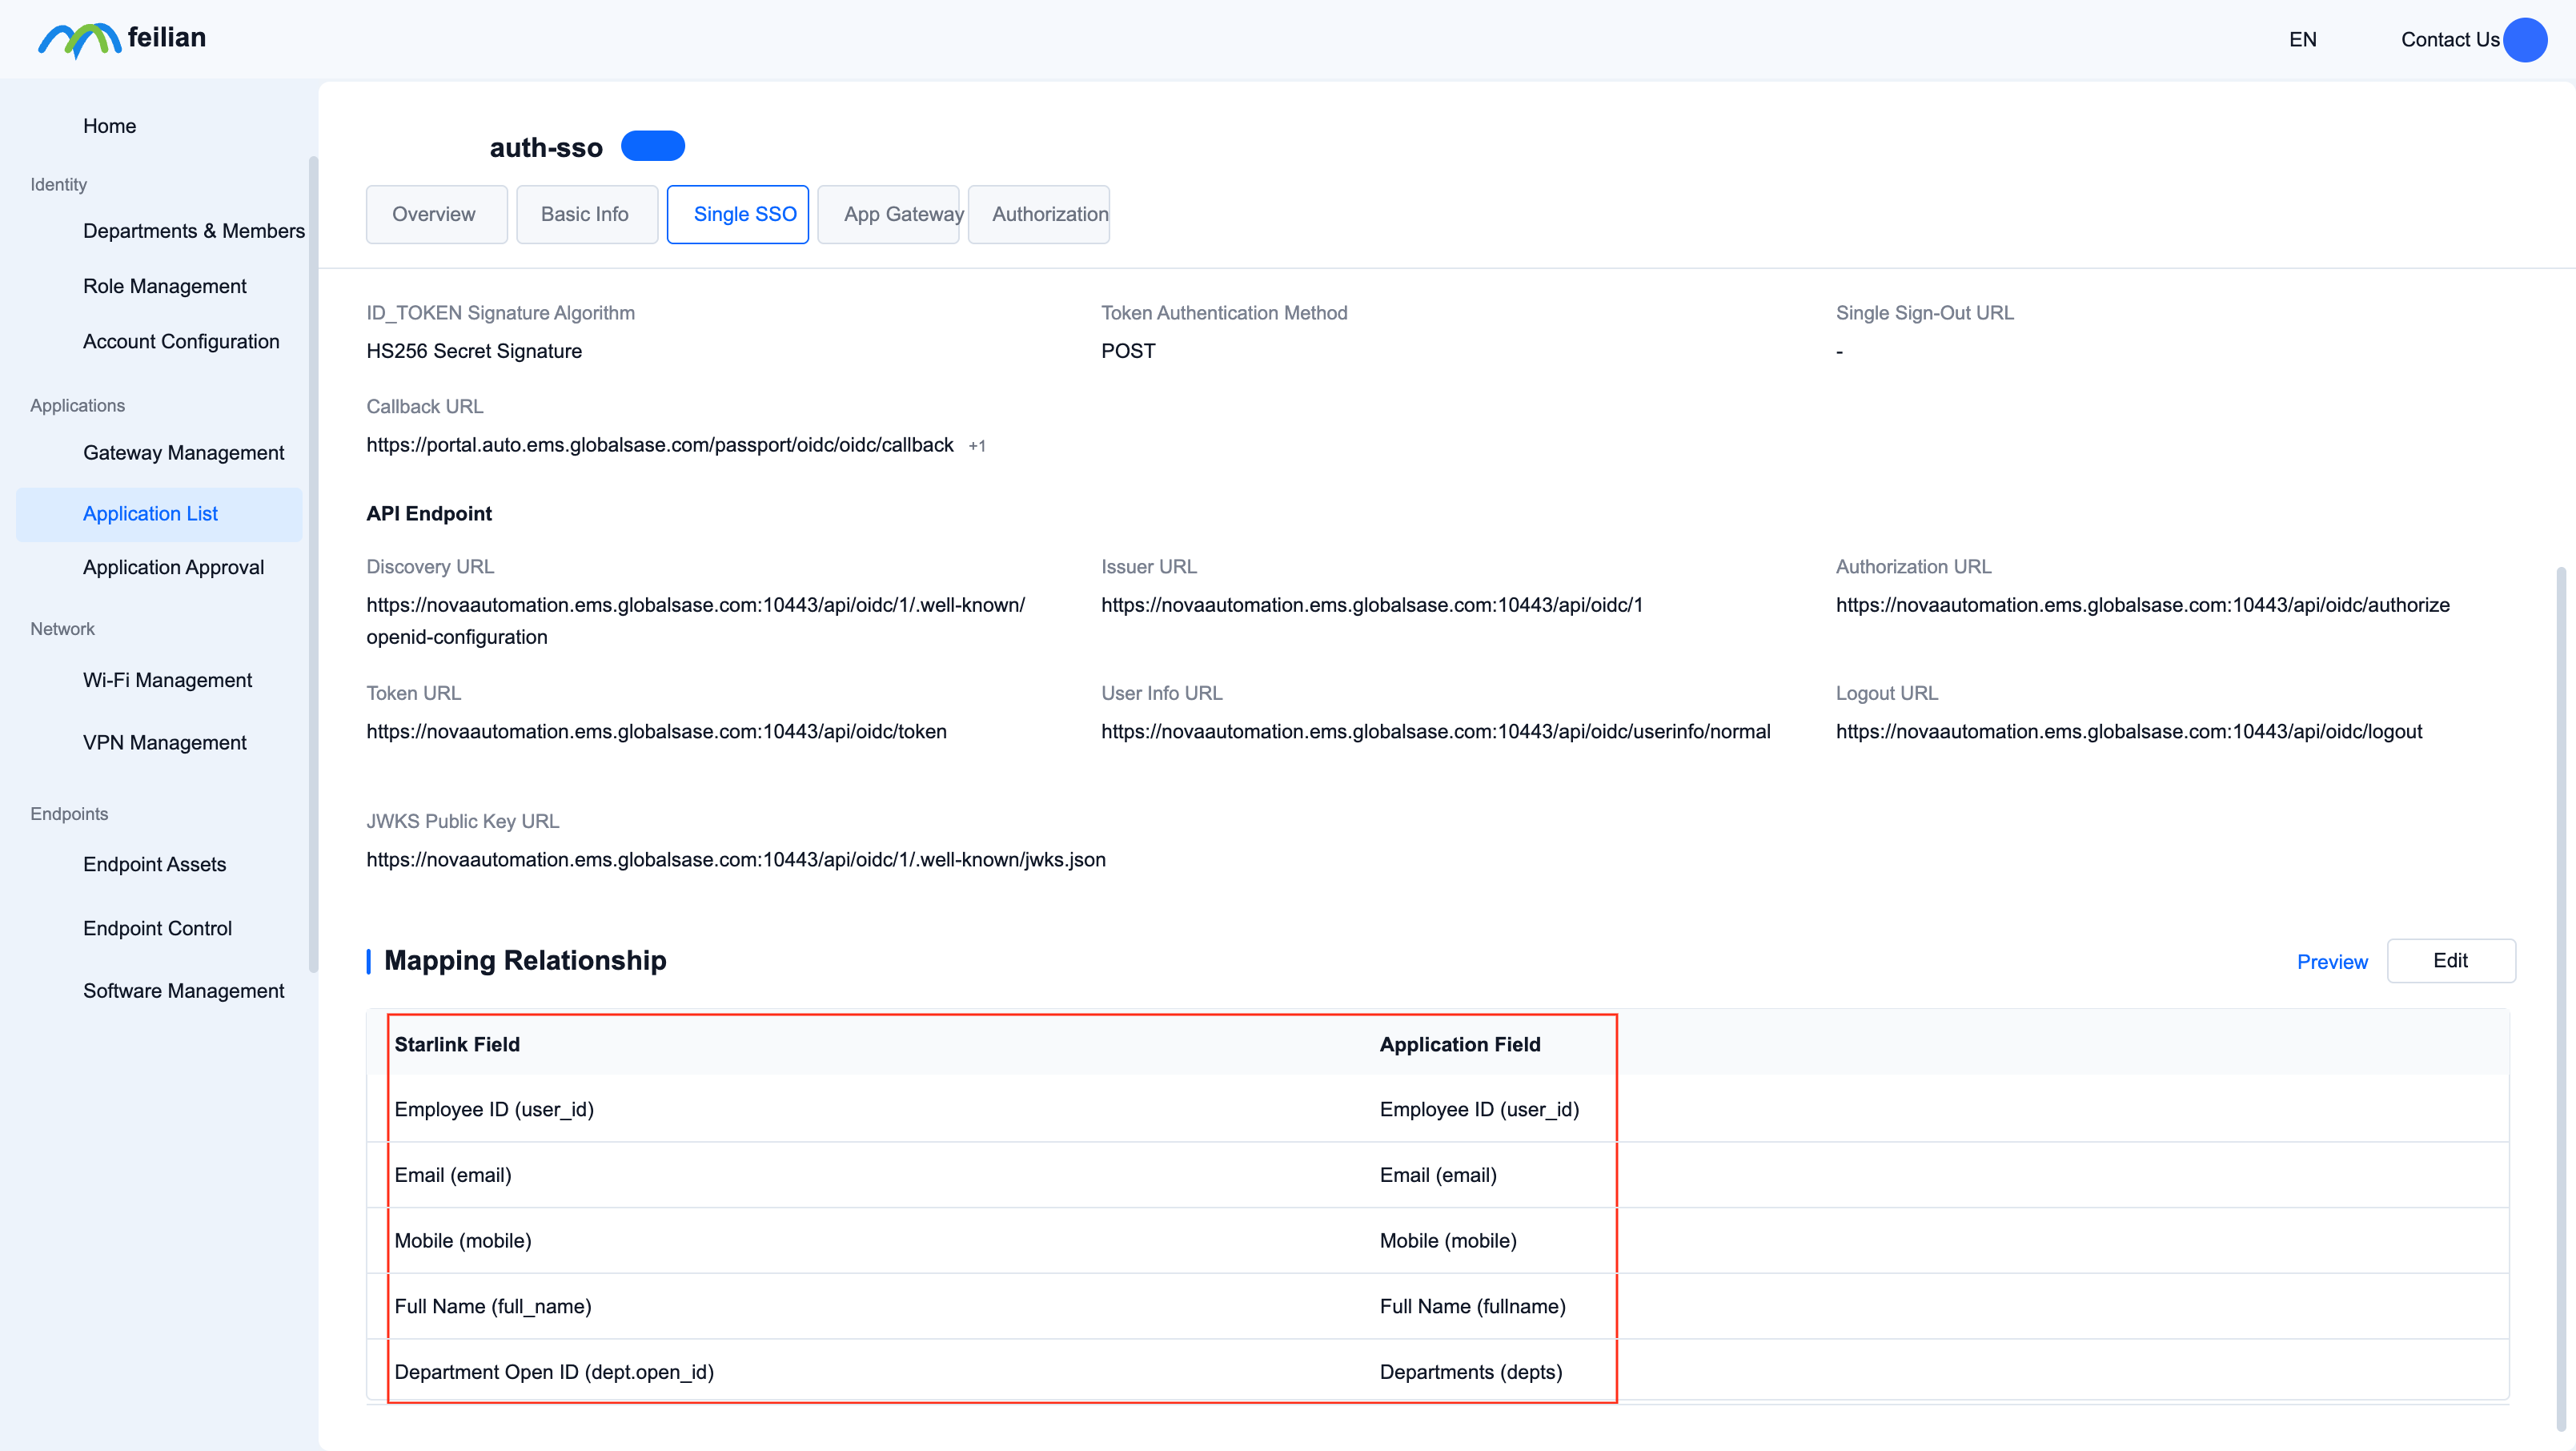
Create a new sso application
Starlink controller, enter: Application-Application List, click "Self-Build Application"
Select "OIDC"
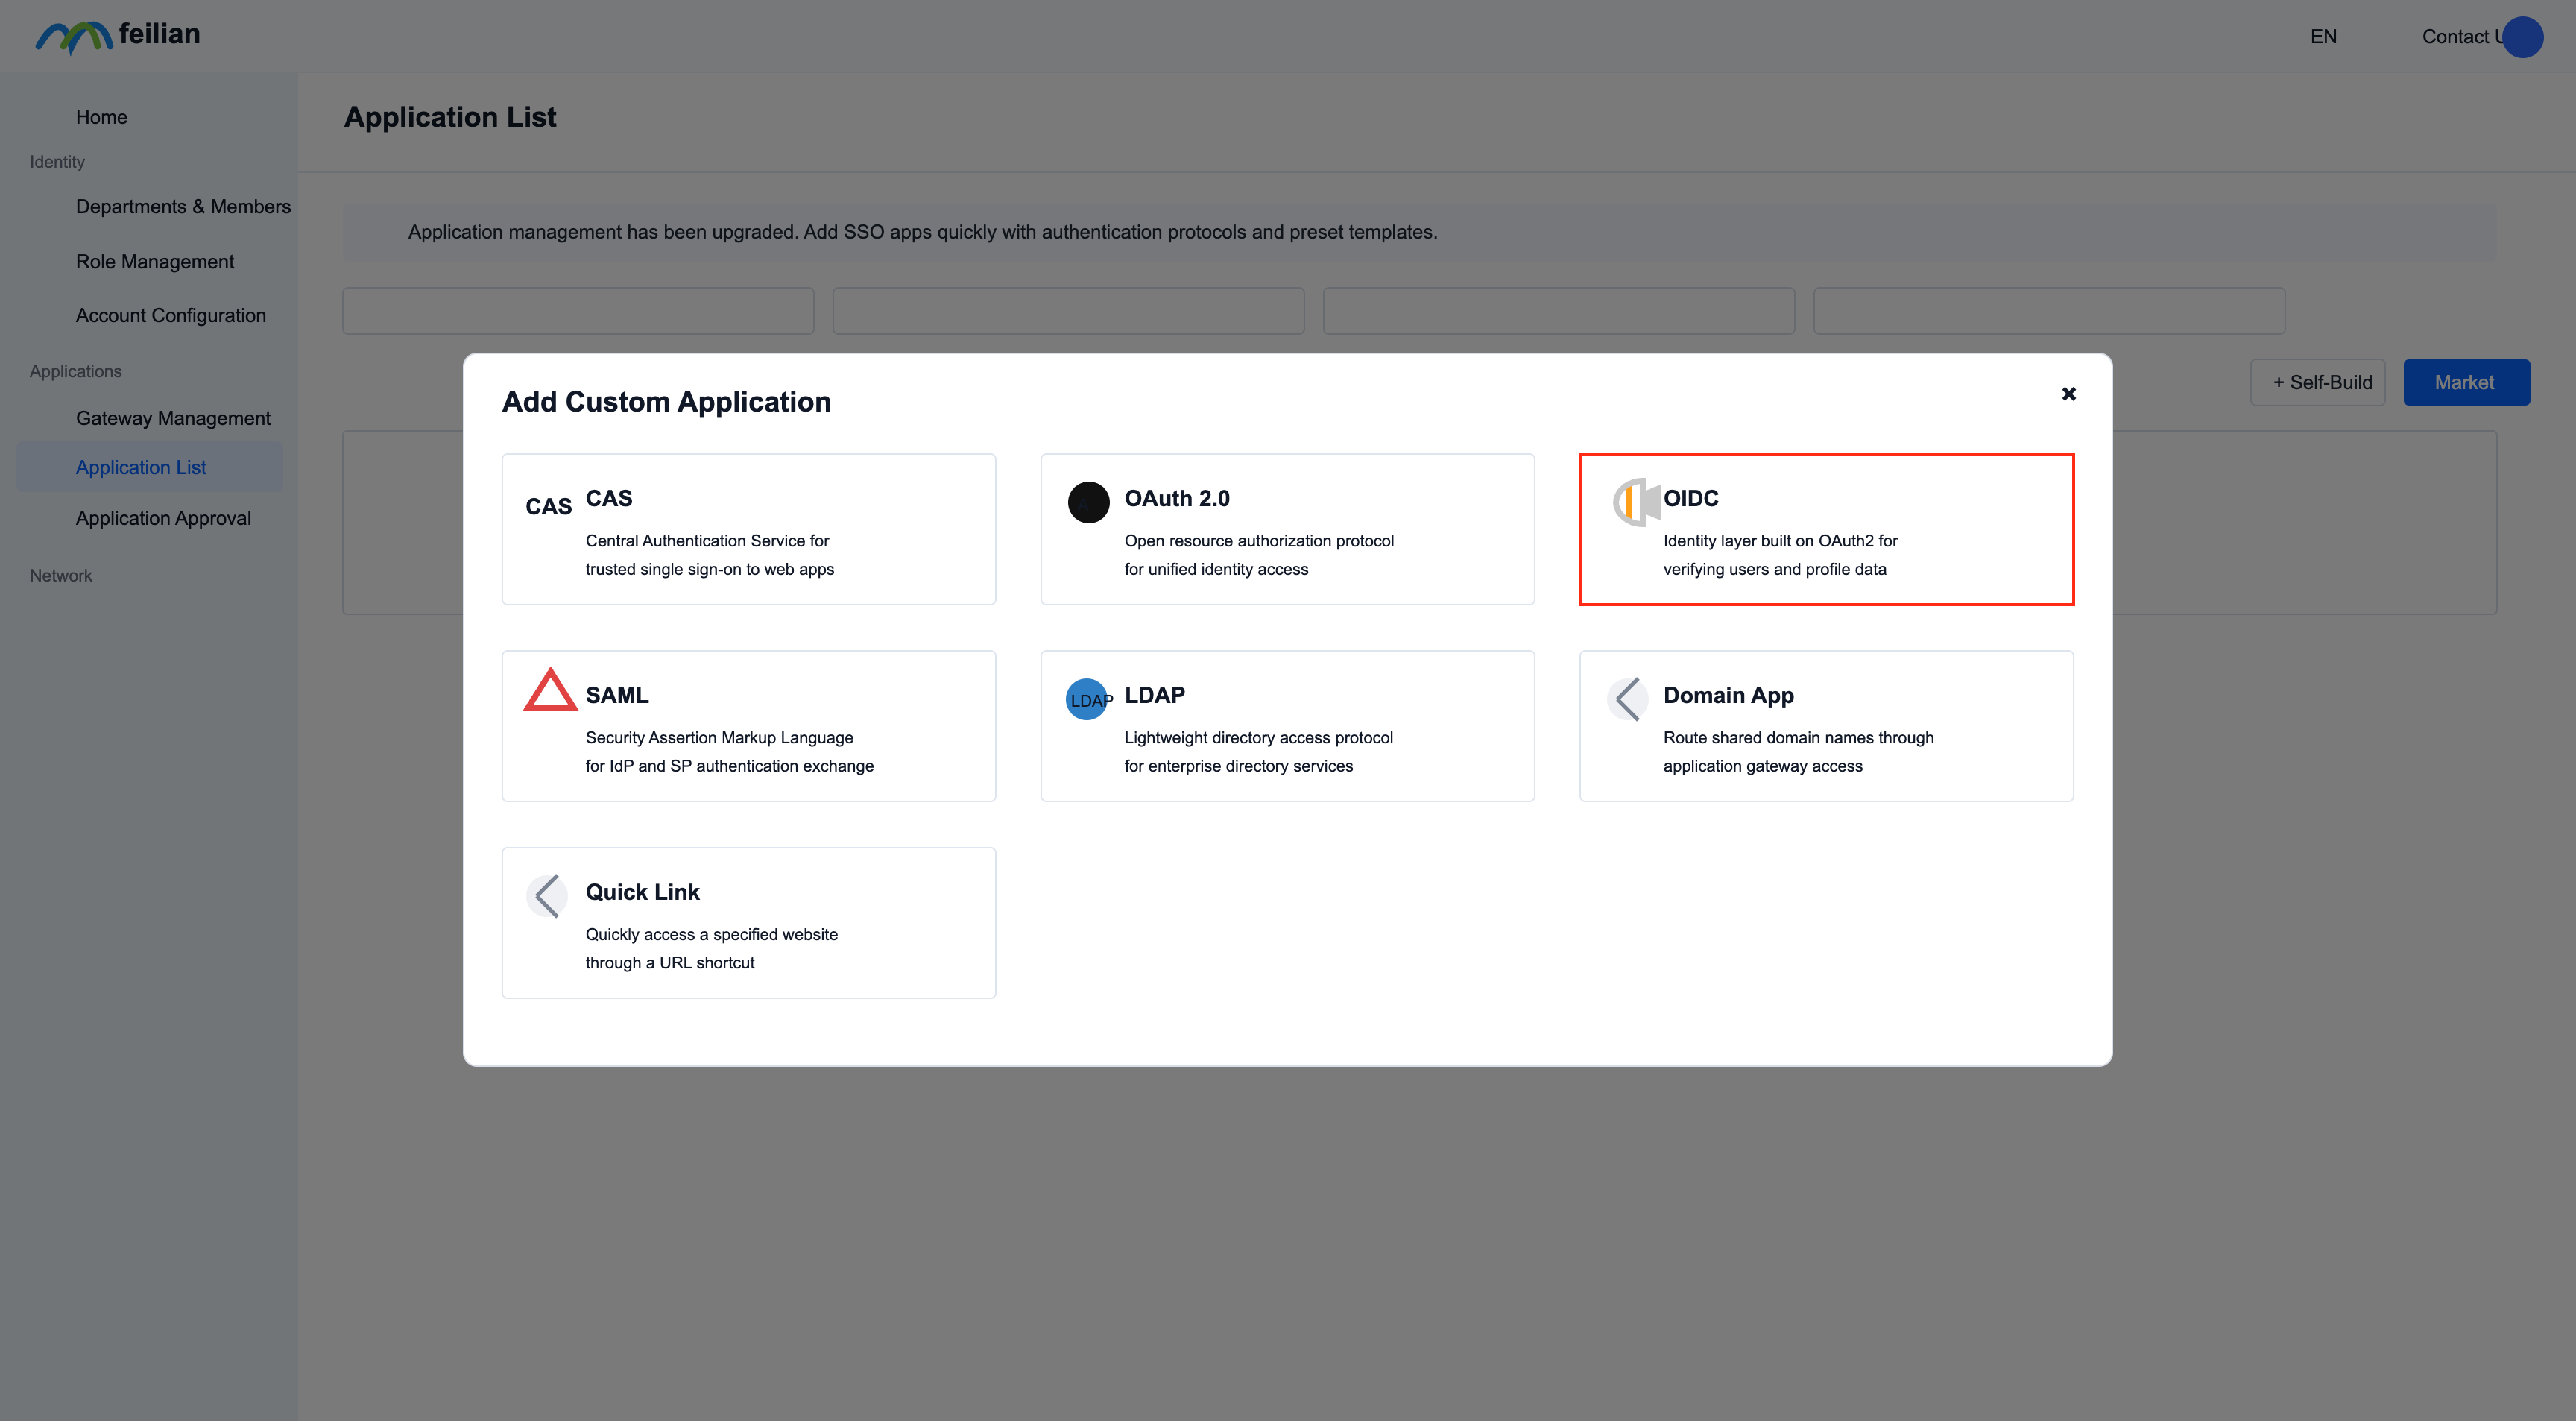
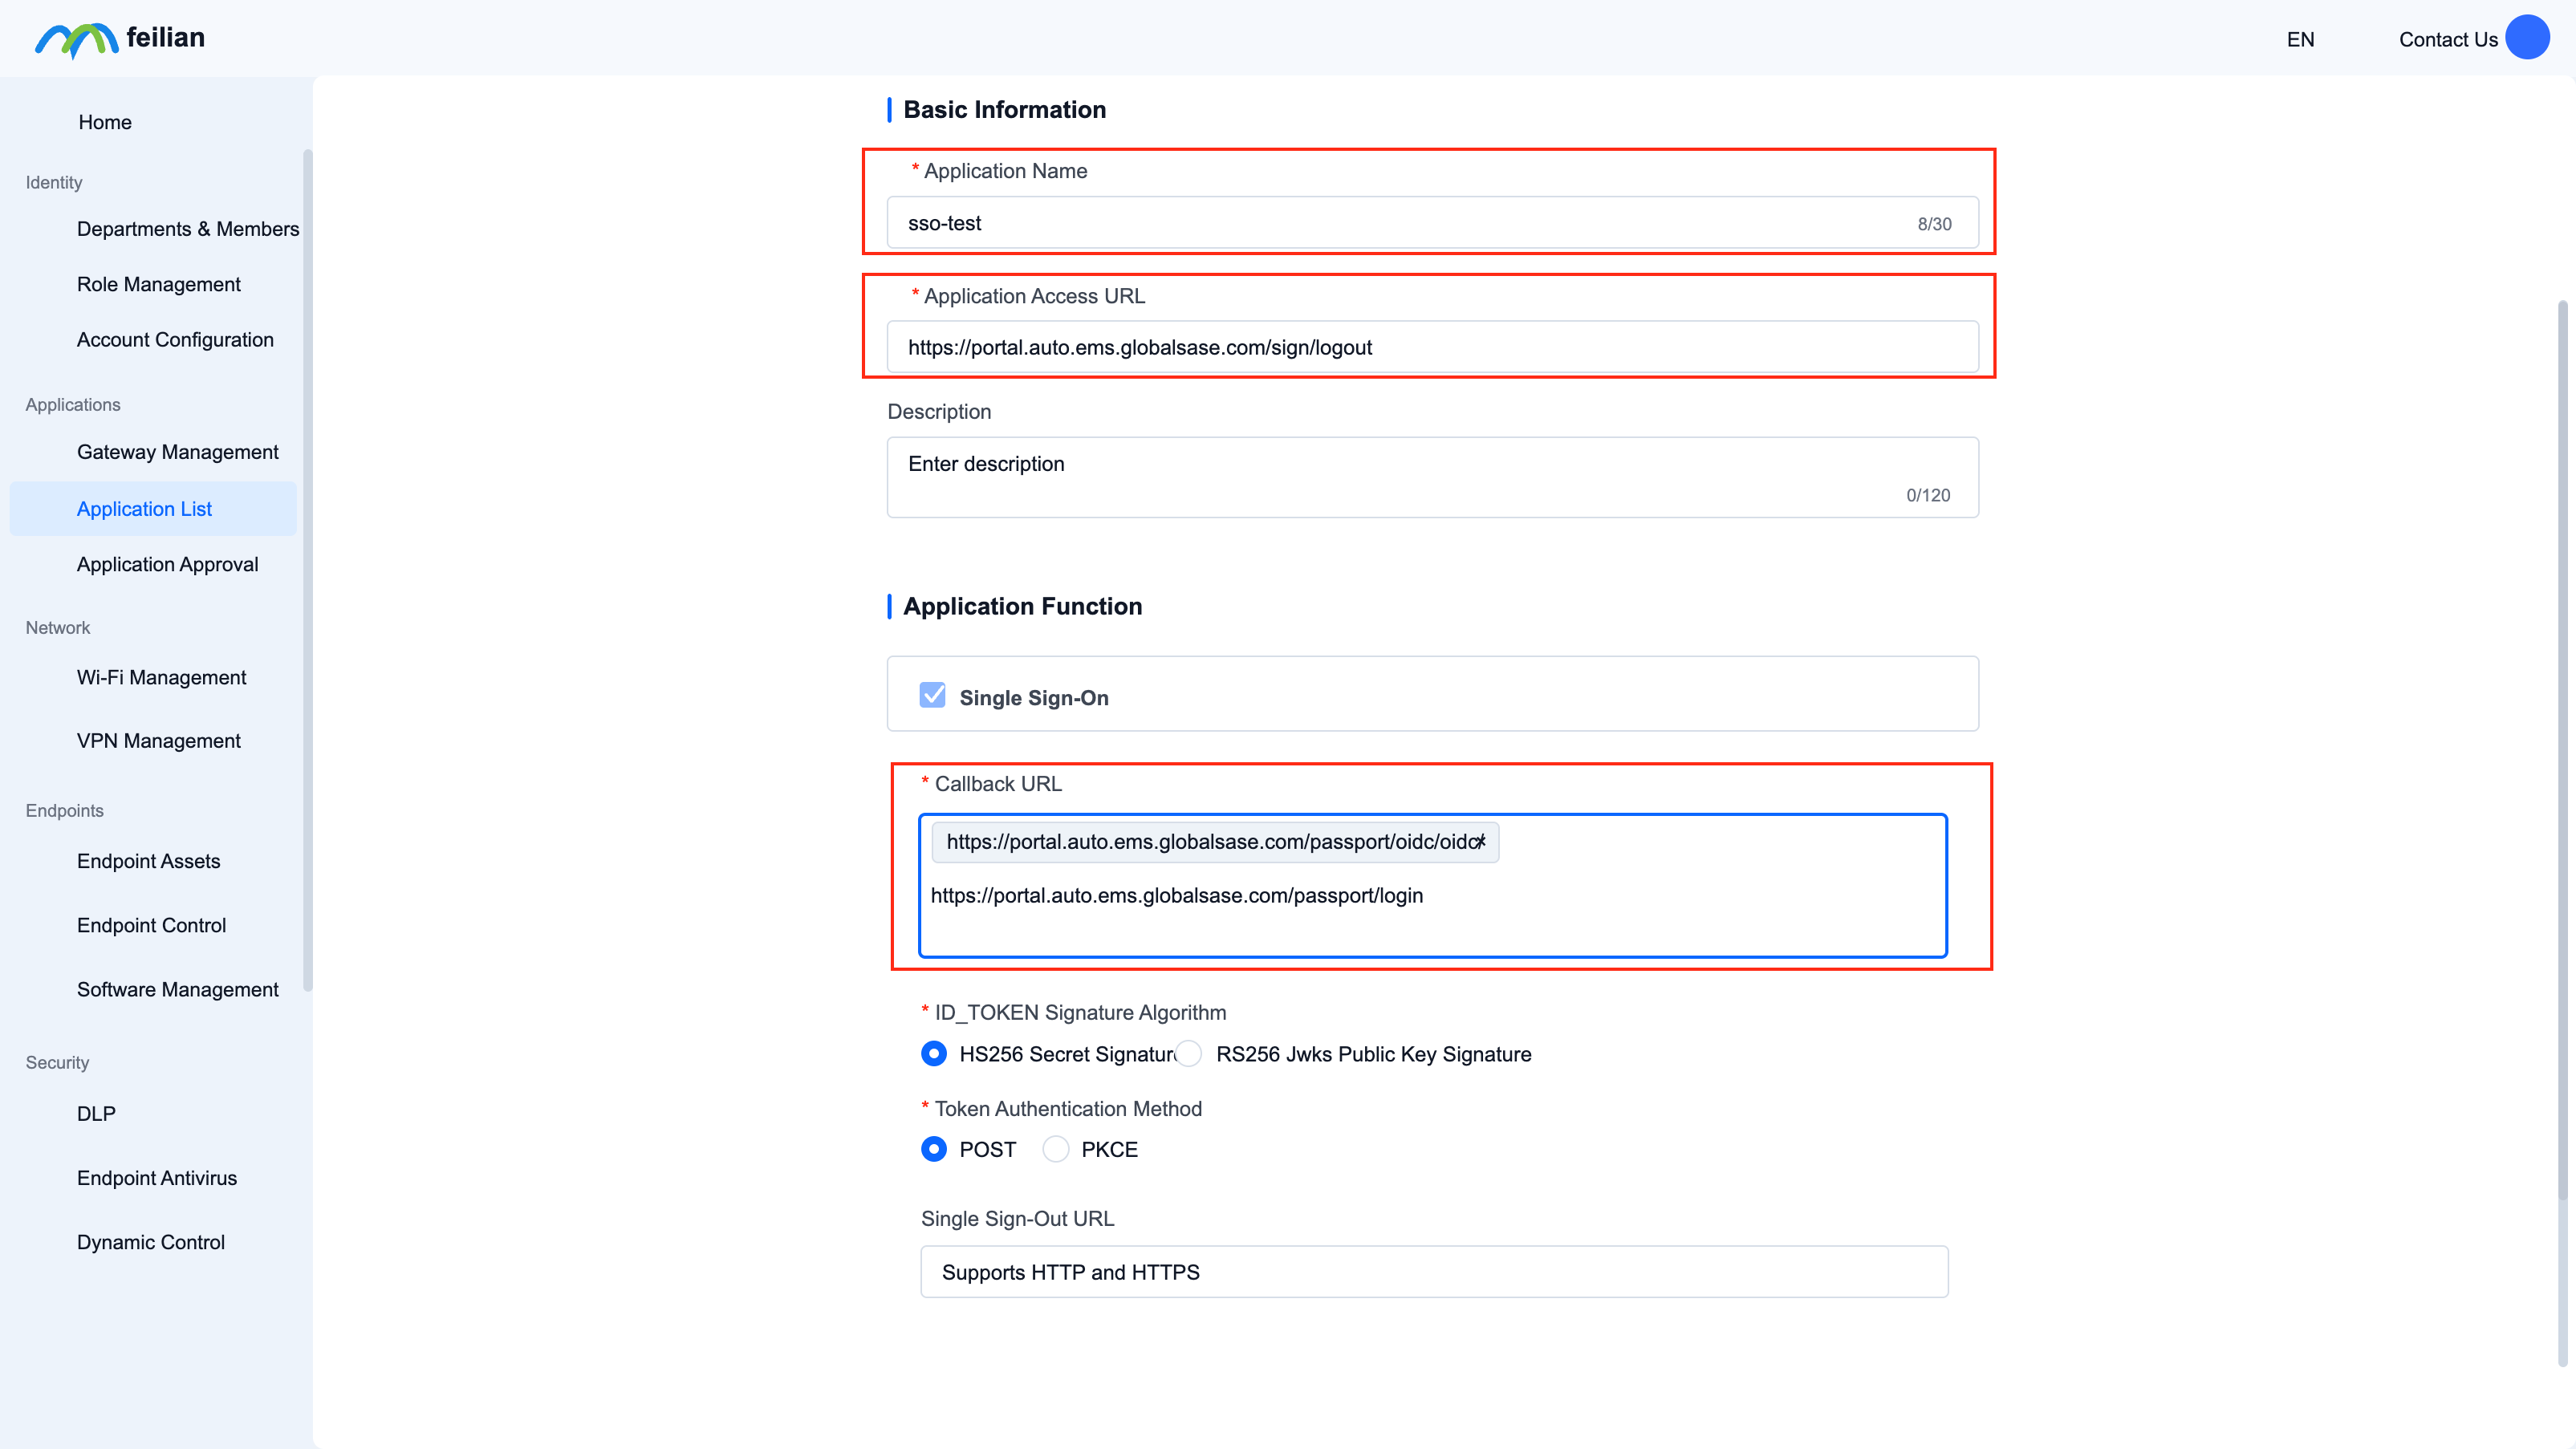
A pop-up window will appear, configure parameters, and then click "OK"
The parameters here are for reference only. Please modify the domain name and other information in the parameters according to the actual situation.
Example of application access address:
Callback address example:
https://portal.auto.ems.globalsase.com/passport/oidc/oidc/callback
Configure mapping relationship
- Configure fields related to identity information in Starlink API
Configuration path: Application details interface-single sign-in page-mapping relationship
- Configuration method: Click "Edit", and the interface will pop up to perform: add/modify/delete
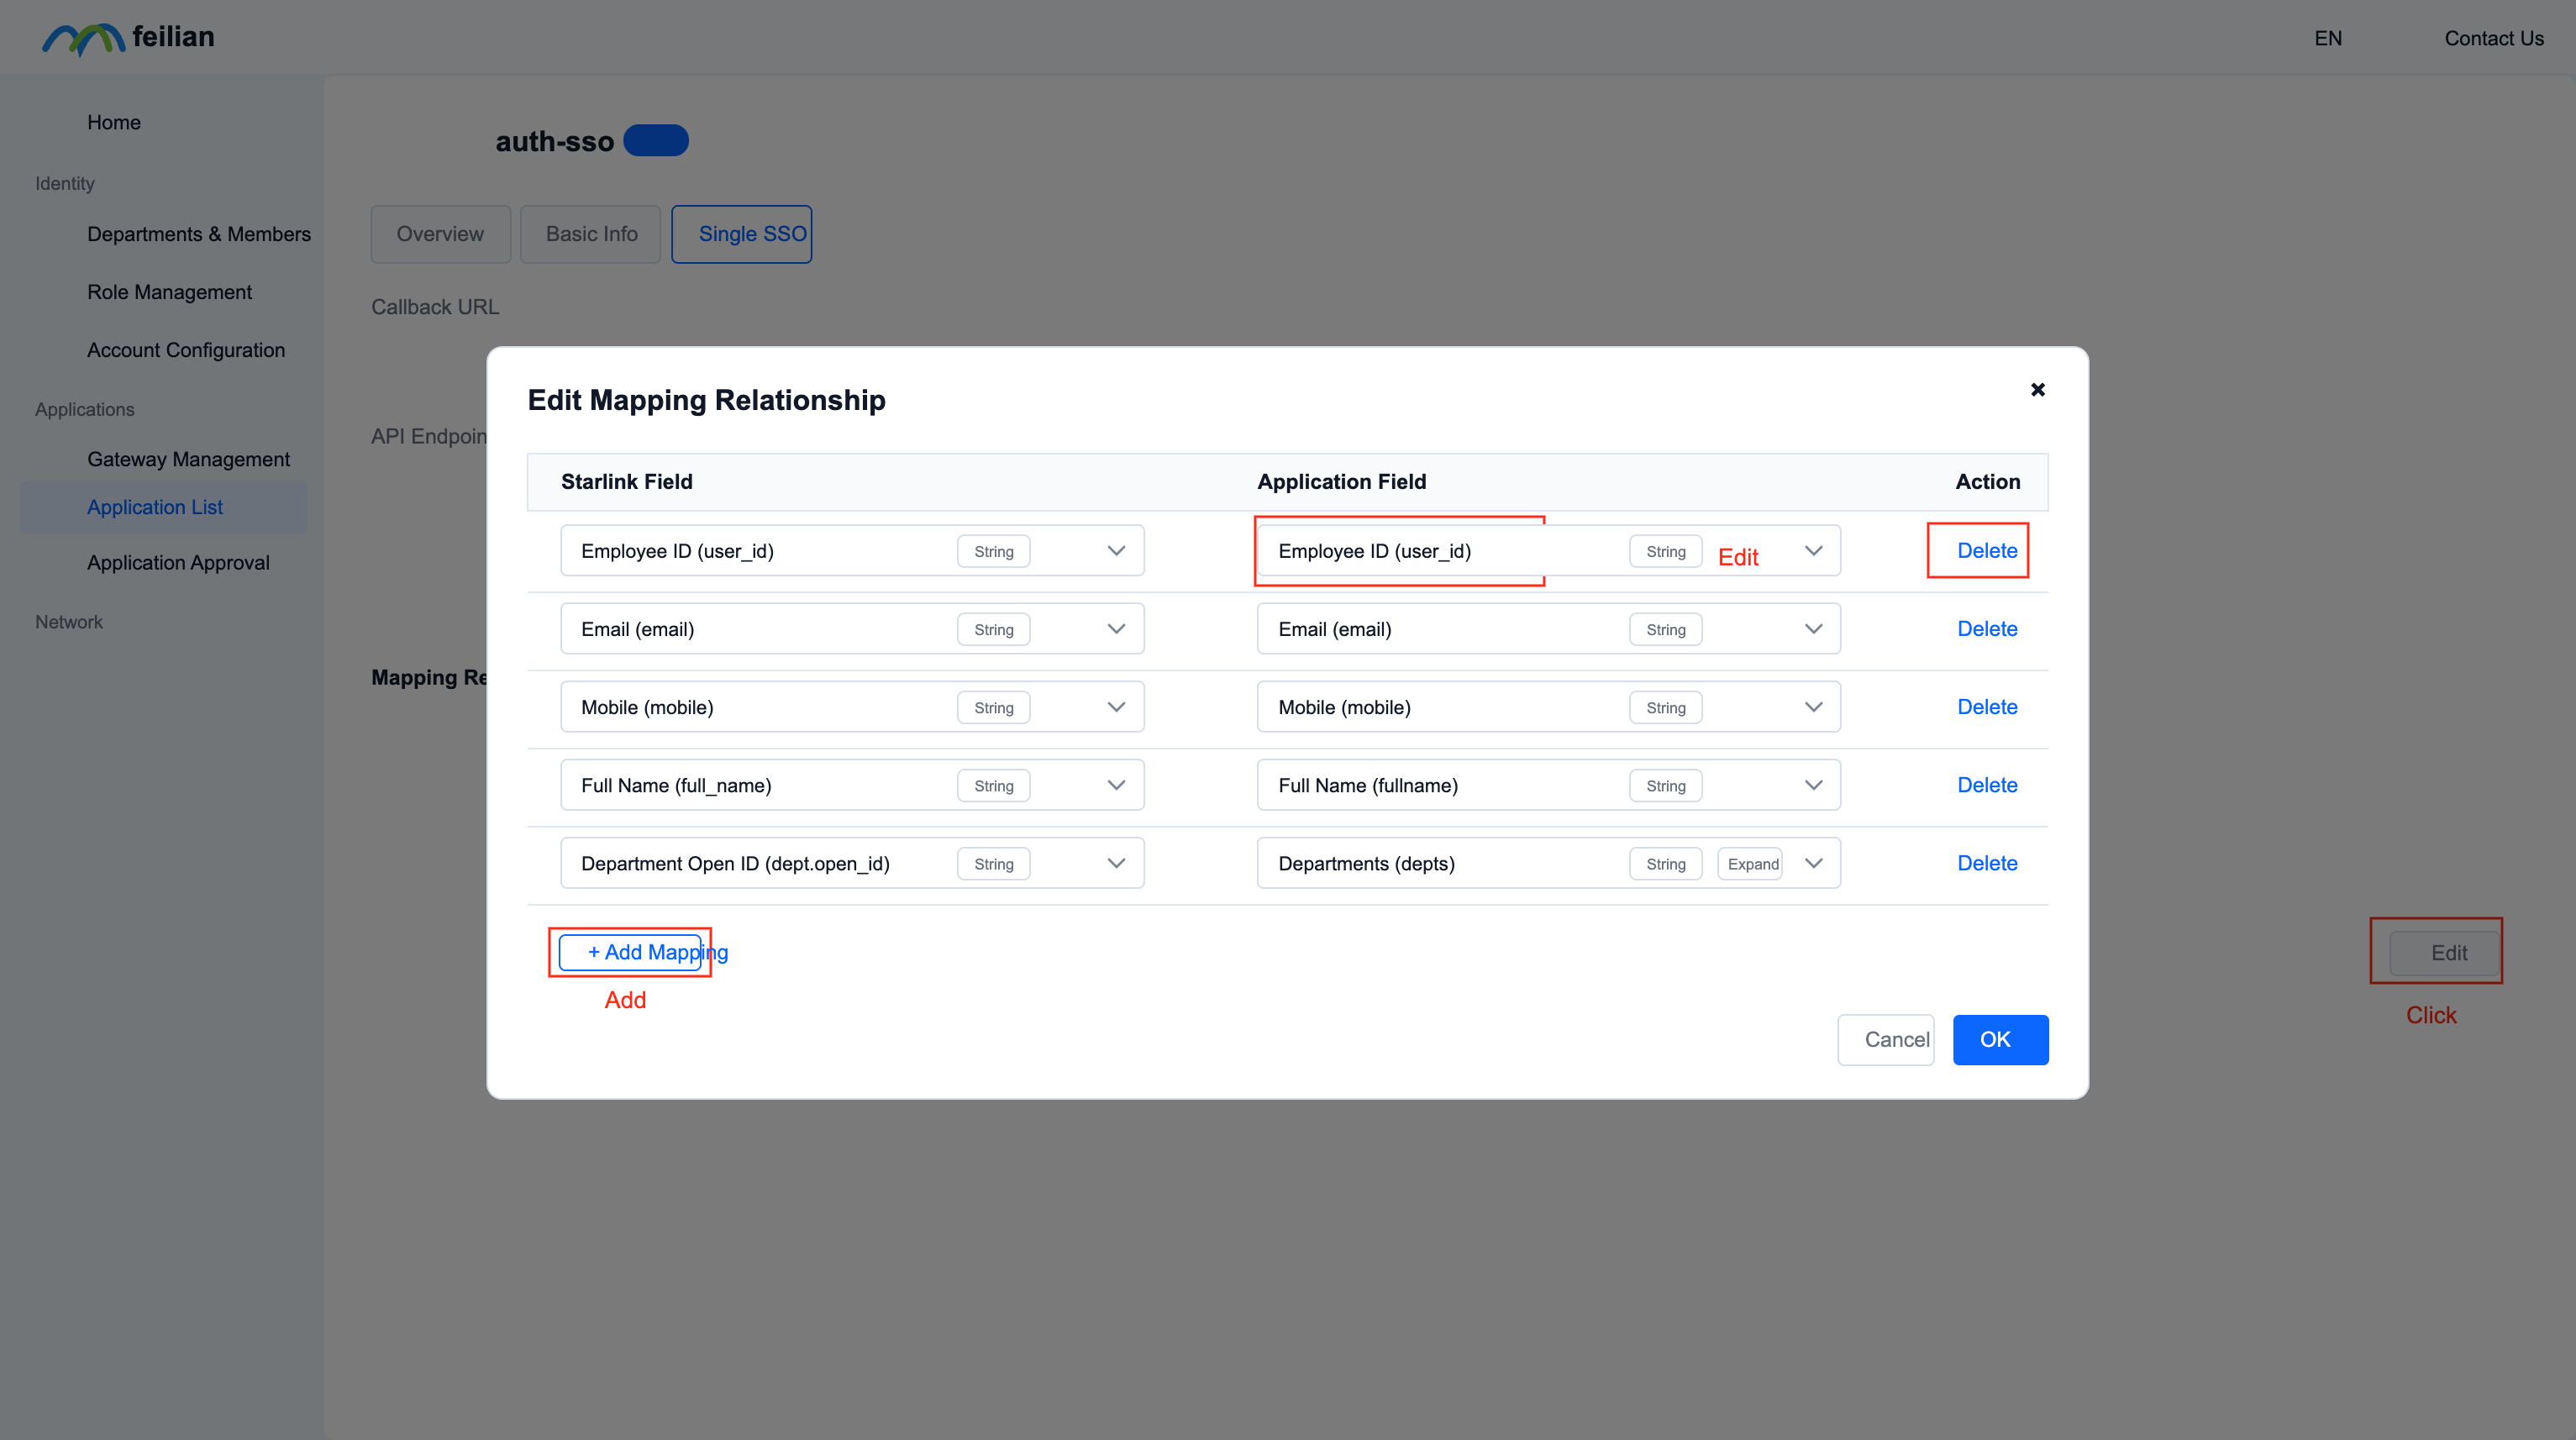
- The configuration parameters are as shown in the figure below
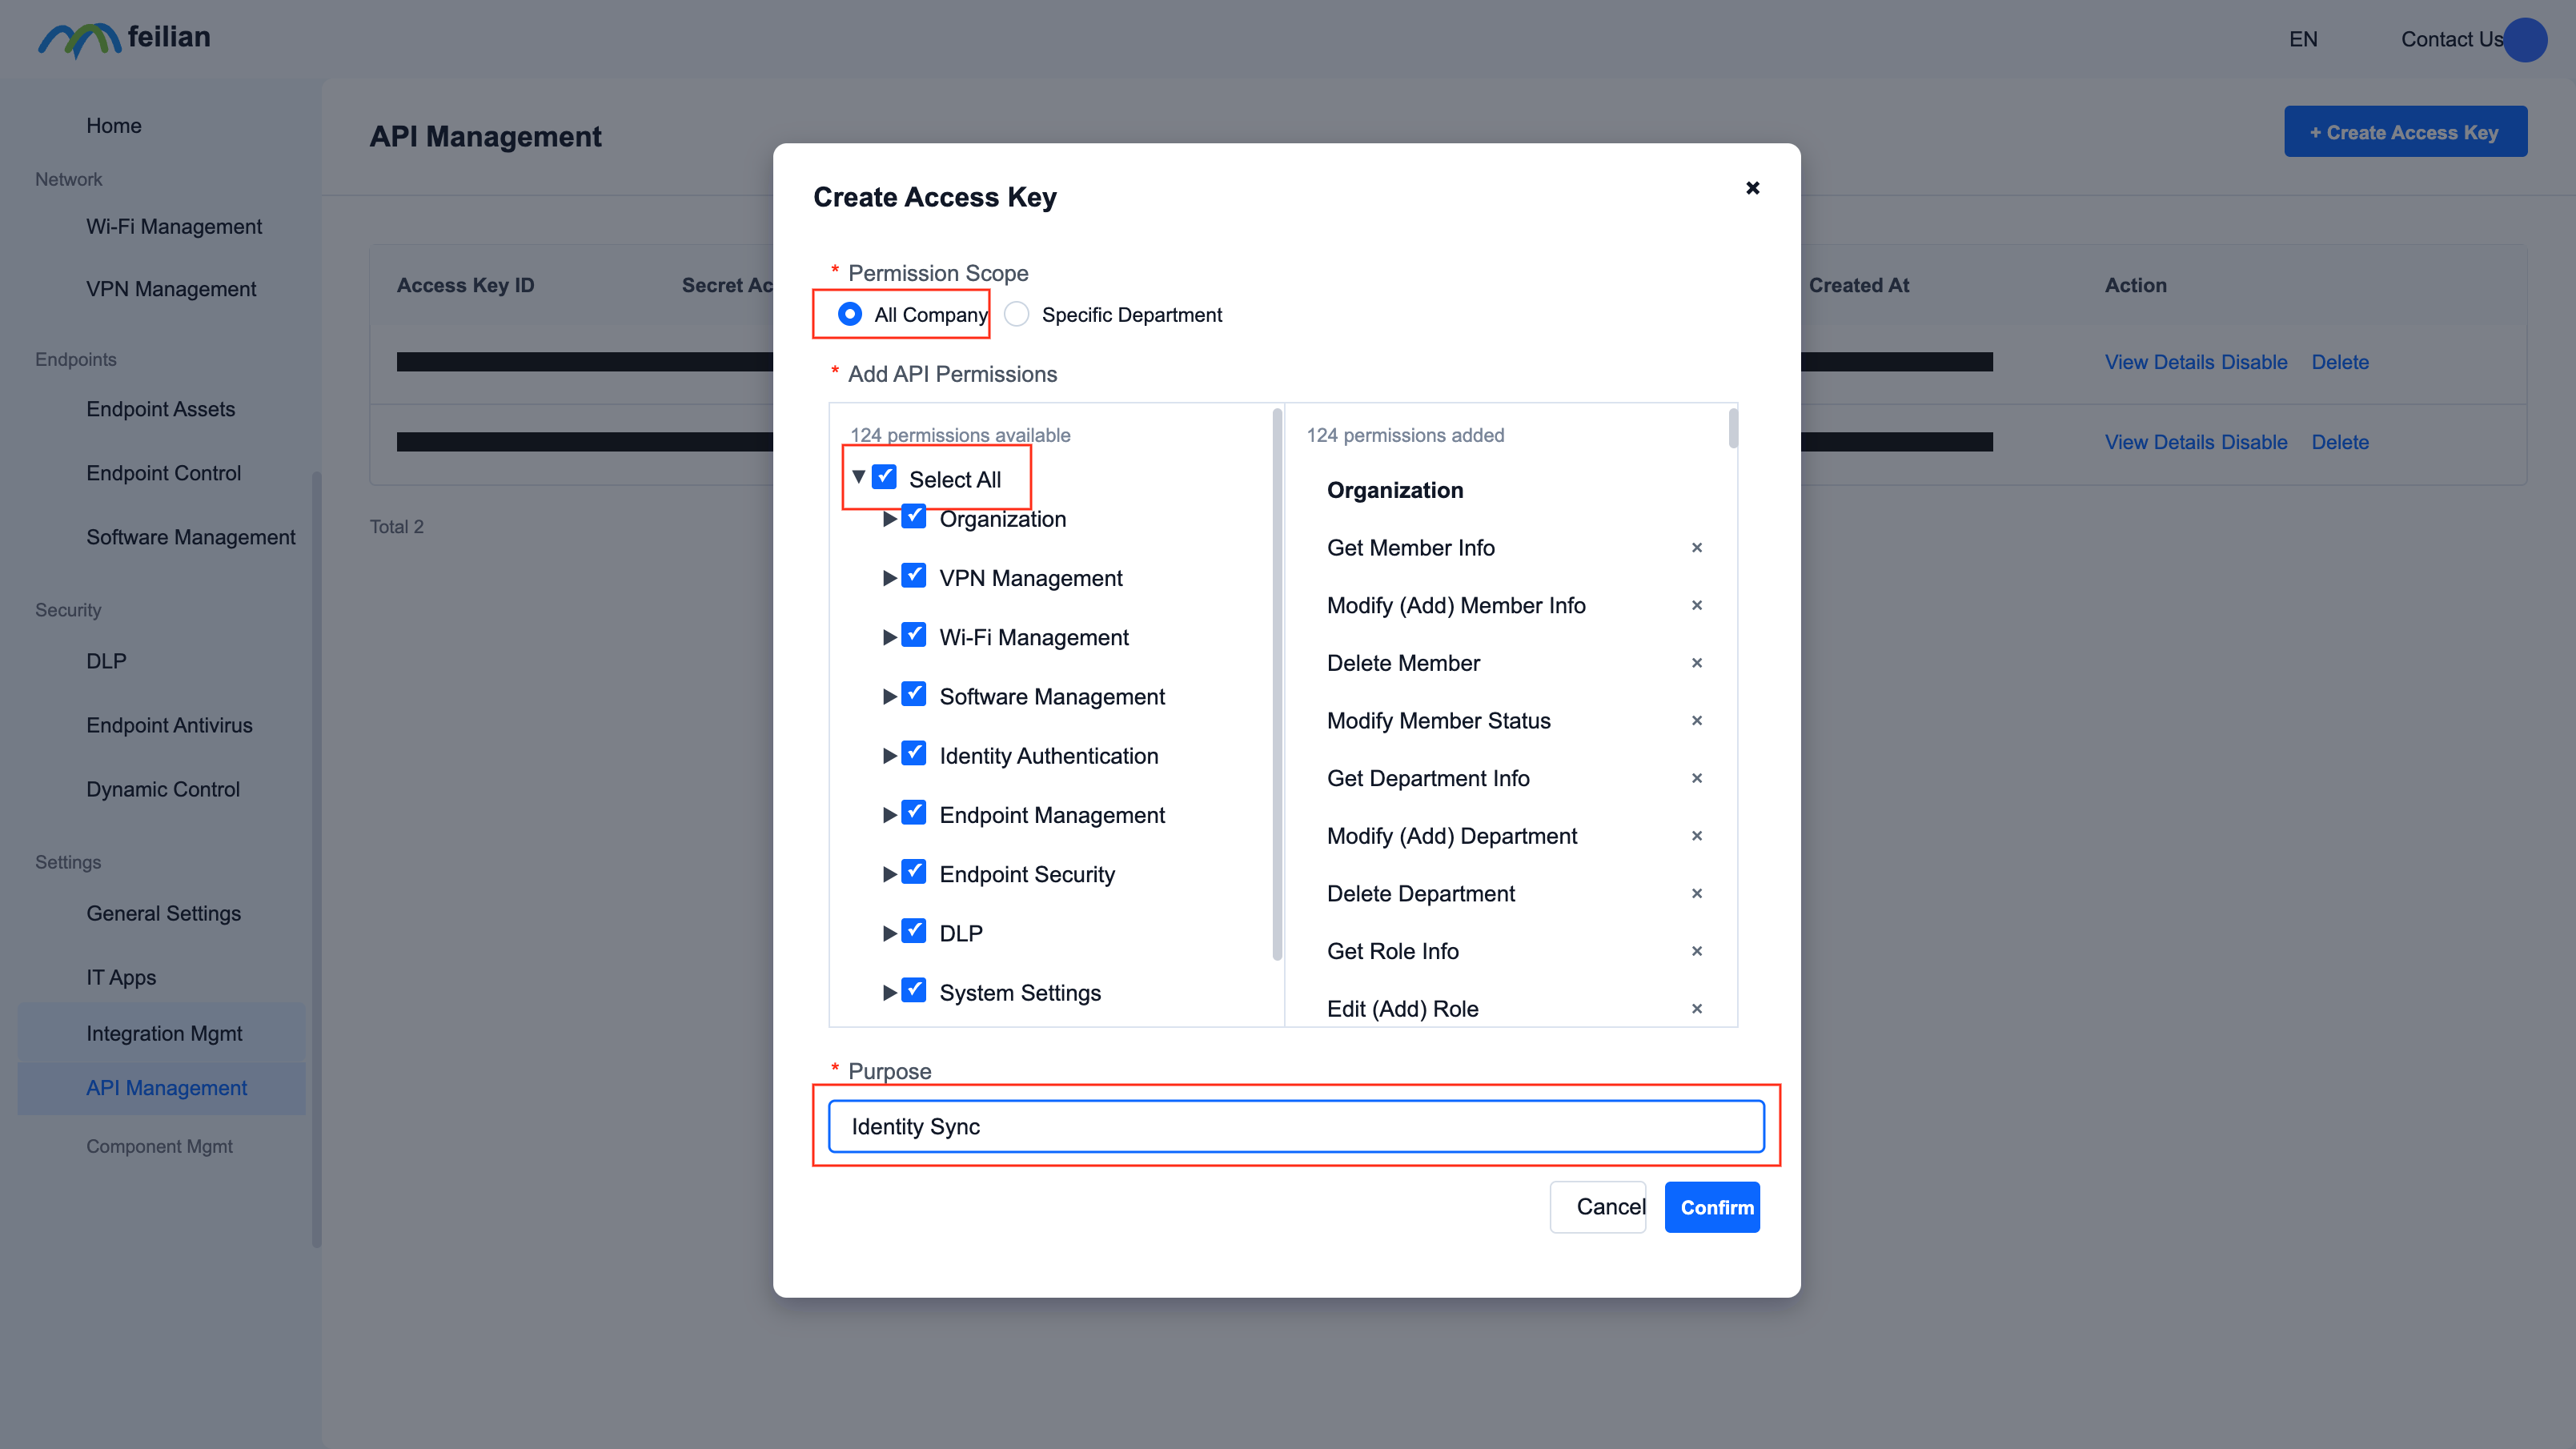
Create a new access key (optional)
- access key is used to call Starlink API and used for identity synchronization, "Please click here for identity synchronization instructions"
- This option only needs to be configured in scenario 2, "Please click here for description of scenario 2"
- Enter: Integration Management-API Management, click "Create Access Key"
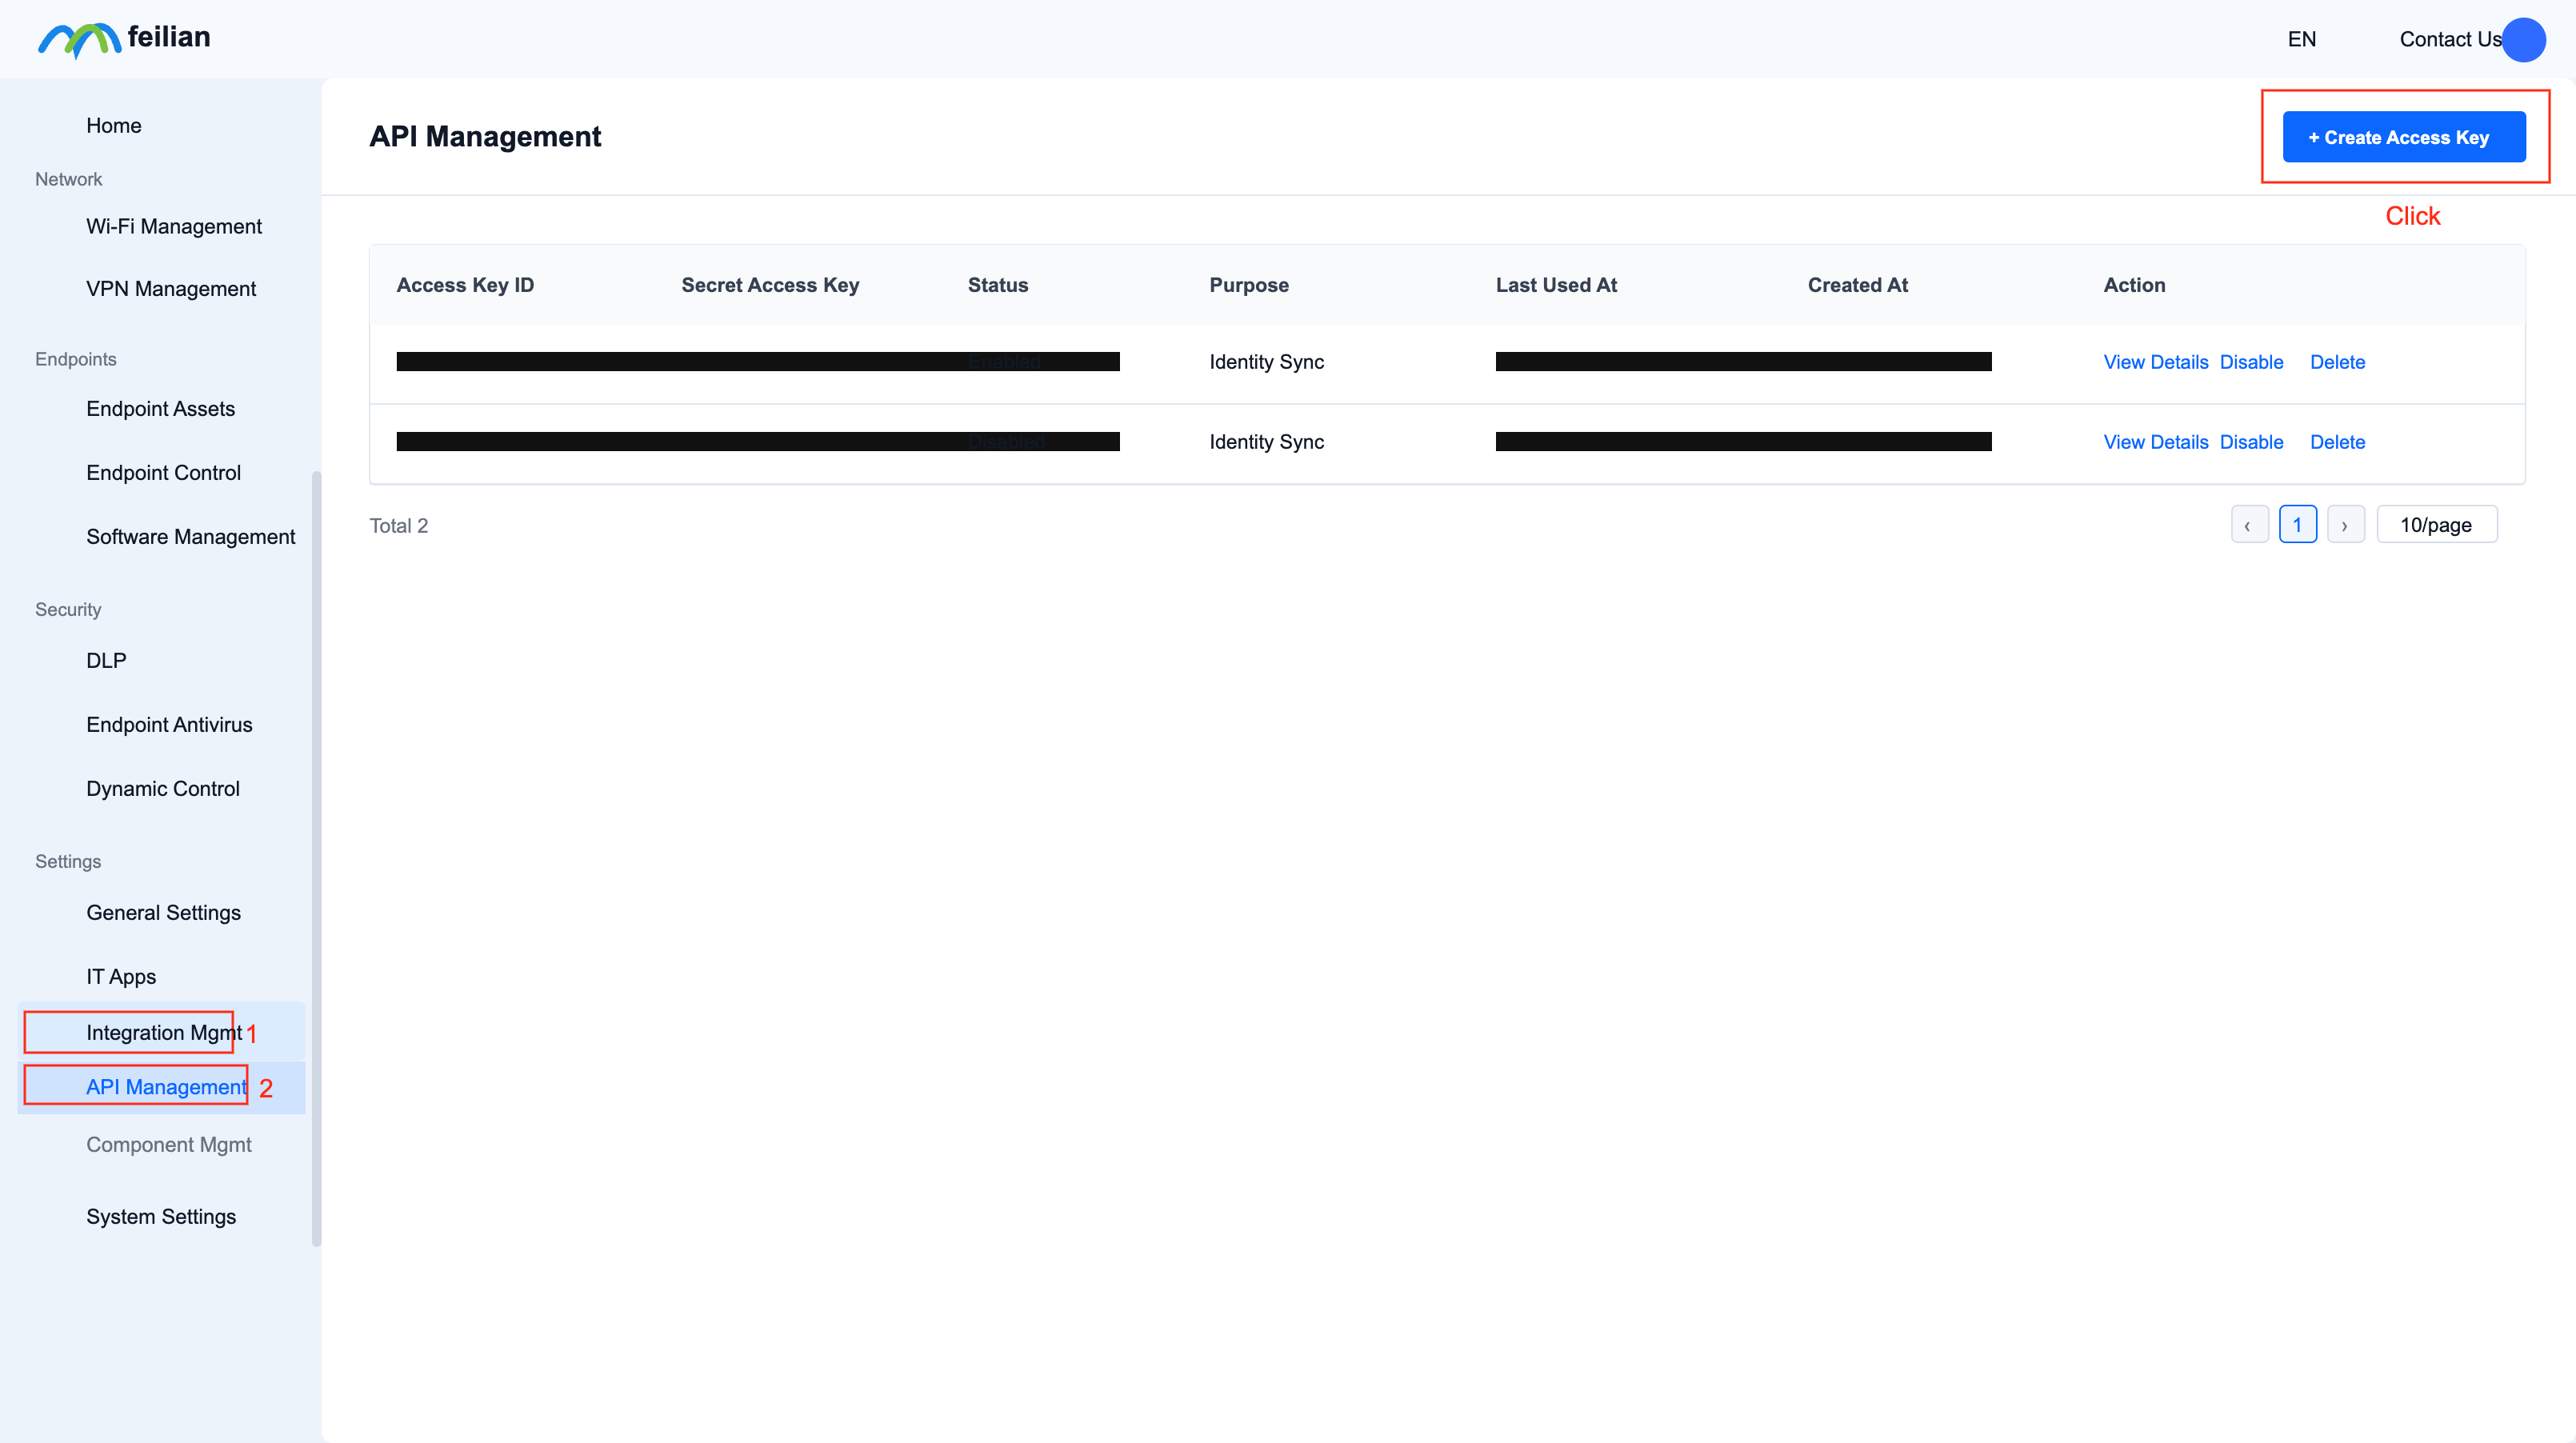
- The configuration example is as follows
Usage scenarios
Scenario 1: The site only enables SSO authentication
Scene description
A company has a department: Sales Department, and the office network segment is: 192.168.100.0/24, where:
- Sales Director: Mr. Li, set up a whitelist and avoid certification
- Other employees in the sales department require certification
Tenant authentication configuration
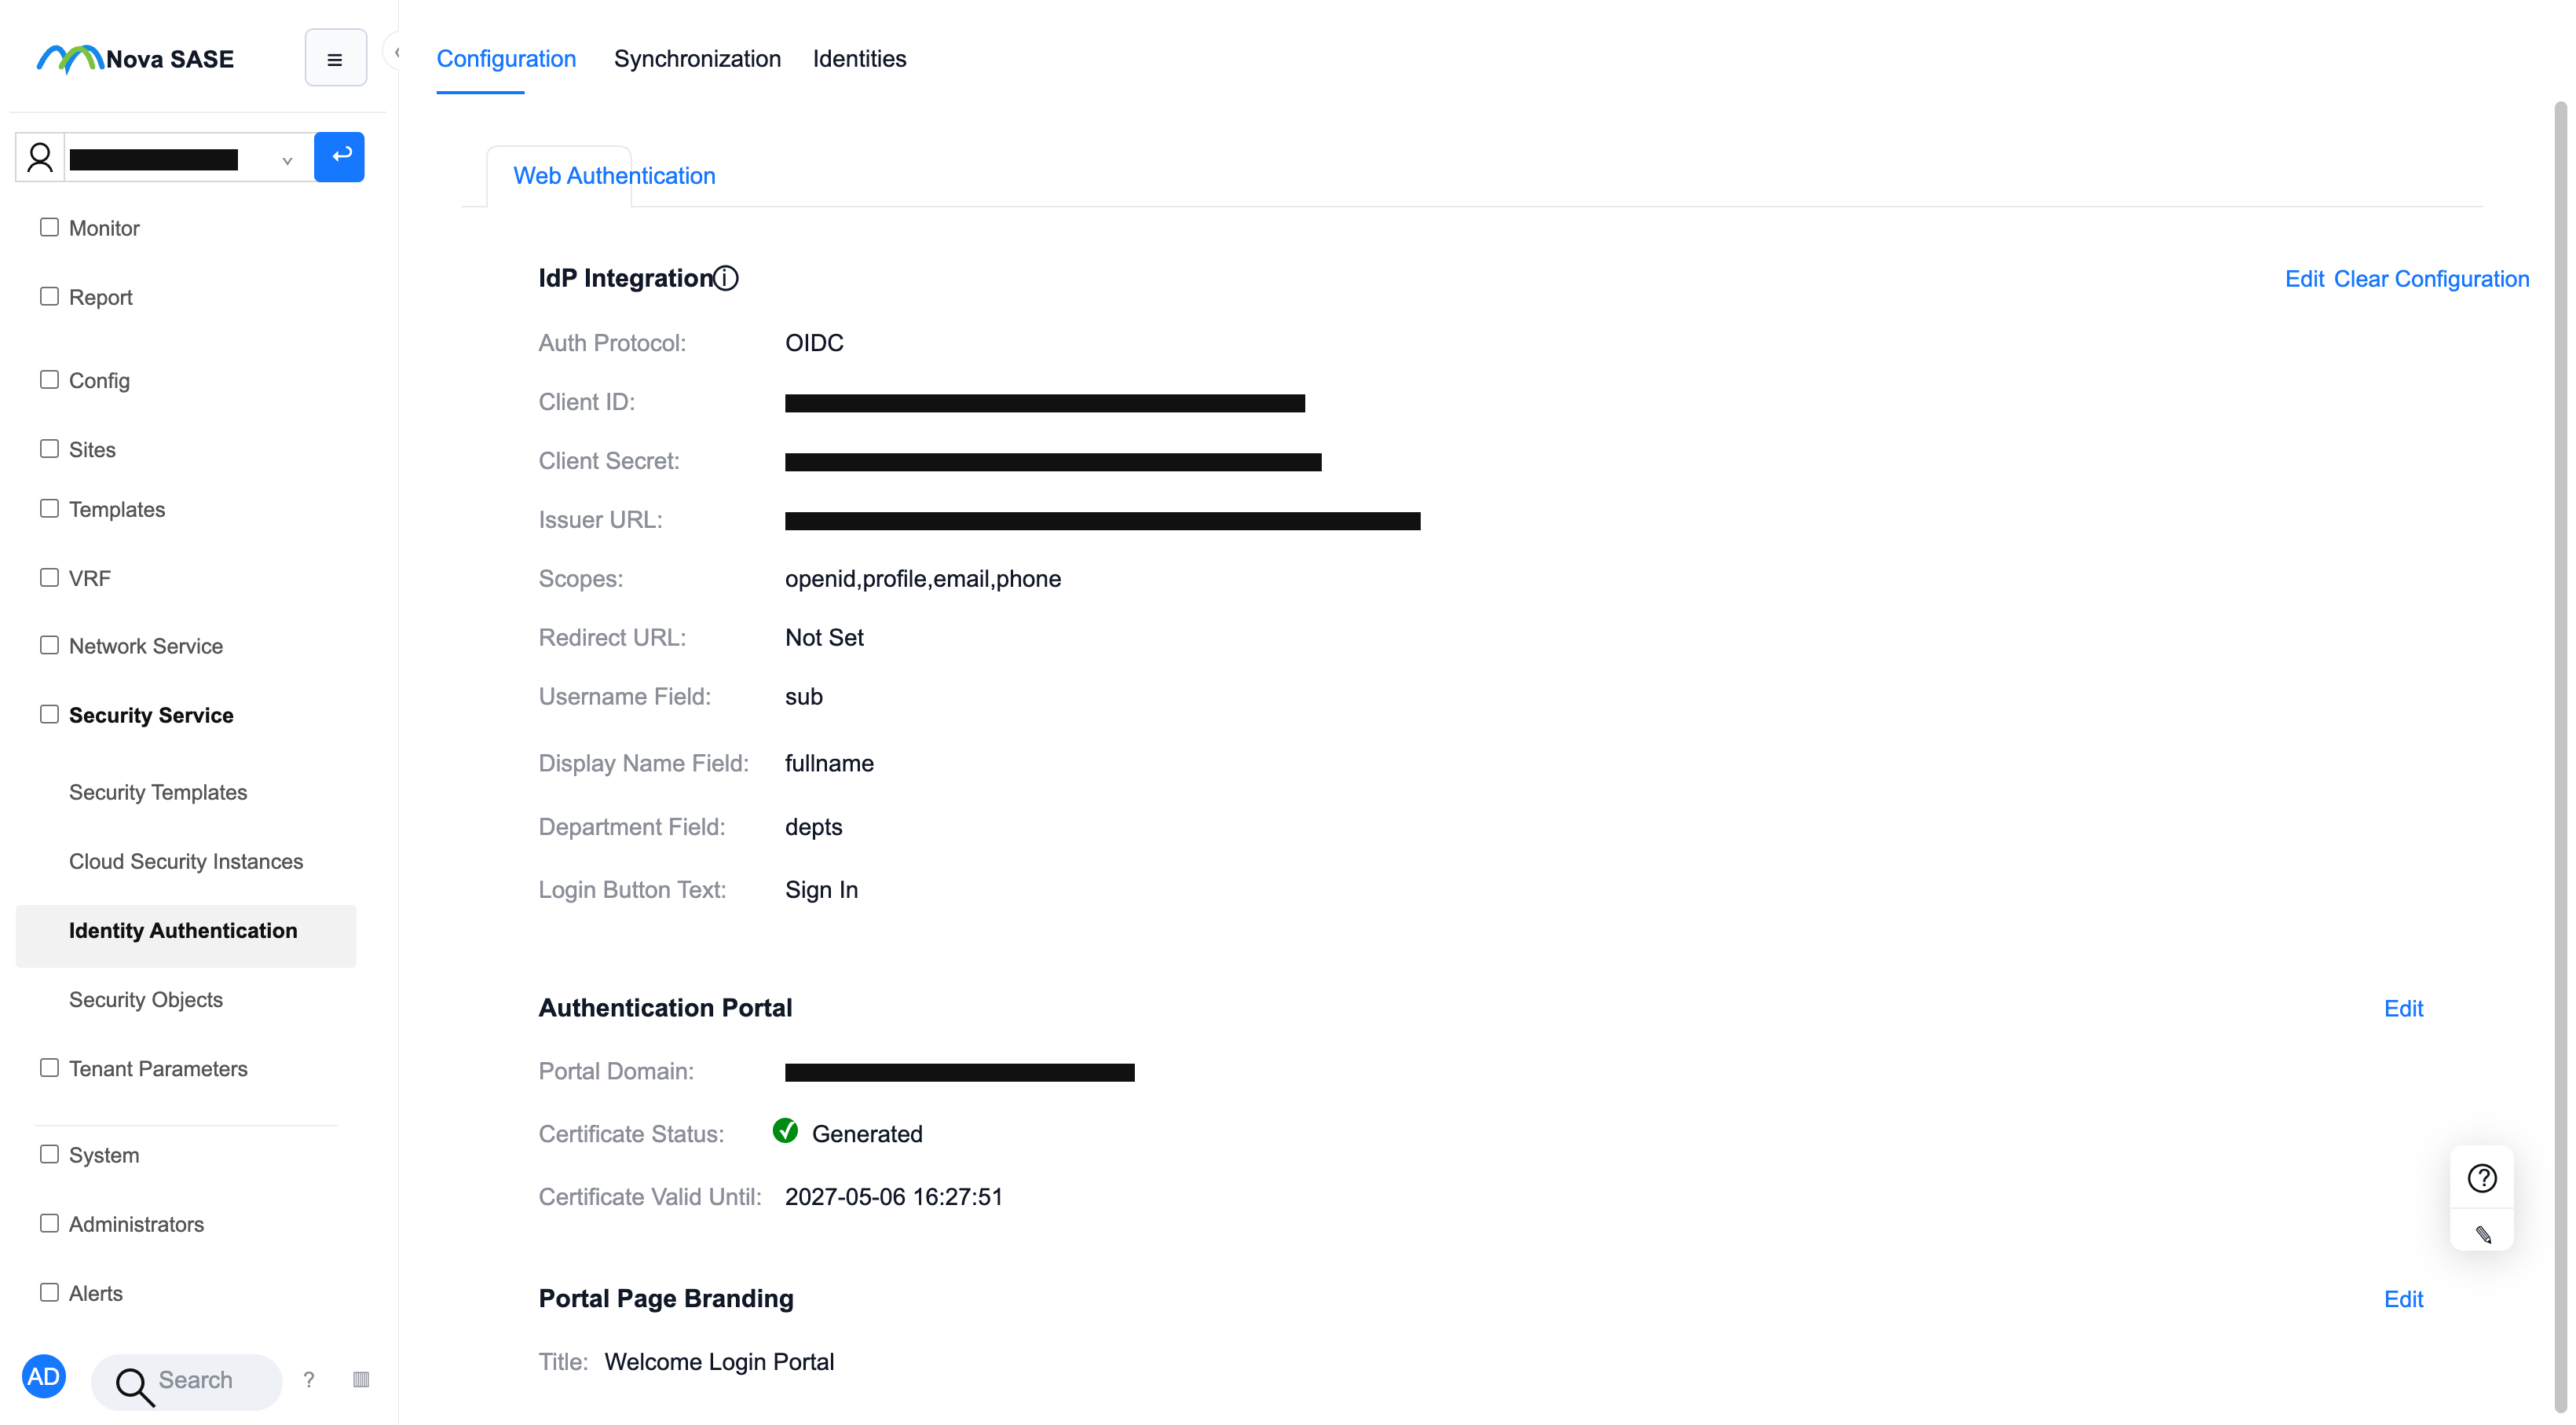
Configuration path: "Tenant" → "Config" → "Security Service" → "Identity Authentication", switch to the "Identity Authentication" page
Configuration: Authentication Integration, authentication portal, authentication page customization
- For specific parameter configuration instructions, please click: "Identity Authentication" configuration instructions
Site authentication configuration
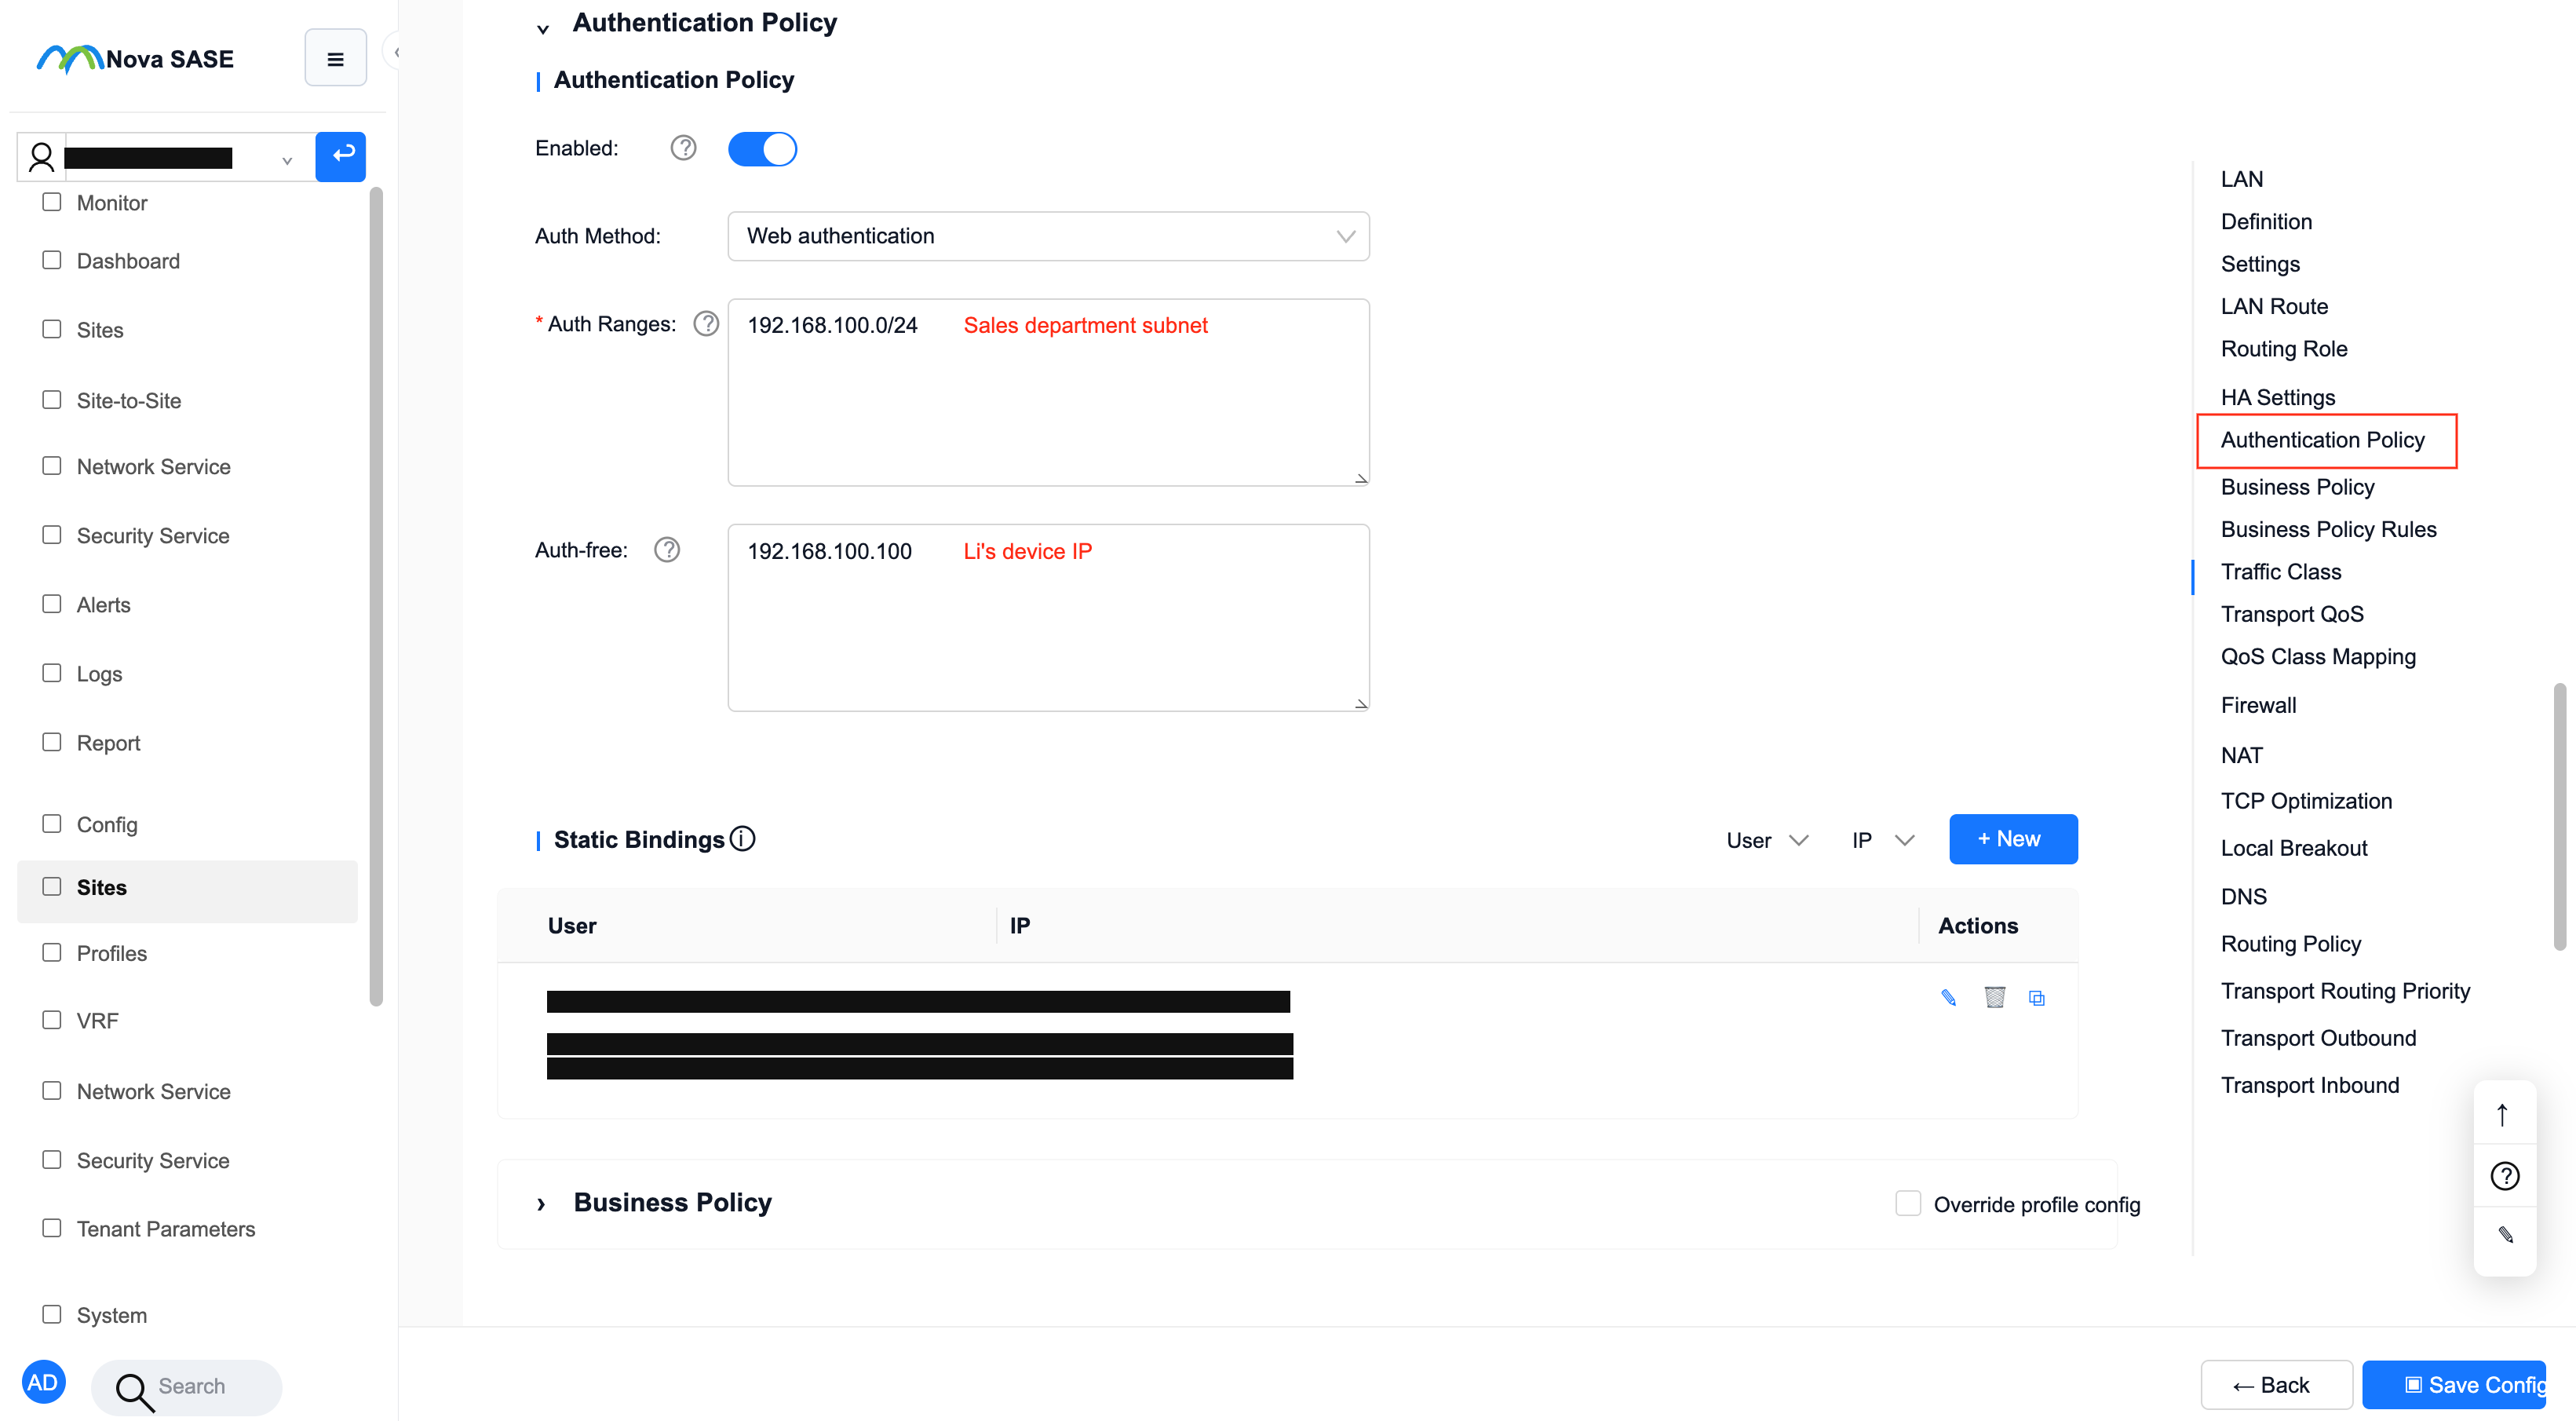
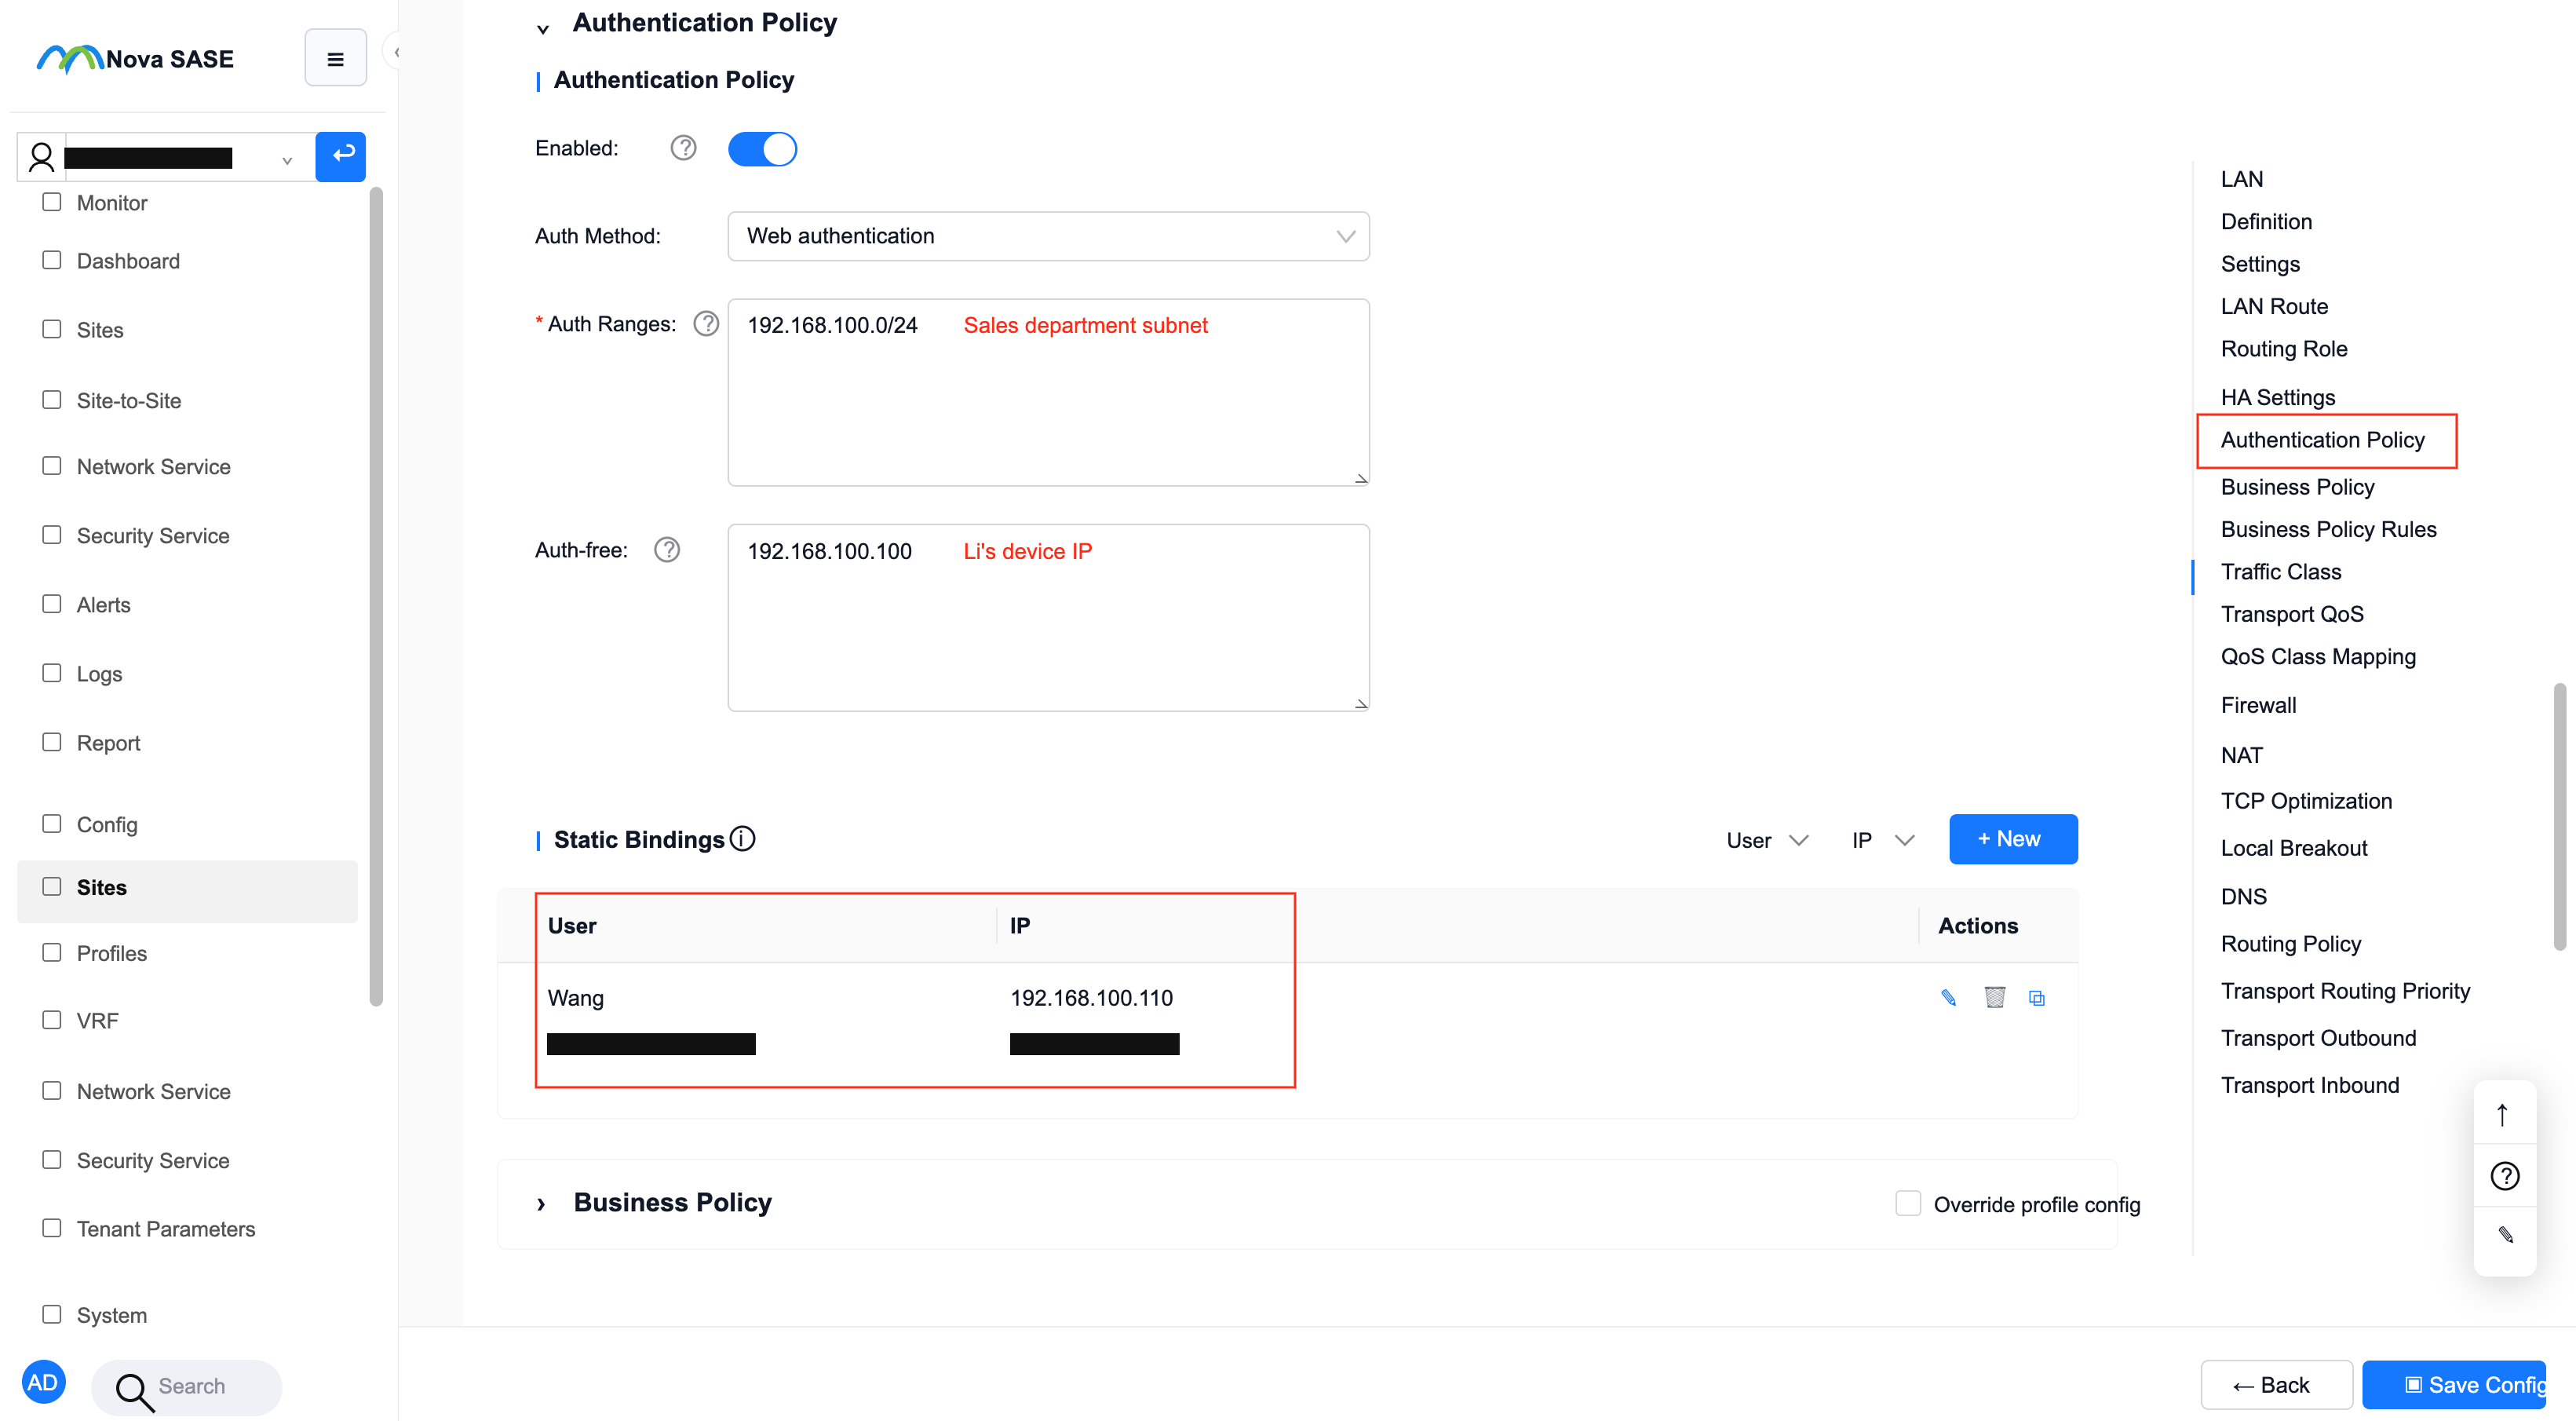
Configuration path: "Tenant" → "Site" → "VRF Configuration" → "Network", "Authentication Policy" section
The configuration is as follows:
- Certification scope: Sales department’s network segment (192.168.100.0/24)
- Whitelist: Mr. Li’s device IP (192.168.100.100)
- For specific parameter configuration instructions, please click: "Authentication Policy" Configuration Instructions)
Instructions: SSO Login
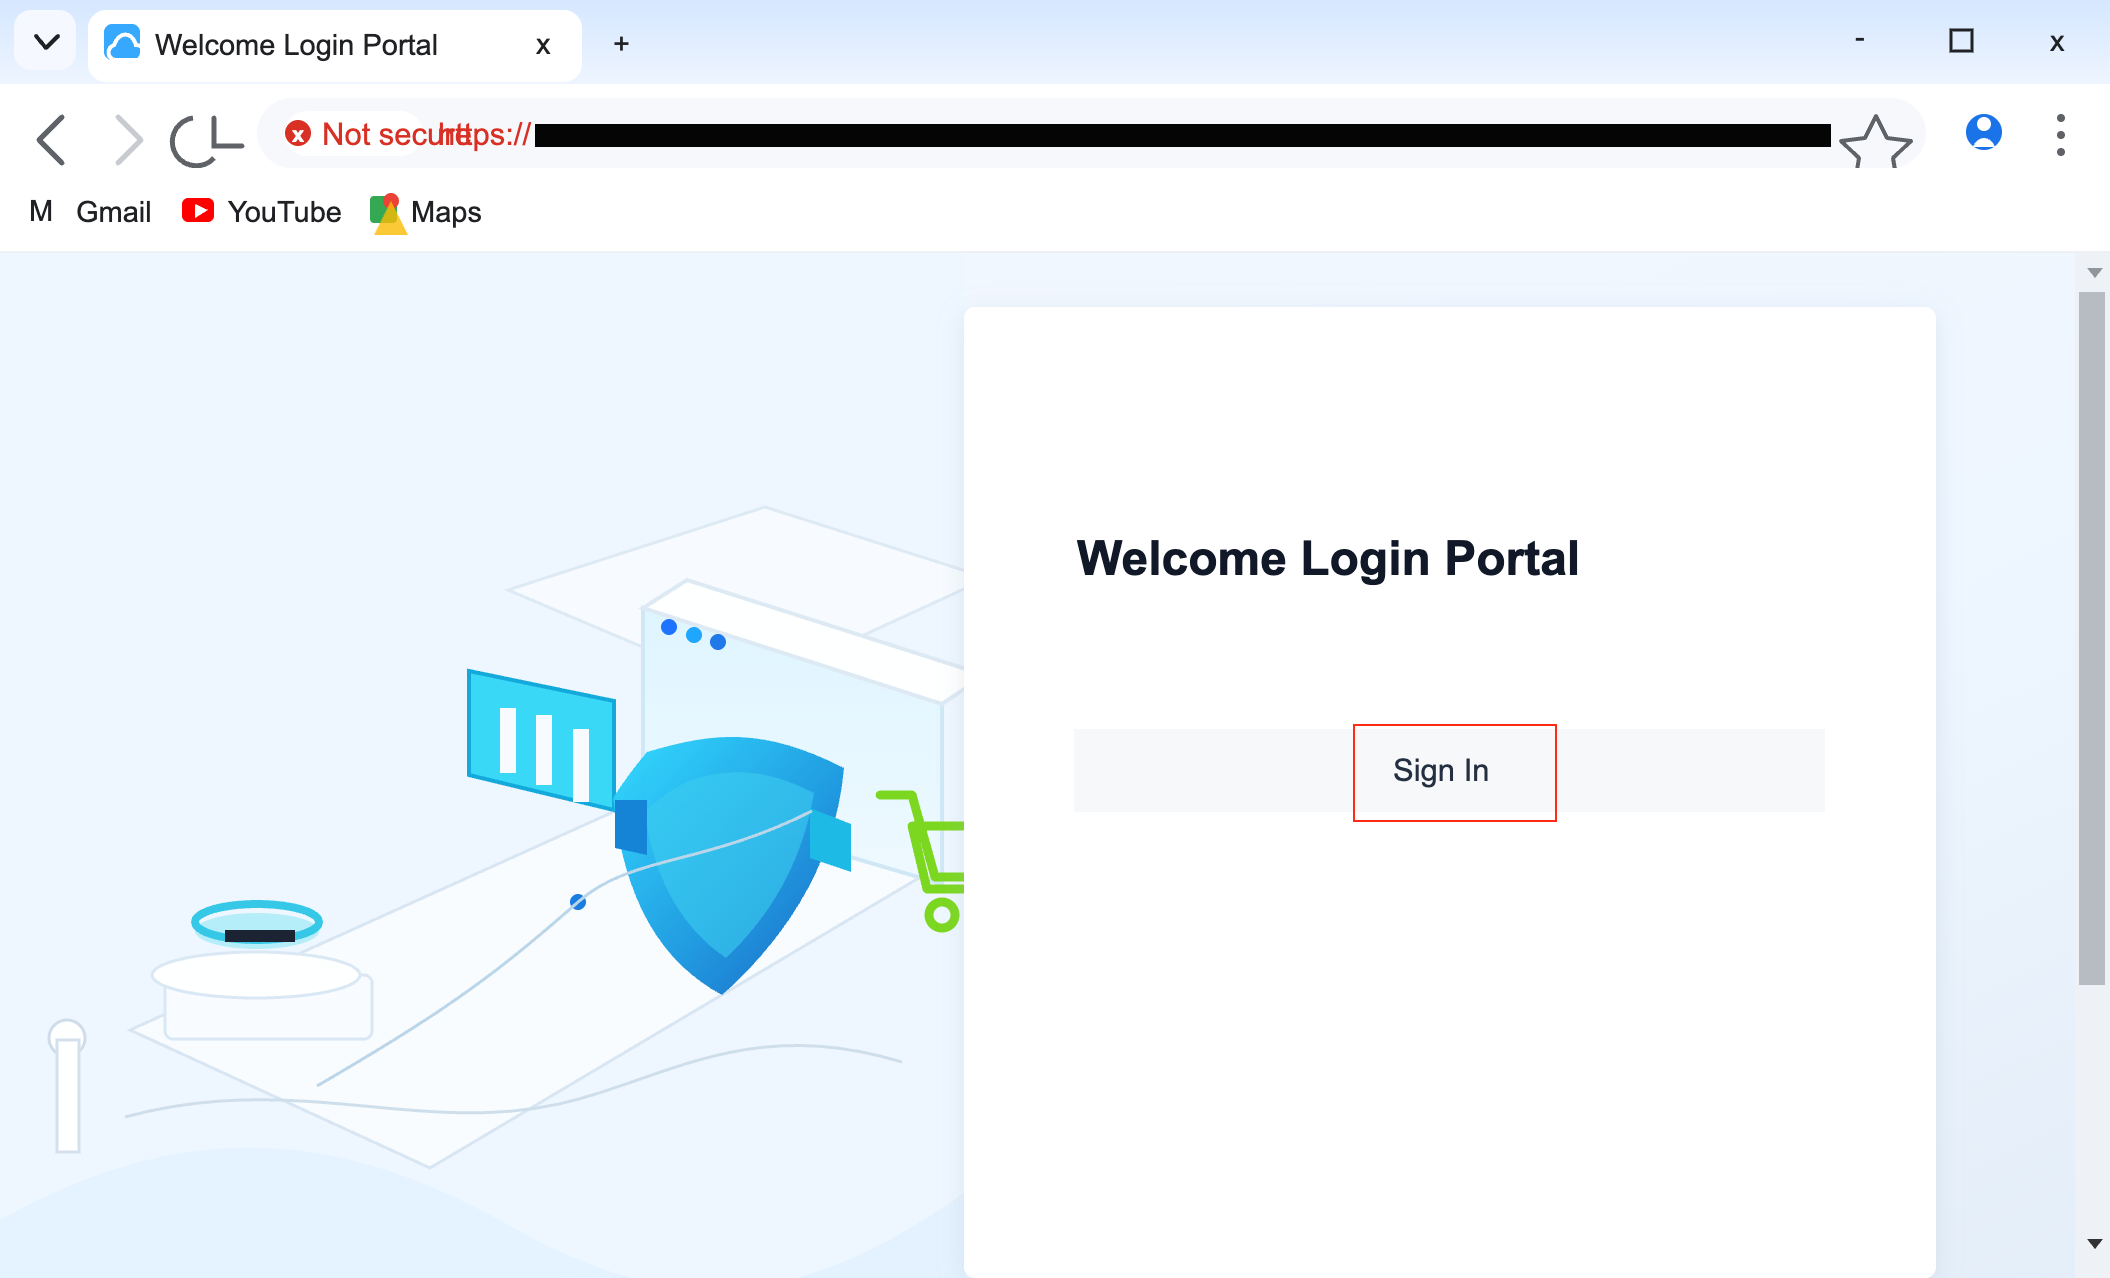
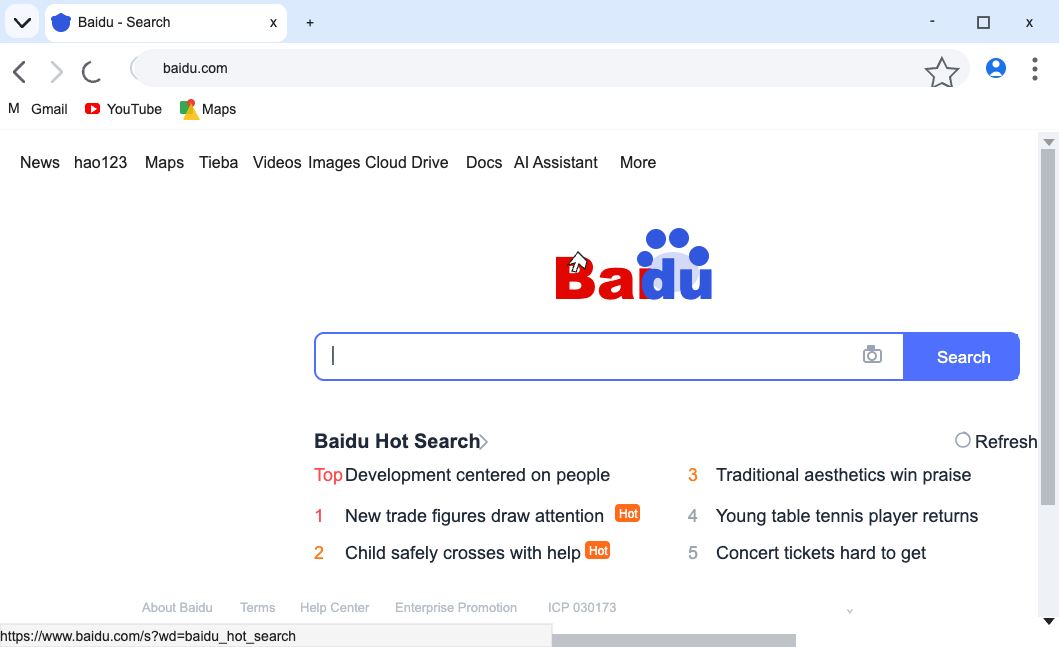
- For an unauthenticated terminal under the site, connect to the Internet or enter the URL in the browser, and the authentication portal will pop up; then click the login button
- If the Portal cannot pop up normally, it is recommended to enter: qq.com in the browser to trigger the Portal to pop up.
Jump to the StarLink login interface, enter the corresponding content, and click "Next"
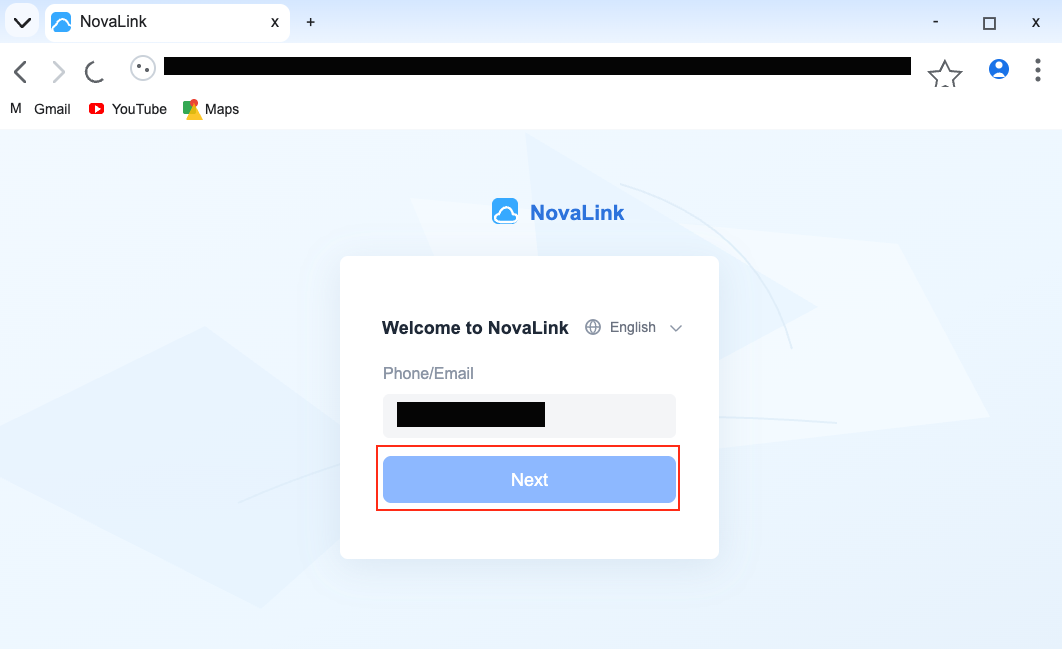
Jump to the password interface, enter the password, and click "Login" to authenticate.
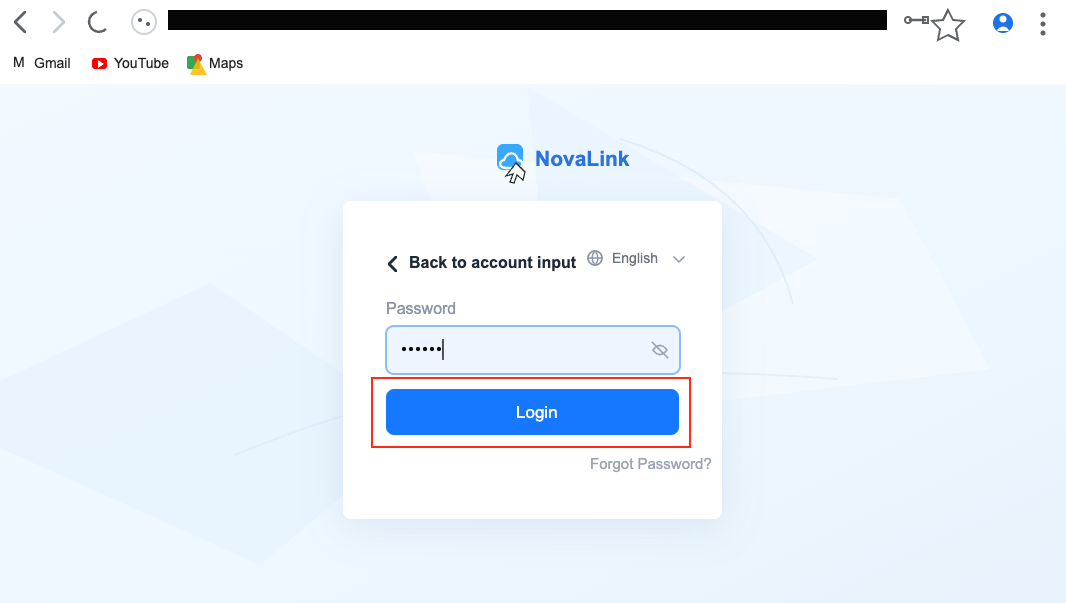
After successful authentication, you can access the web page normally.
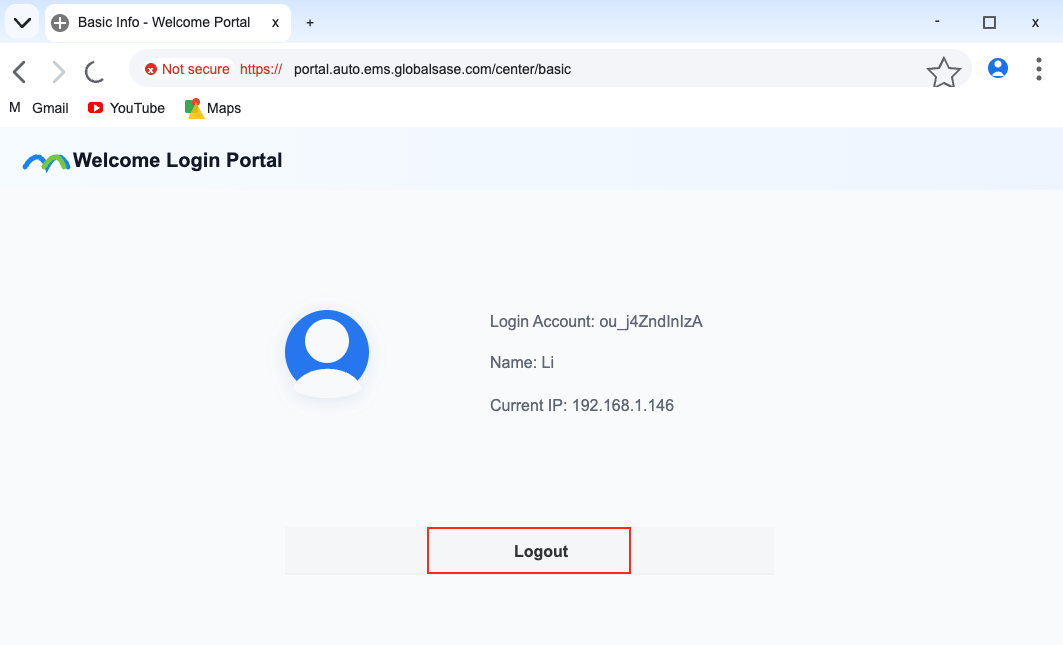
Instructions: SSO Logout
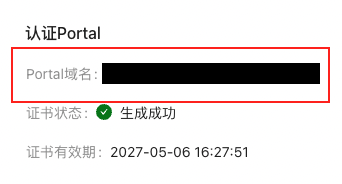
- For a terminal that has been successfully authenticated, enter the authentication portal address on the browser to jump to the logout interface, and then click "Logout"info
Check the authentication portal address: "Tenant" → "Config" → "Security Service" → "Identity Authentication" → "Identity Authentication" page
"Portal domain name" in the "Authentication Portal" section
 :::
:::
Scenario 2: The site enables SSO authentication and needs to configure a policy based on identity information.
- To configure SSO authentication and SSO login/logout, please refer to the introduction in Scenario 1
- This section focuses on: Configuring policies based on identity information
- Supports the following policies: Policy Routing, business policy, ACL firewall, application firewall, SNAT, security policy
- Source/destination, select this site to support configuring identity information
- Policy Routing/security policies only support the configuration of source identity information, and other policies support source/destination identity information.
- A single rule in the policy allows only one department to be selected; if multiple departments are required, please configure multiple rules.
- If the identity information changes, for example, the department to which the user belongs changes, it is recommended that the user re-authenticate before using the policy based on the user.
- After successful user authentication, based on the policy of the department to which the user belongs, the maximum effective time is: 5 minutes
Identity synchronization
- Identity synchronization, used to synchronize Starlink identity information (users, departments) to the controller side
- Identity synchronization must be performed first before identity information can be used in different policies
- For specific parameter configuration instructions, please click: "Identity Synchronization" Configuration Instructions
Configuration path: "Tenant" → "Config" → "Security Service" → "Identity Authentication", switch to the "Identity Synchronization" page
Click "Modify" and configure the synchronization parameters in the pop-up interface; click "Sync Now" to trigger the synchronization operation.
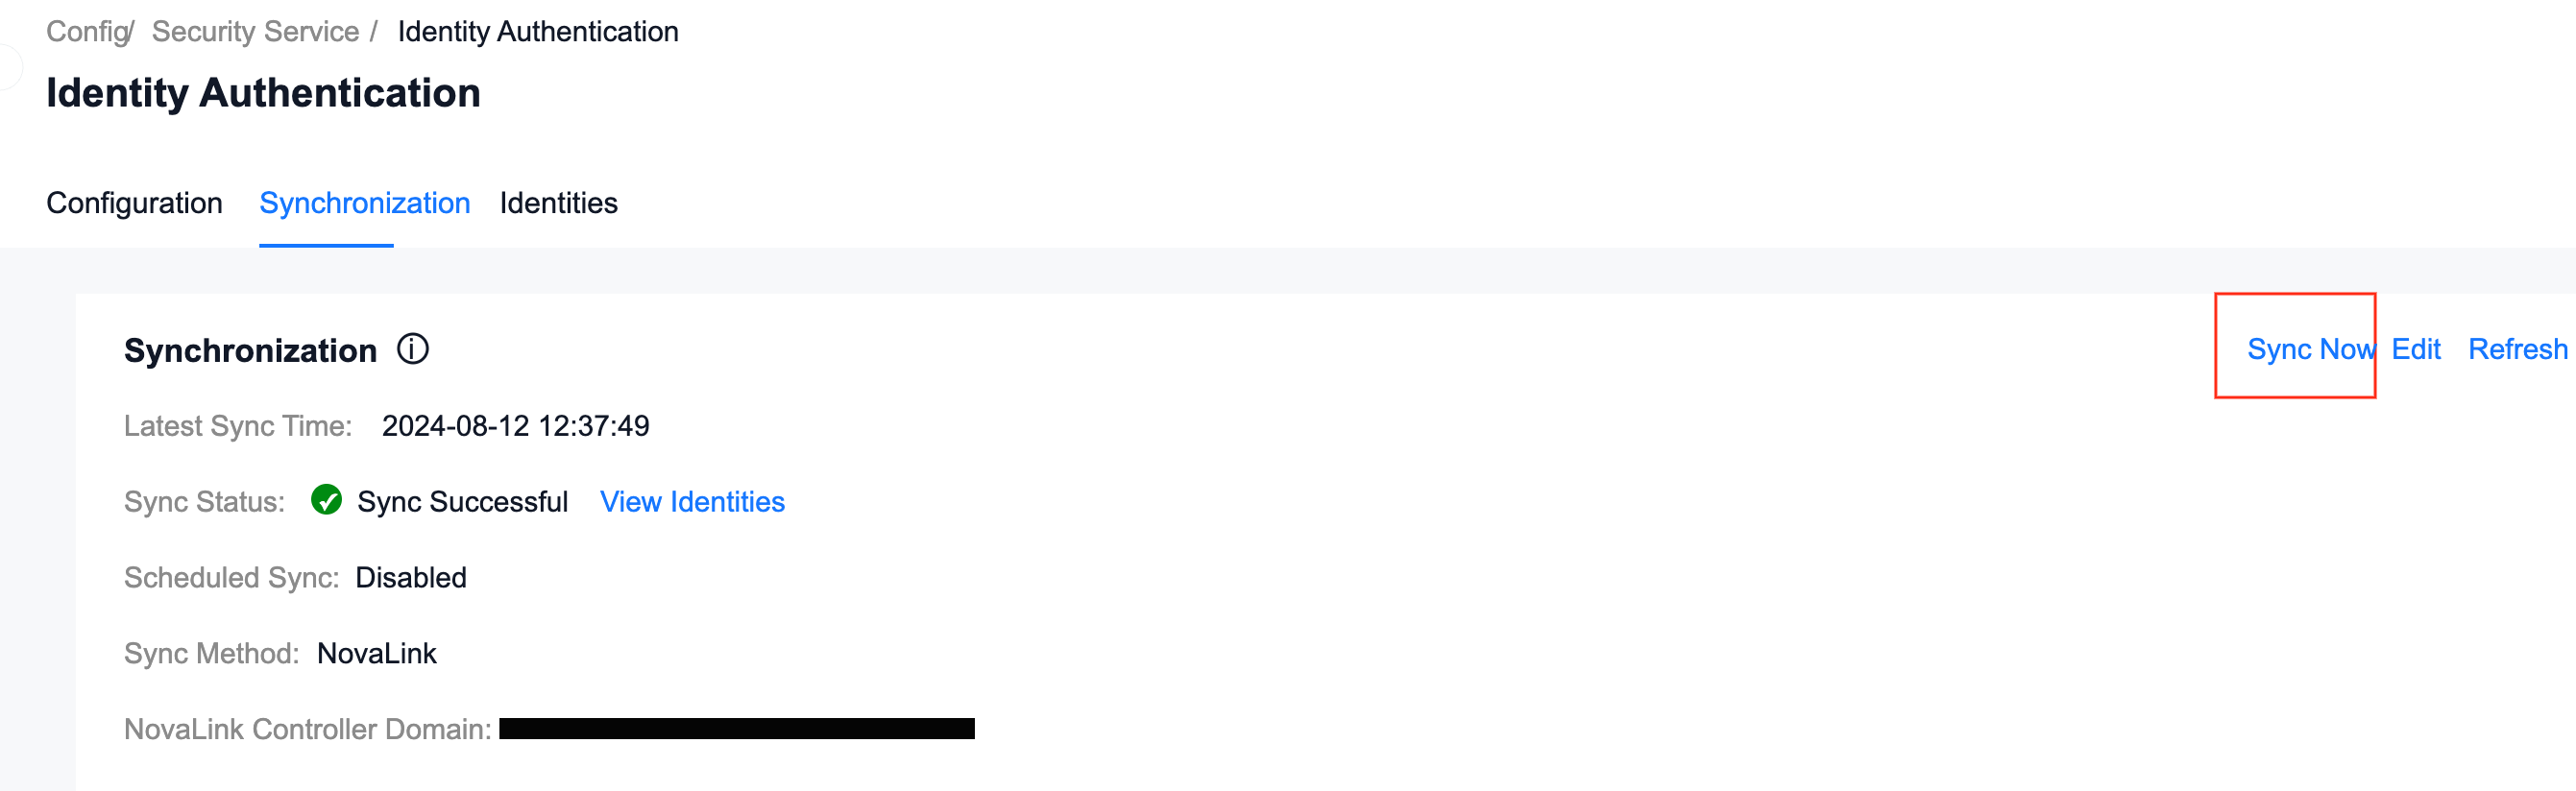
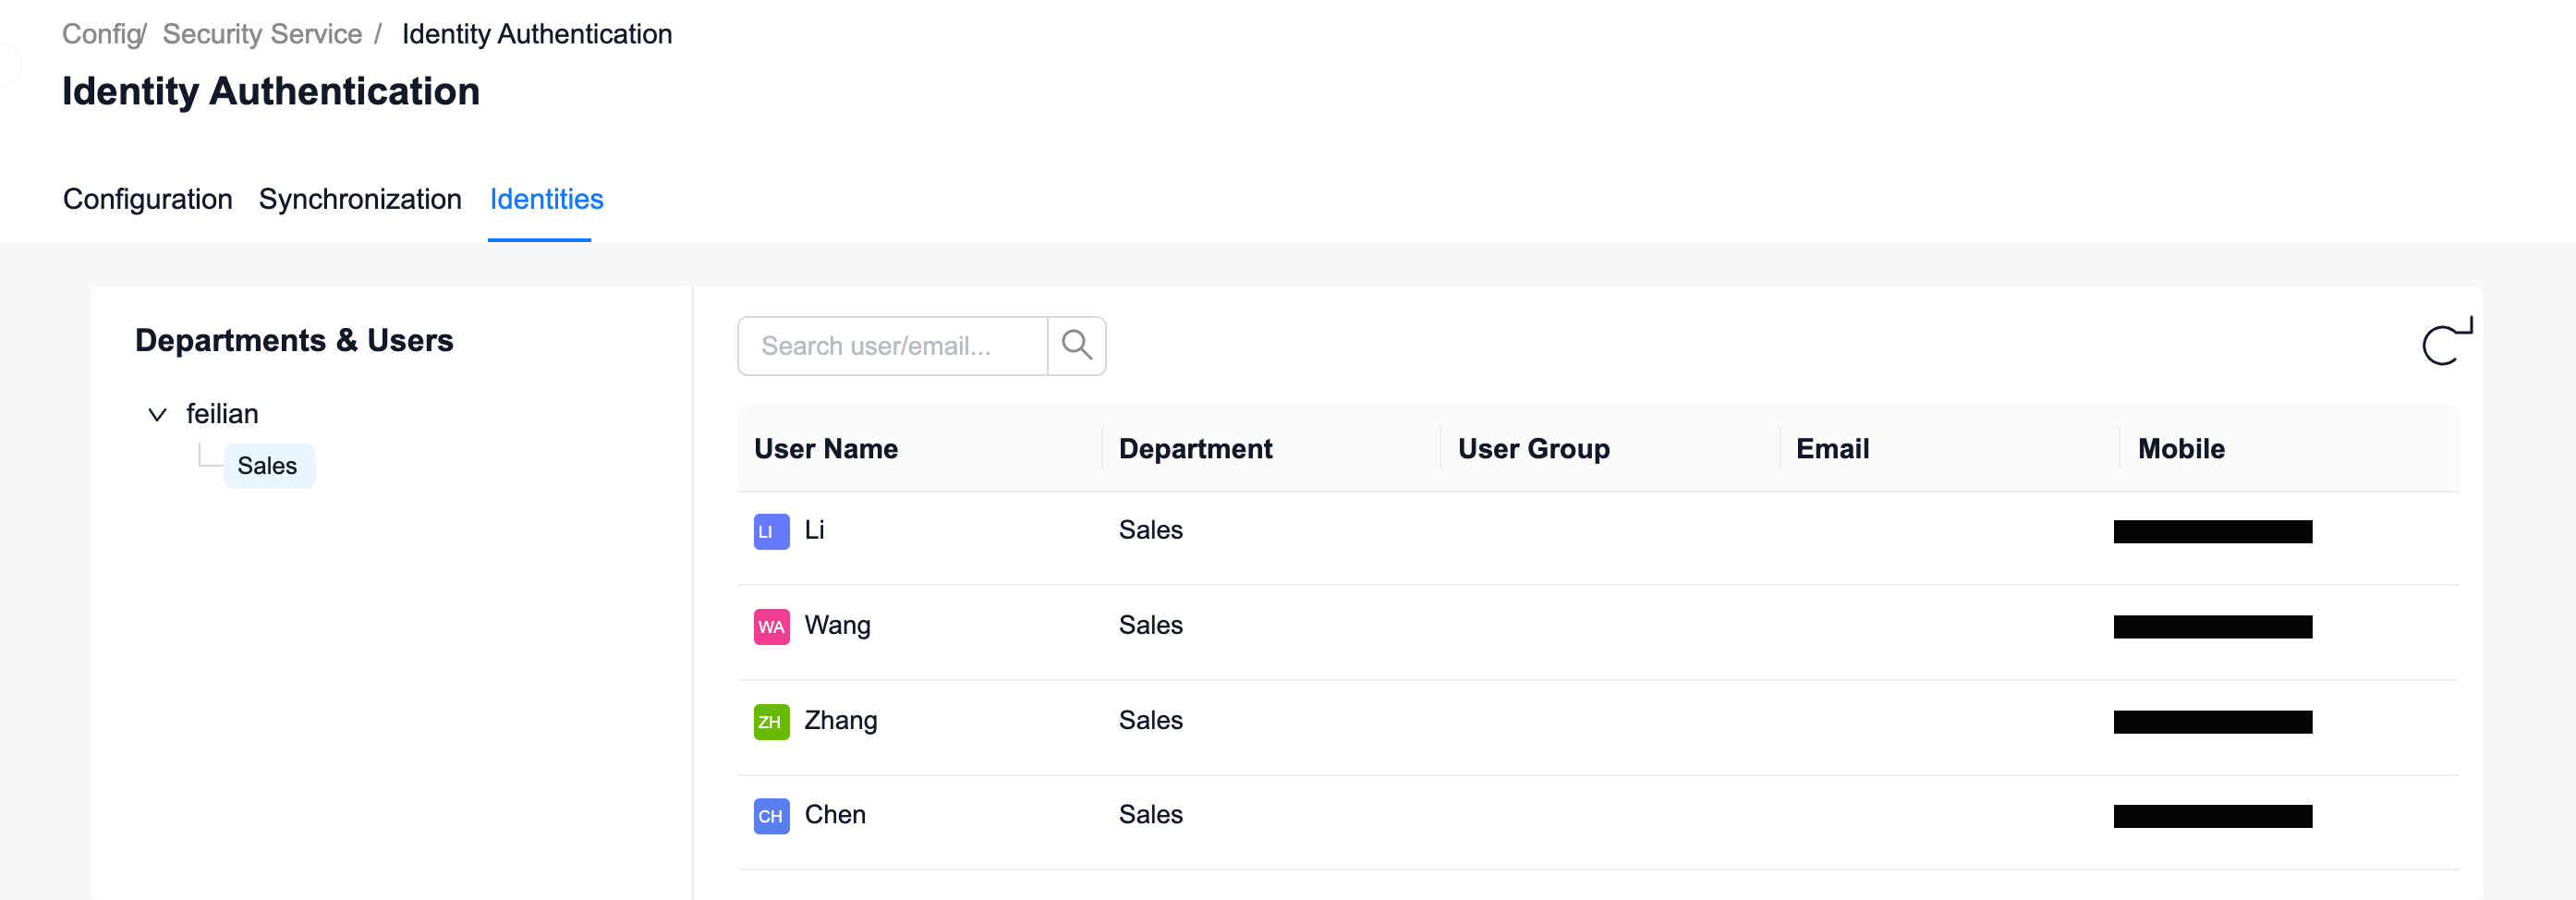
Switch to the "Identity Information" page to view the synchronized identity information
Static binding
- Identity synchronization is required before static binding can be performed
- Bind the device IP to the user
- Staticly bound IP, no authentication required, you can access the network
- Generally used for devices that cannot pop up the Portal page
The configuration is as follows:
Identity-based policy configuration
Operation instructions: Select the identity in the policy
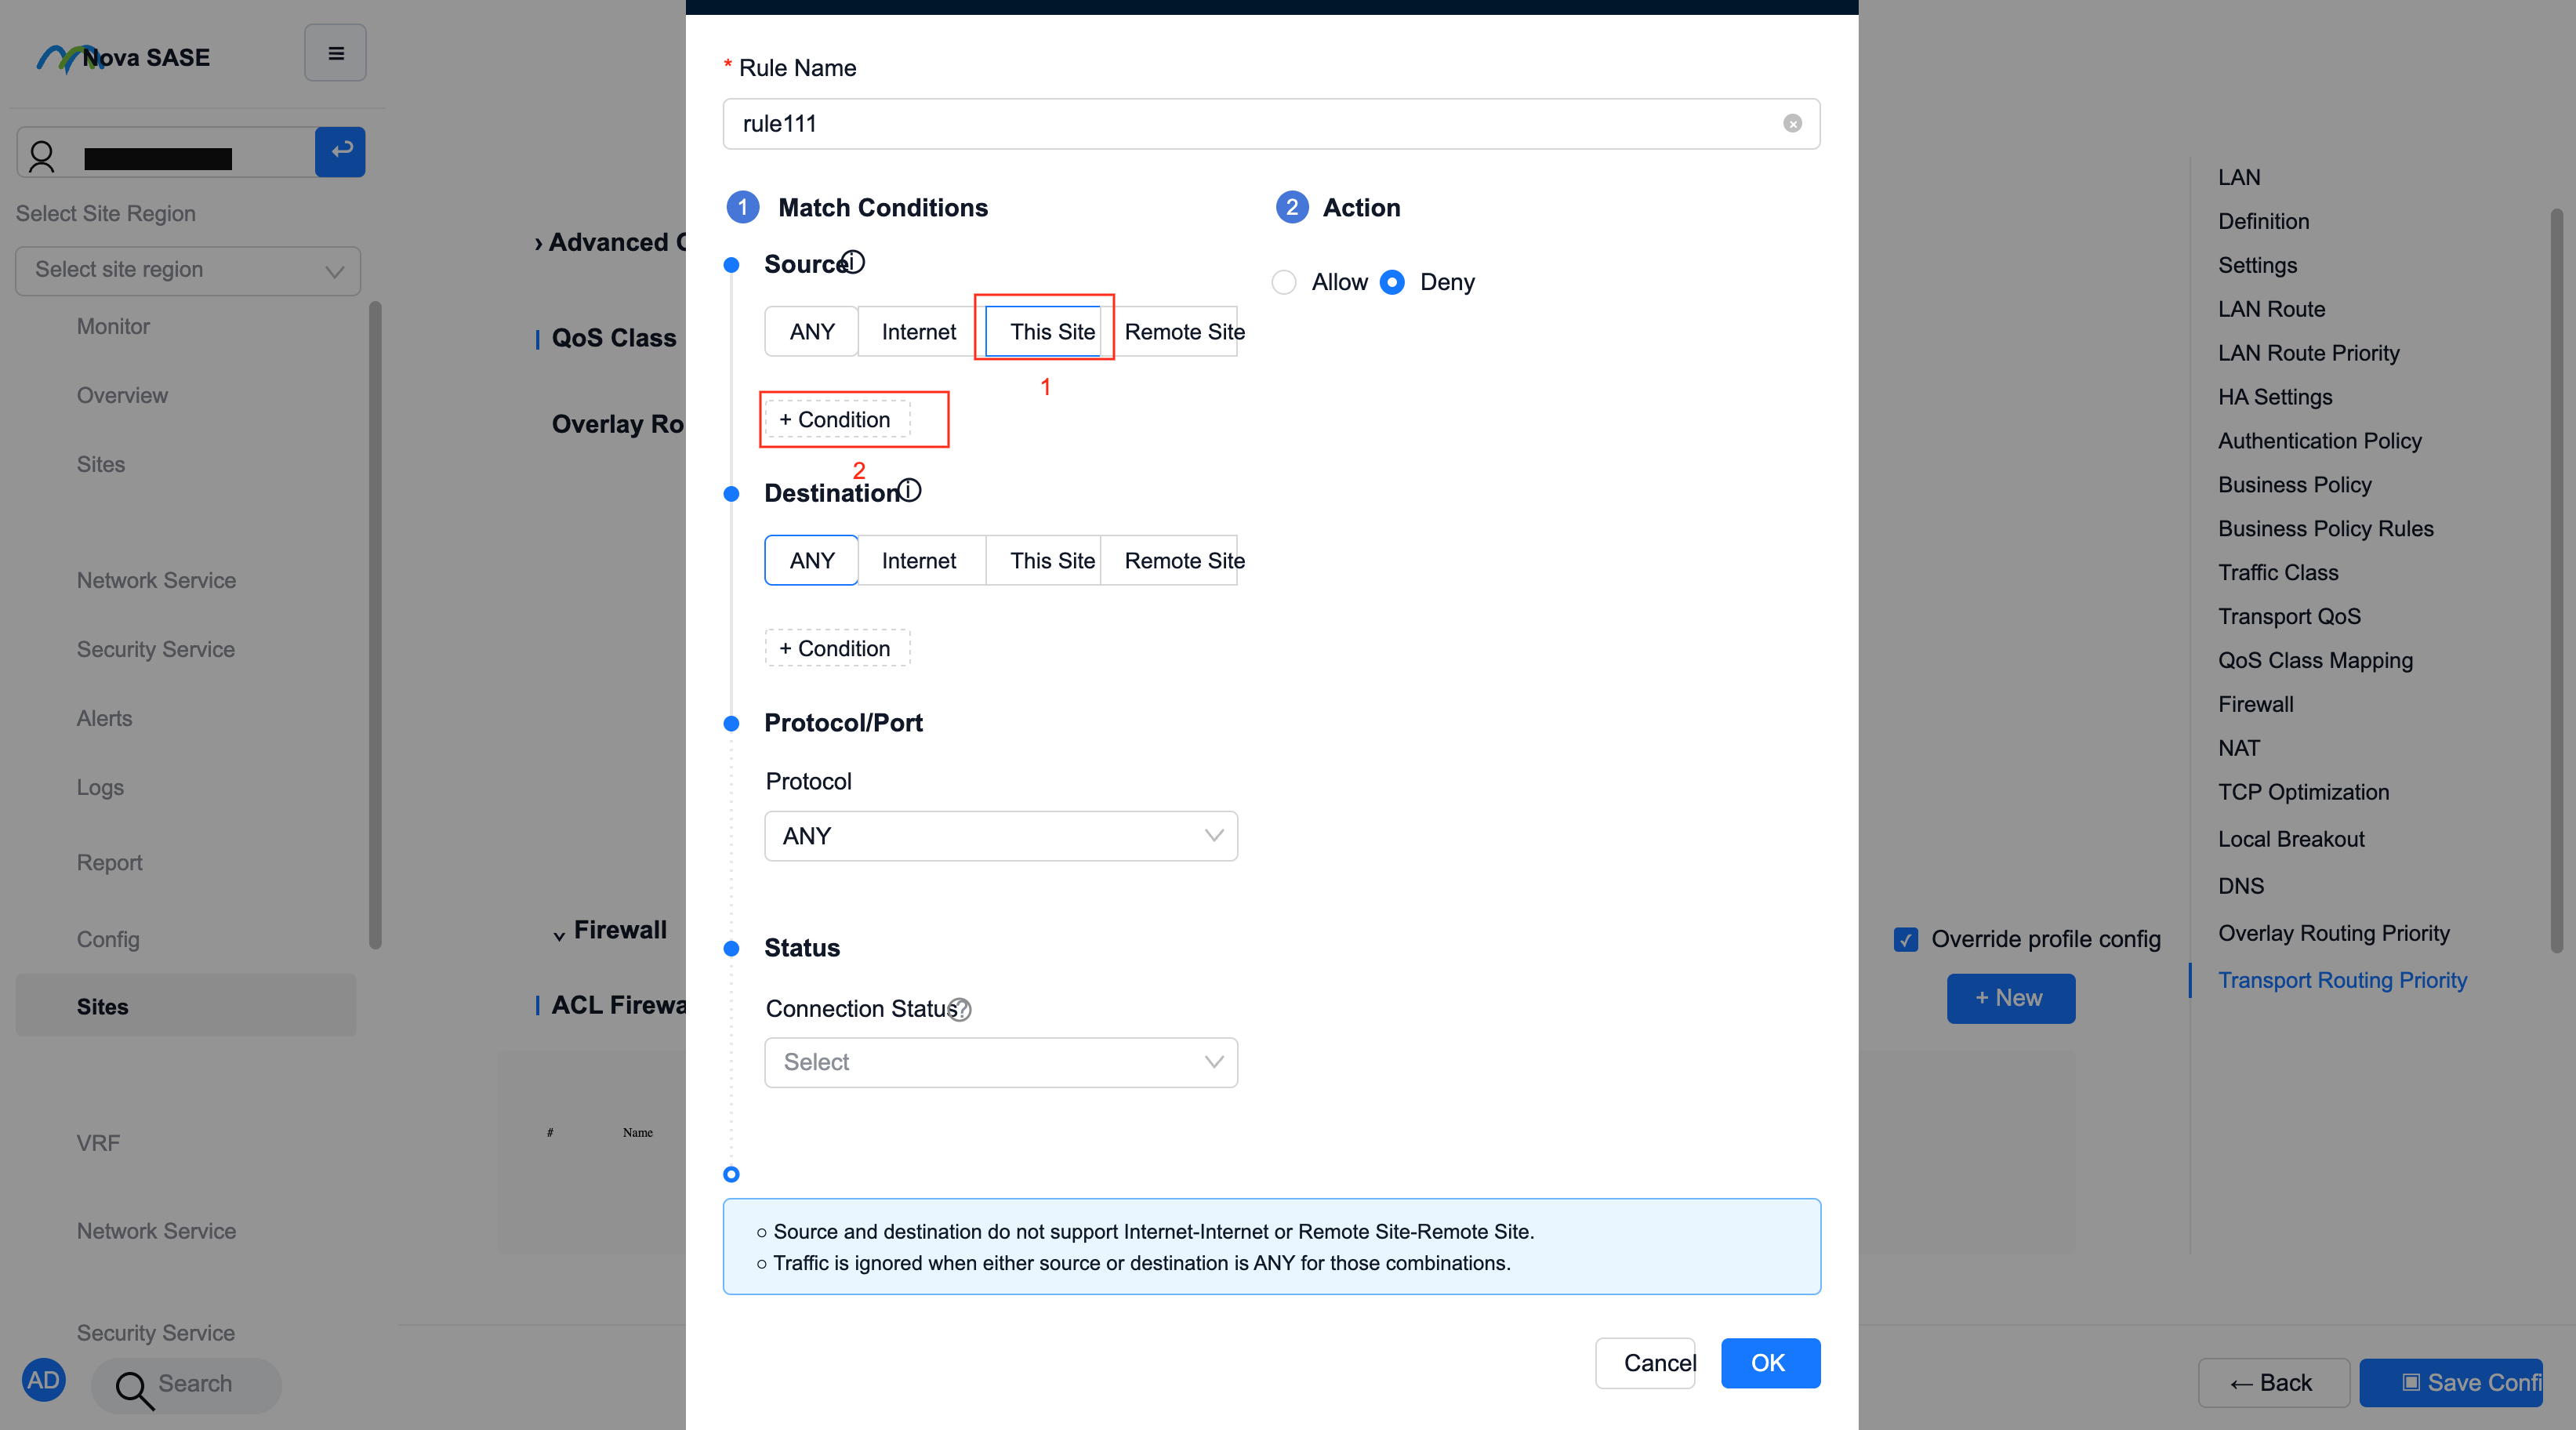
Take ACL firewall as an example, create a new rule, first click "This site", and then click "Matching conditions"
Click on the "Department/User" page

Currently in the root department, click "Subordinate" to enter the subordinate department
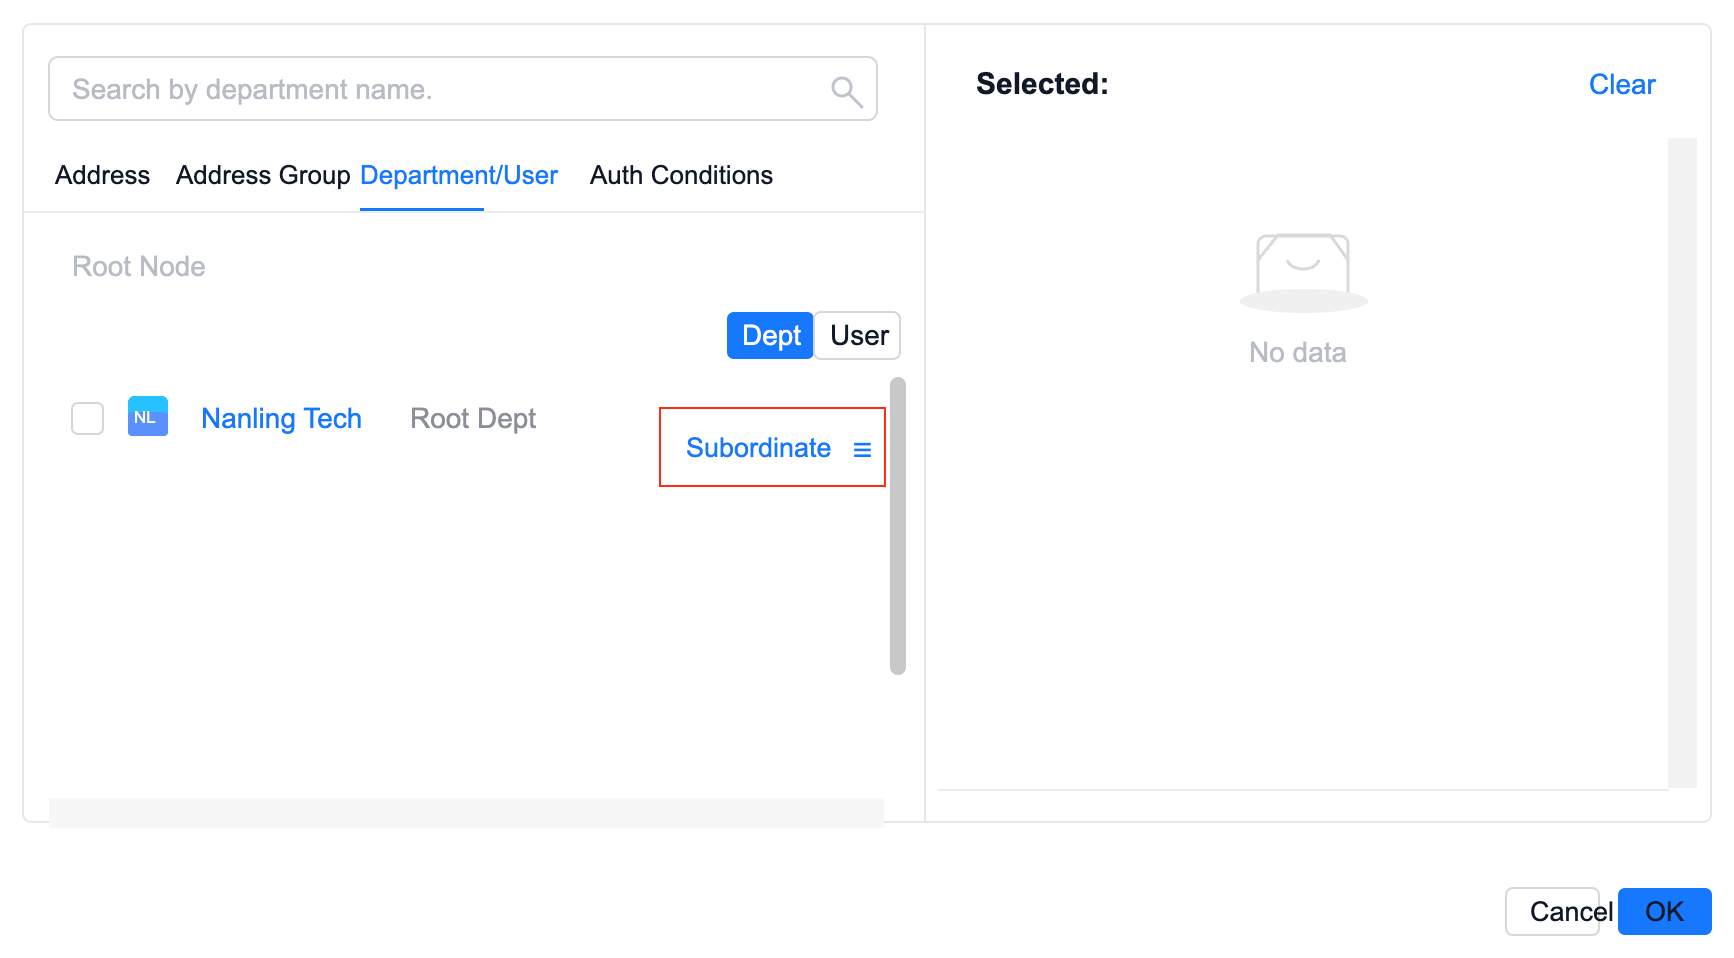
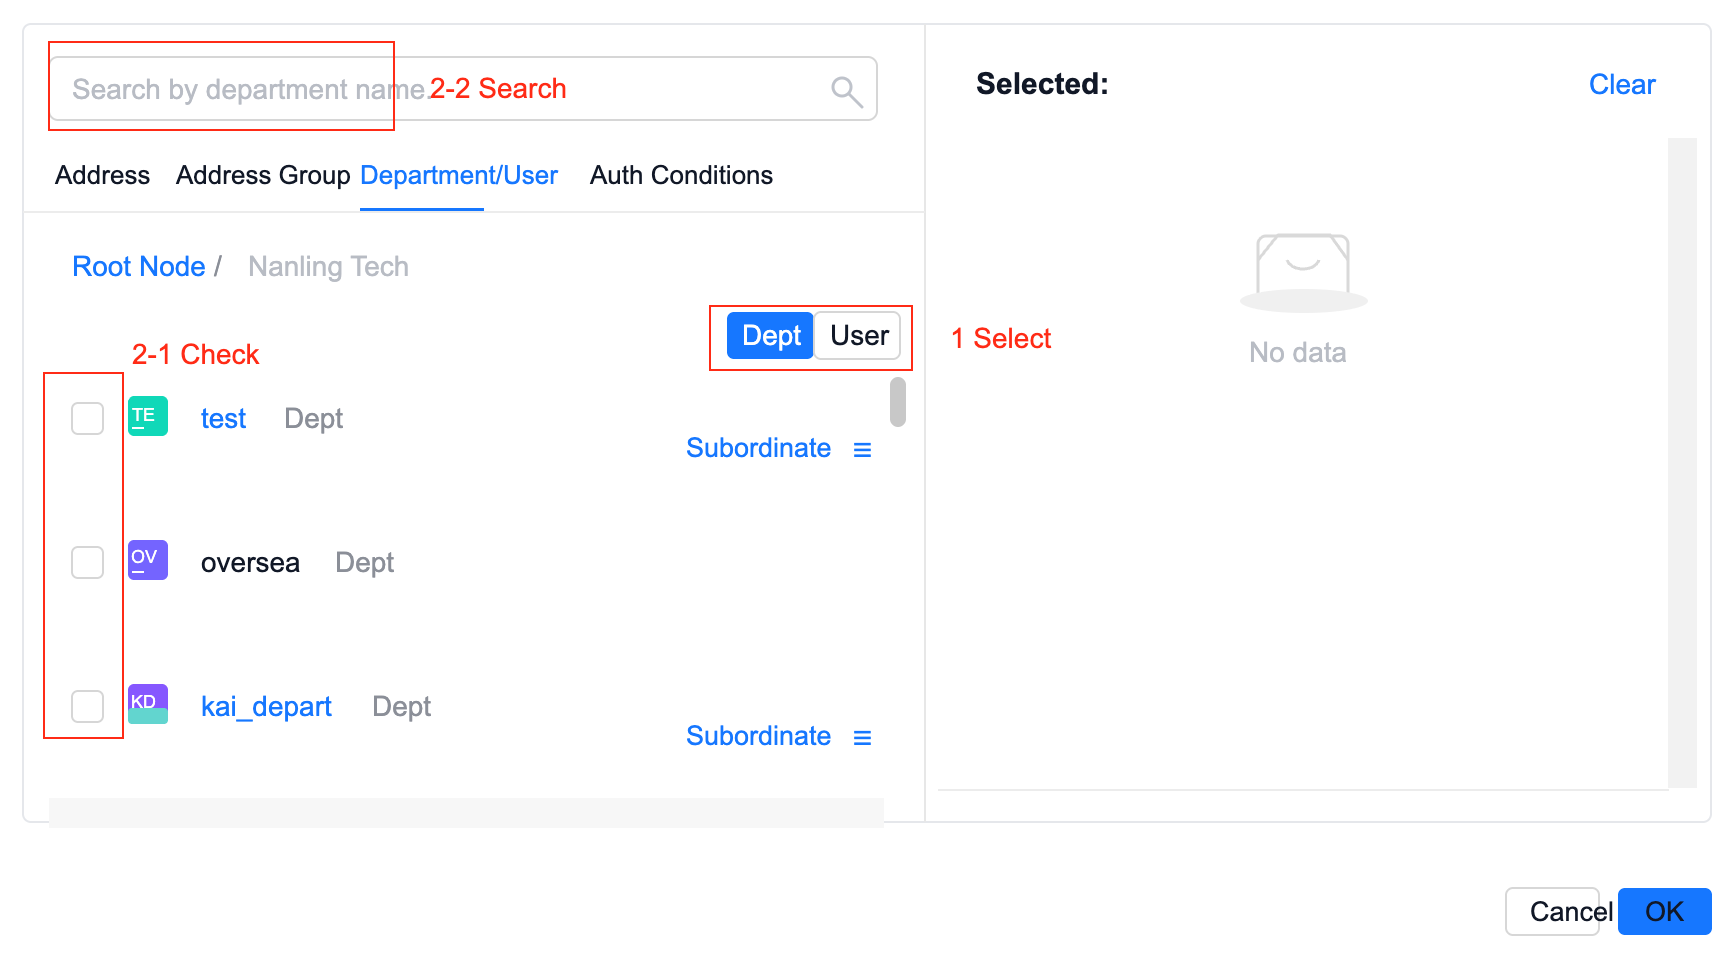
First select the category: user or department, then under the category, select the user/department by checking or searching.
The selected user/department will be displayed in the list on the right. Then click "OK"
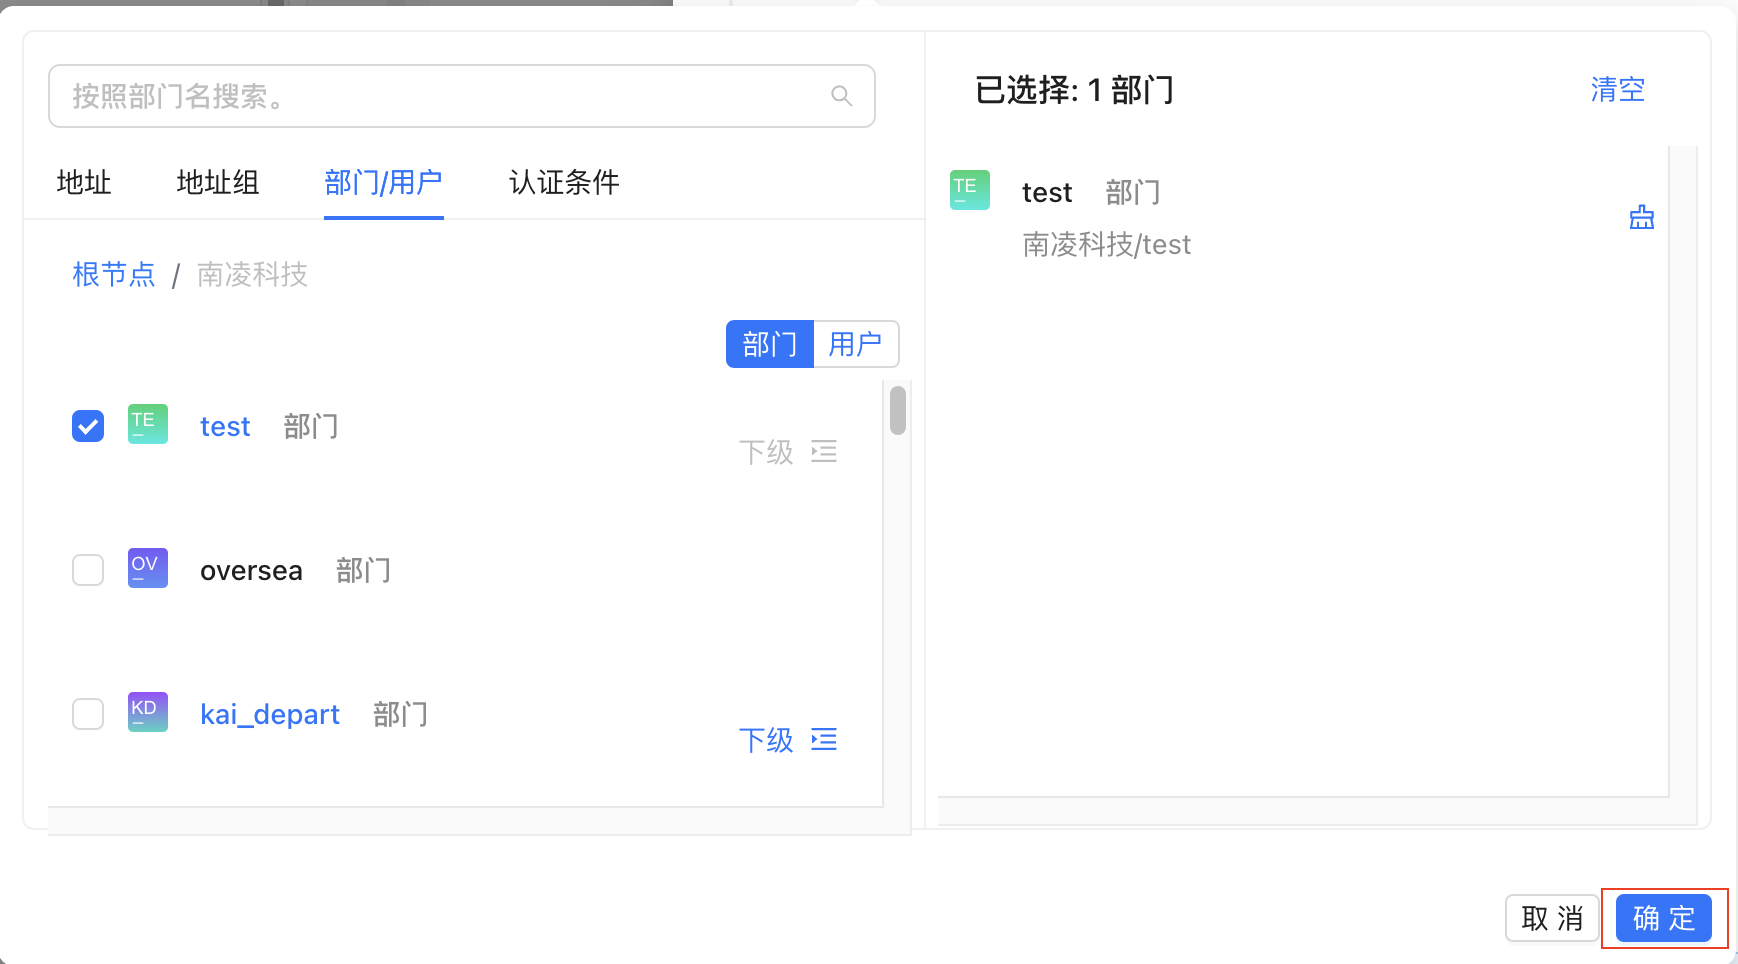
Configure other parameters of the rule and click "Save Configuration"
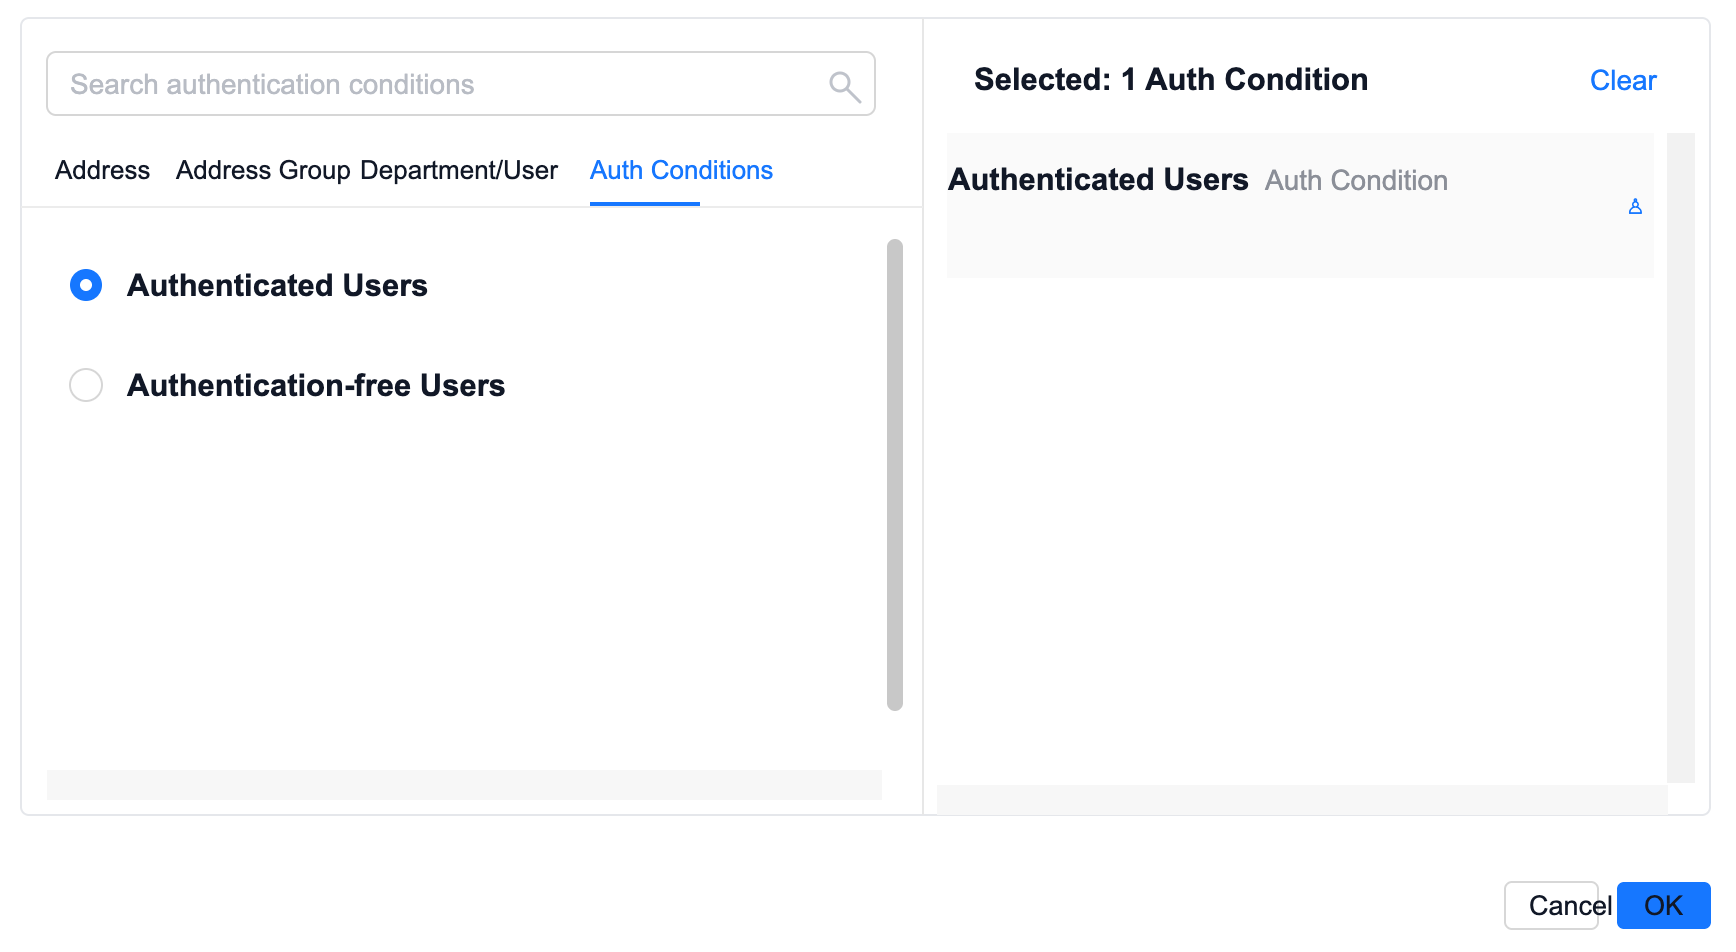
Operation instructions: Using authentication conditions in policies
- Authenticated: certified or statically bound
- Certification-free: certification whitelist or outside the certification scope
- Authentication conditions cannot be configured with departments/users
Take ACL firewall as an example, create a new rule, first click "This site", and then click "Matching conditions"
Click the "Authentication Conditions" page, select authenticated users/authentication-free users, and then click "OK"
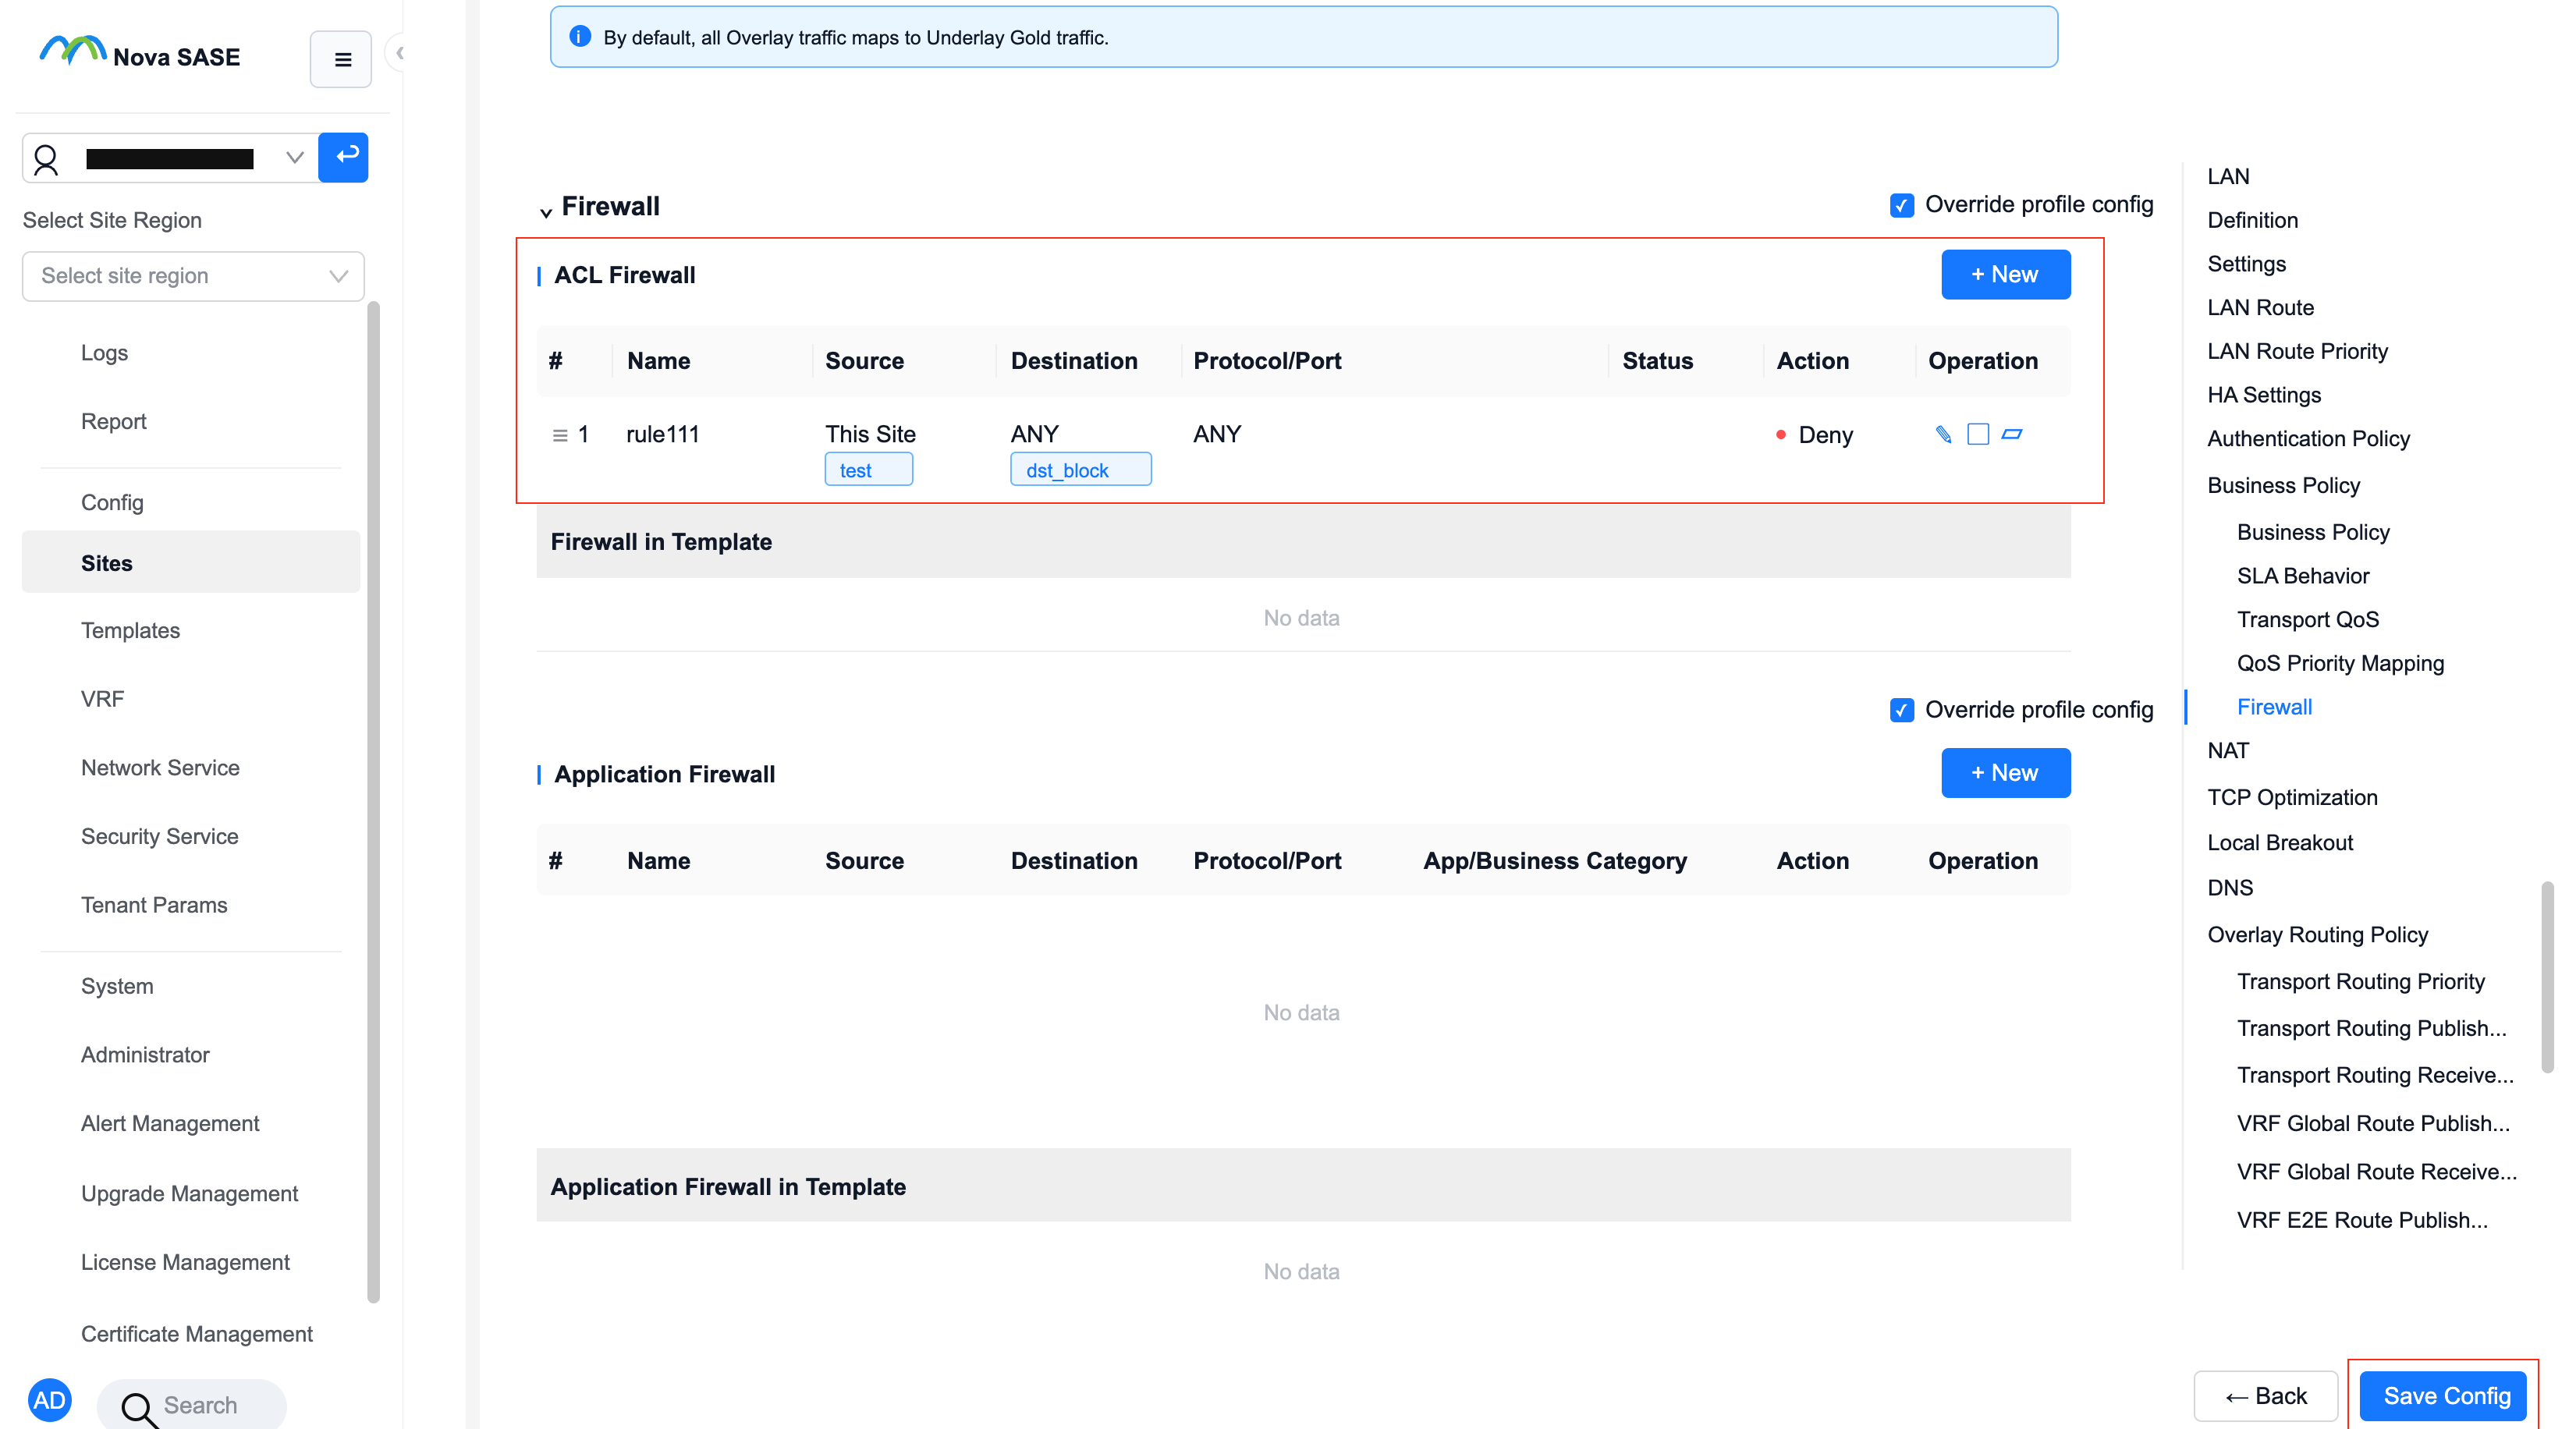
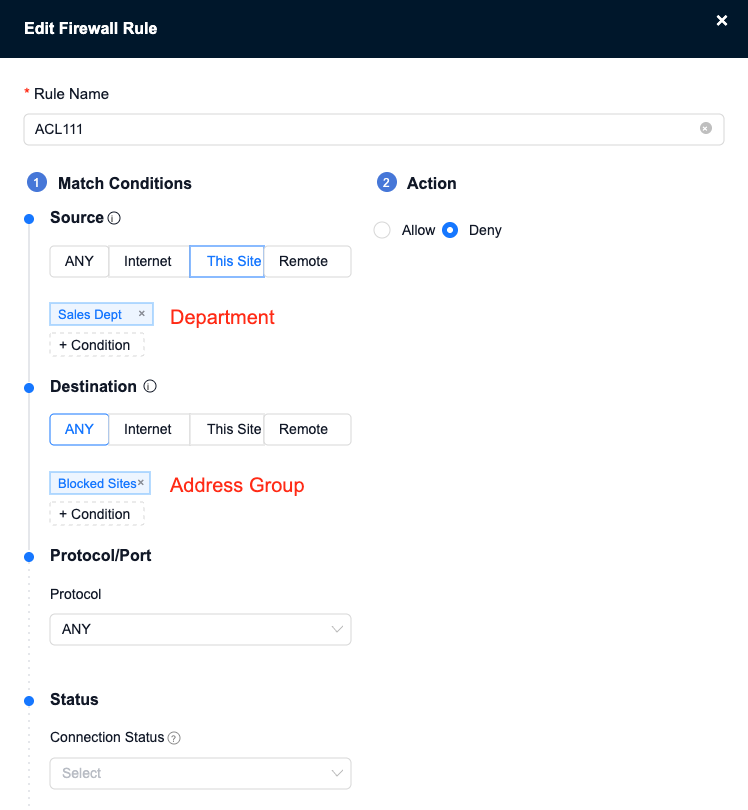
Scenario 1: Configure ACL firewall: prohibit a certain department from accessing specified websites
First configure the Address Group, including the URL of the prohibited website.
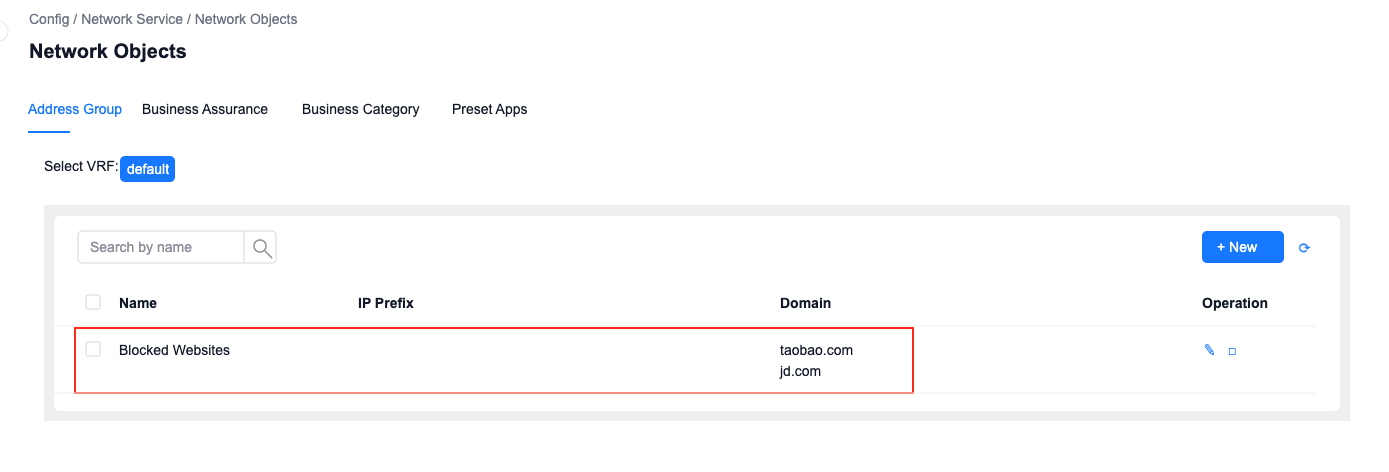
Configure the following ACL firewall rules, where: select the department as the source, and select the Address Group as the destination.
Scenario 2: Configure business policy: the department director has a speed limit of 20M, and the rest of the department employees have a speed limit of 10M
- Director rules have a higher priority than department rules, so configure department rules first and then configure director rules.
Business Policy, configuration department, speed limit 10M
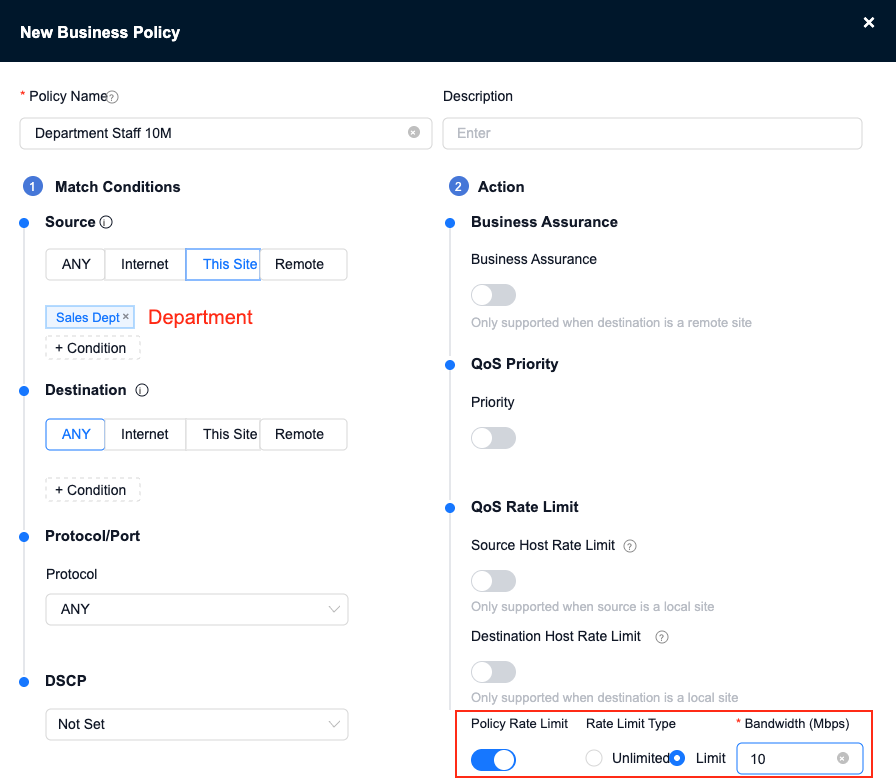
Business Policy, configure the department director’s user, limit the speed to 20M
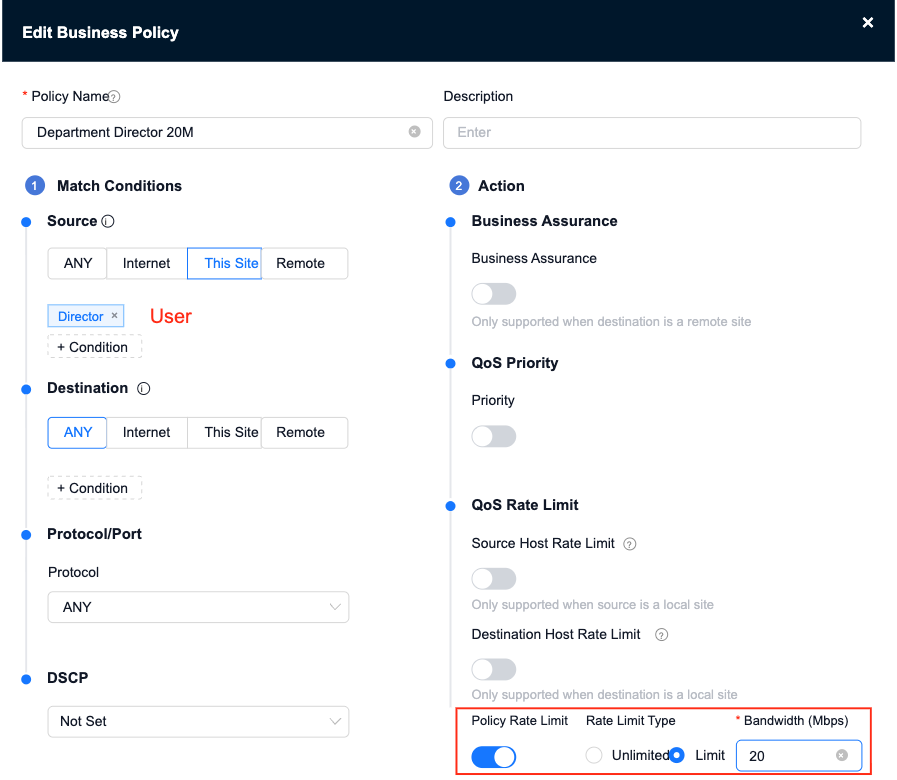
The configured Business Policy is shown as follows

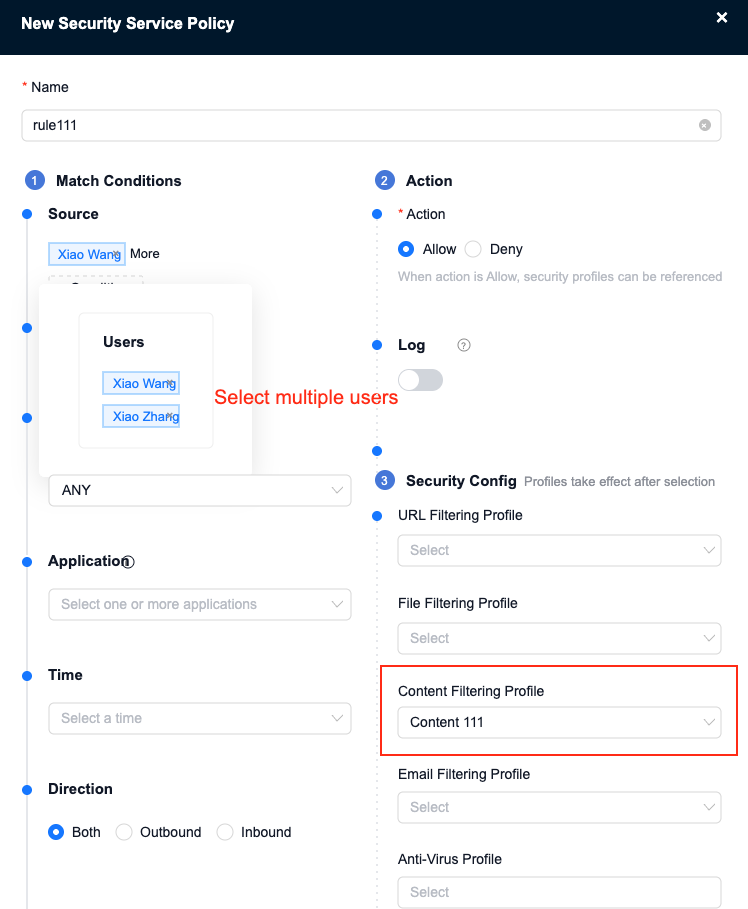
Scenario 3: Configure security policy: enable content filtering for some users under the department
First configure the content filtering configuration file

Configure the security policy, select multiple users as the source, and reference the content filtering configuration file
Monitoring related
Online terminal and static binding
Authentication log
Authentication login/logout log
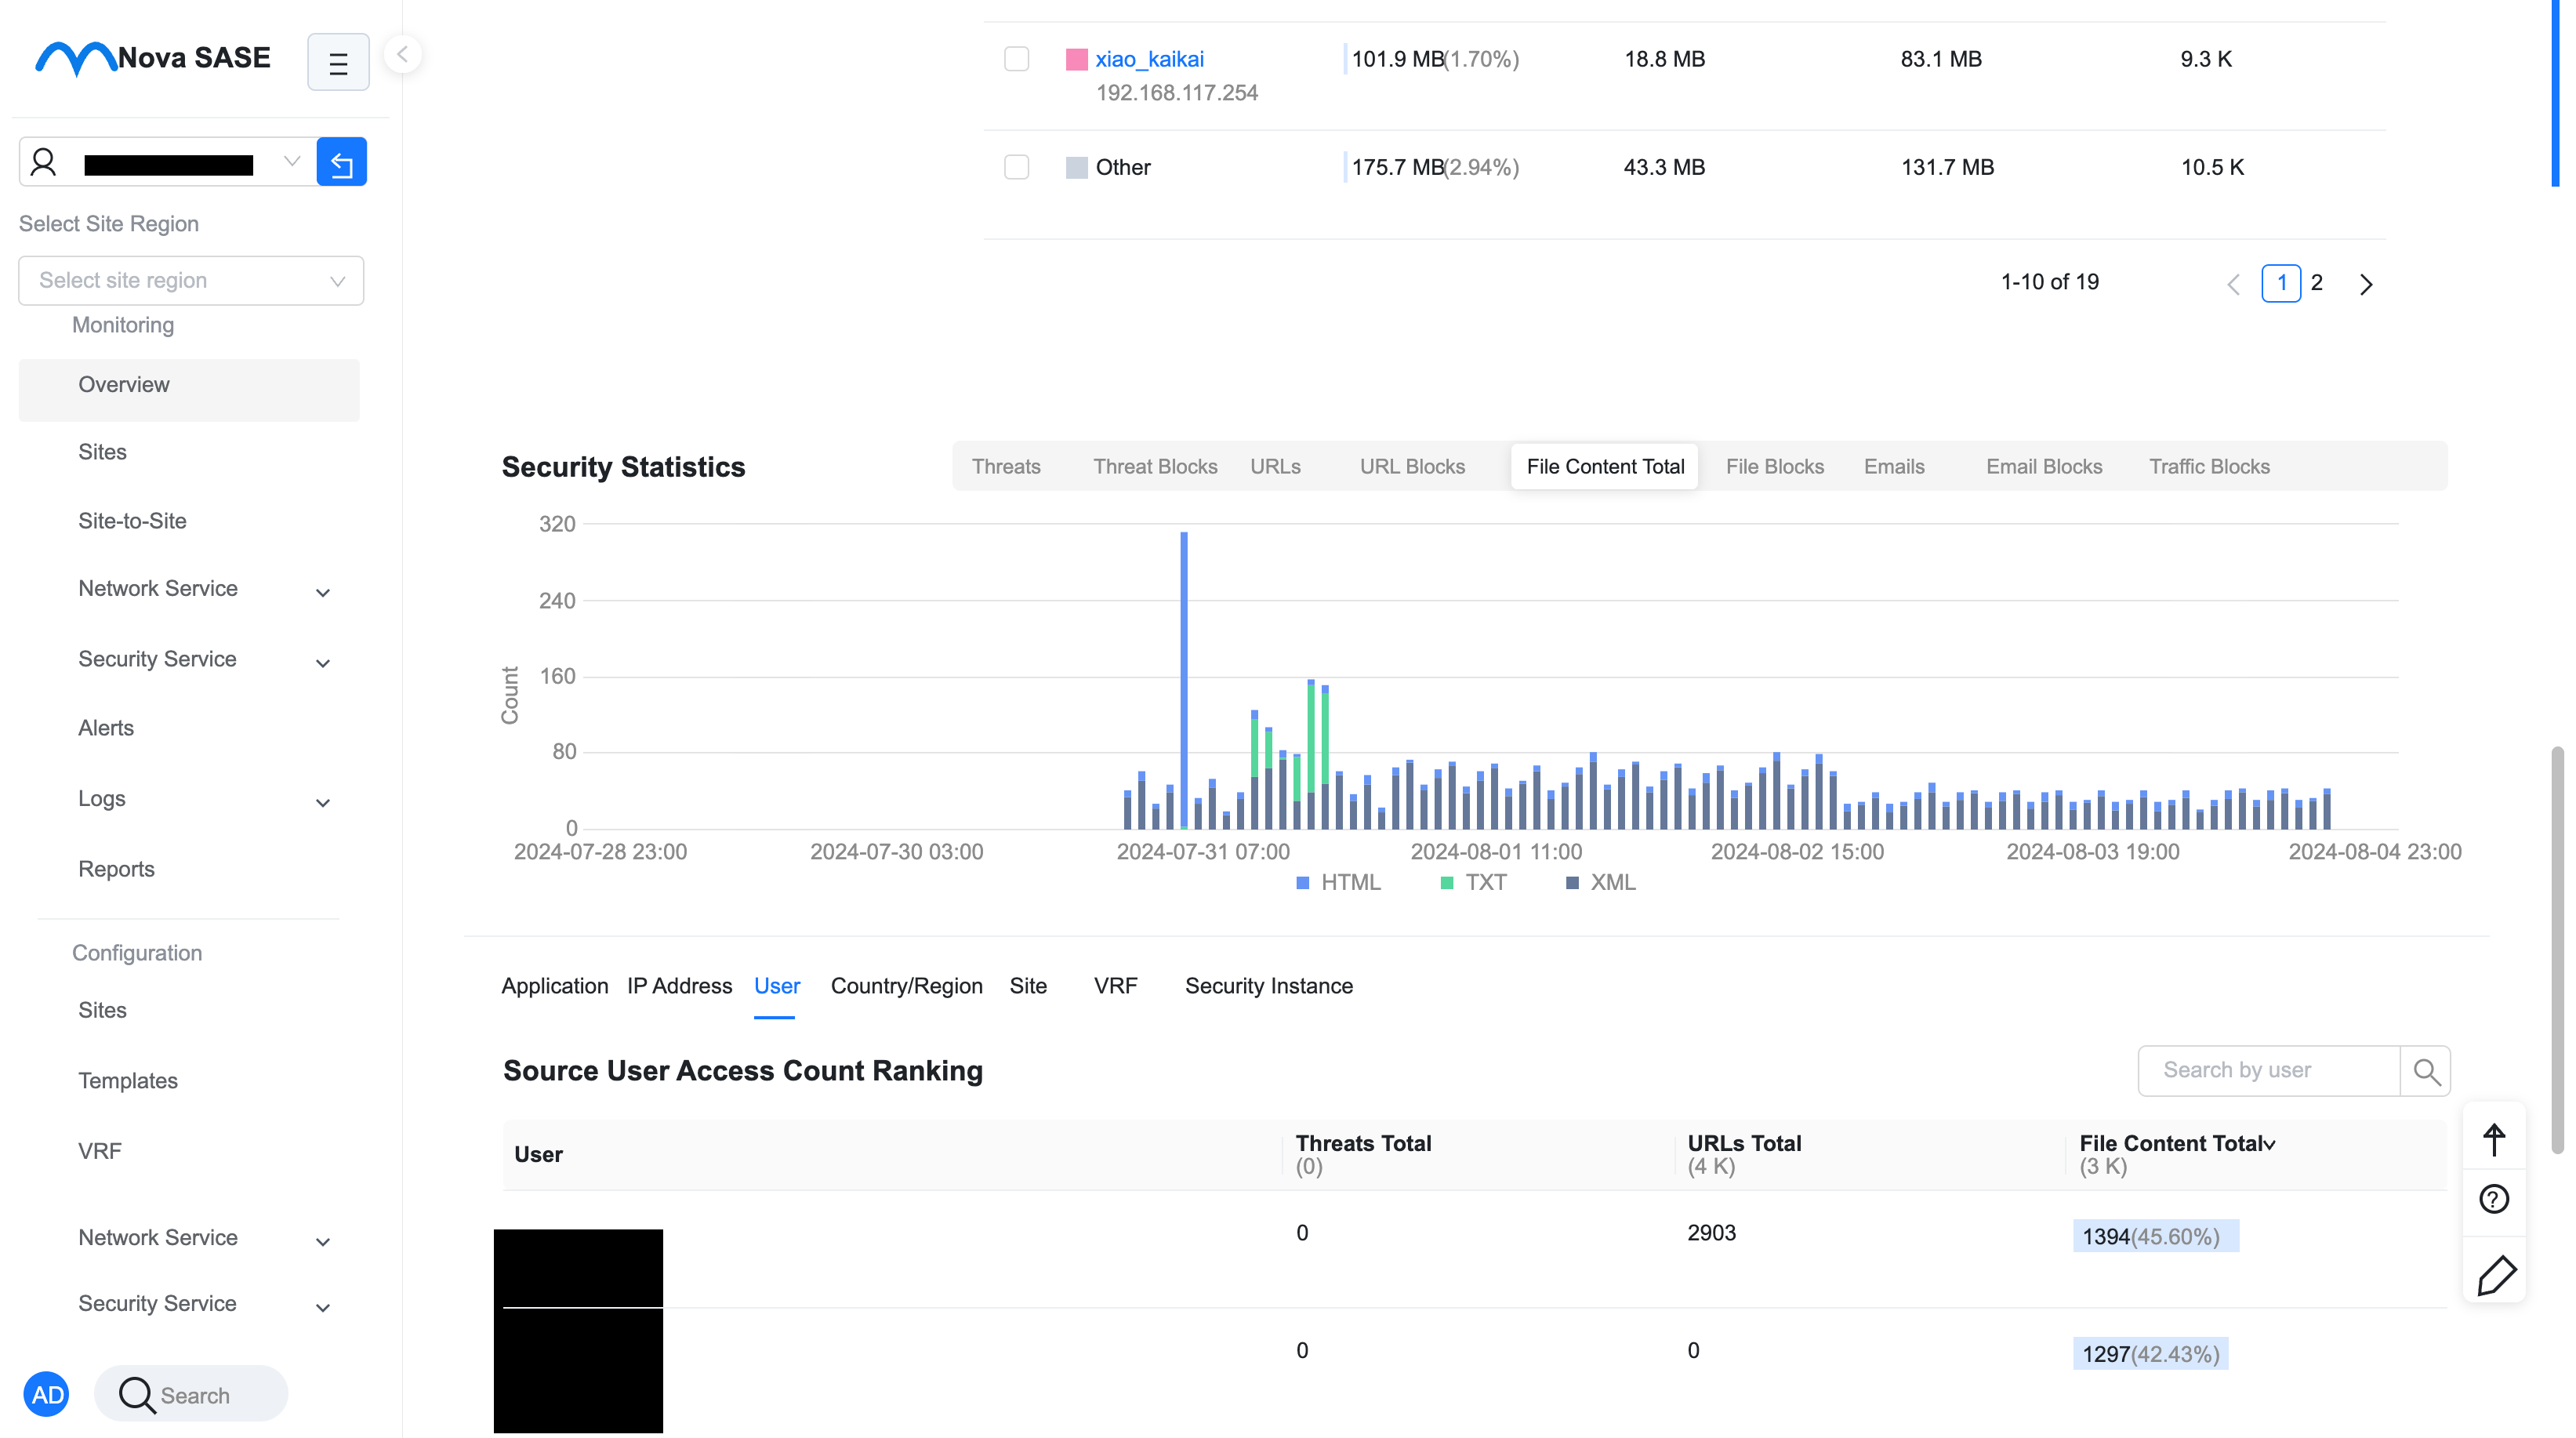
Identity-based monitoring
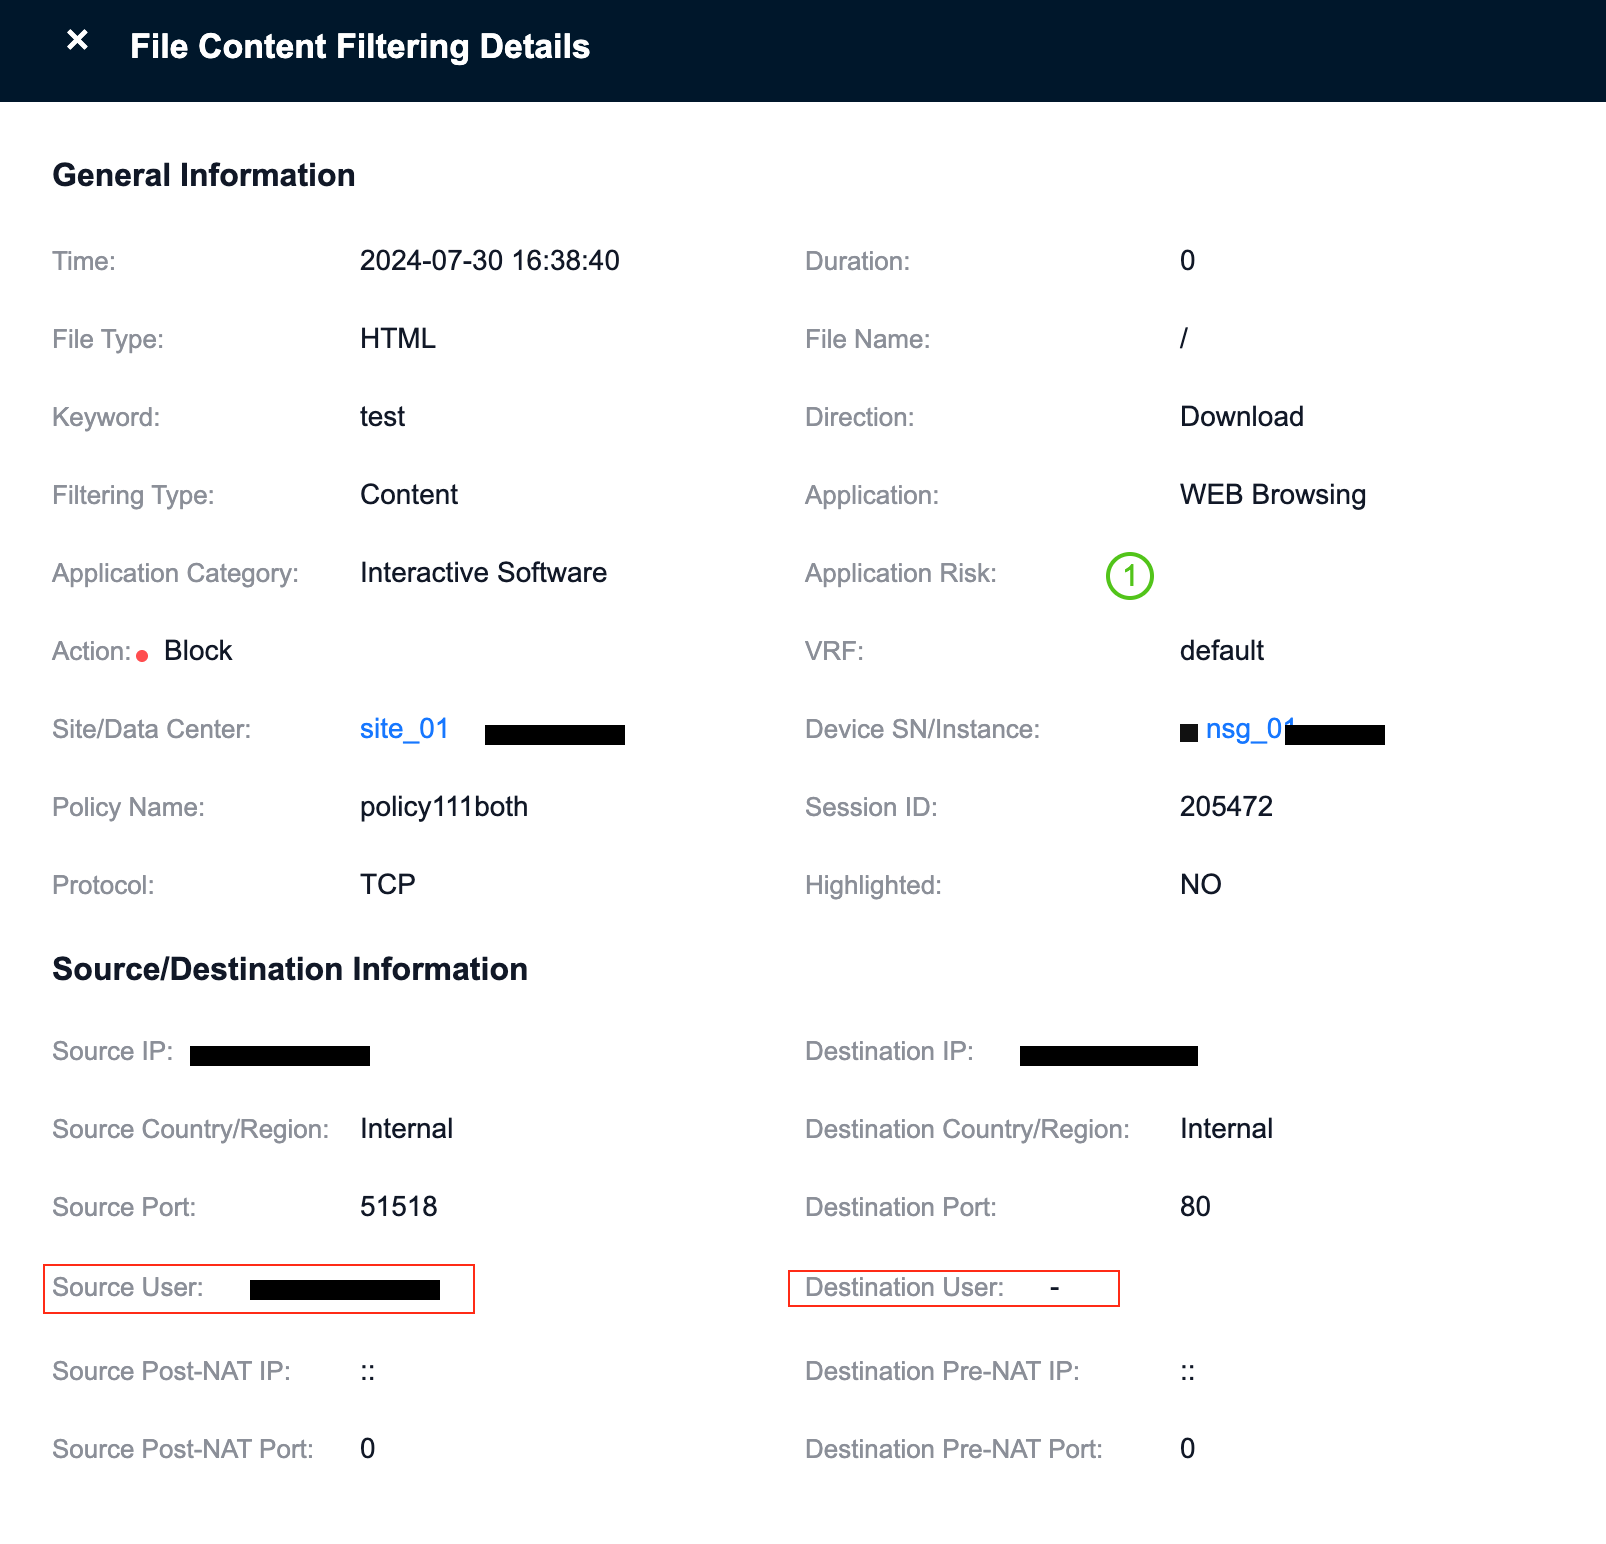
Security log
- Source/destination users reflected in security logs
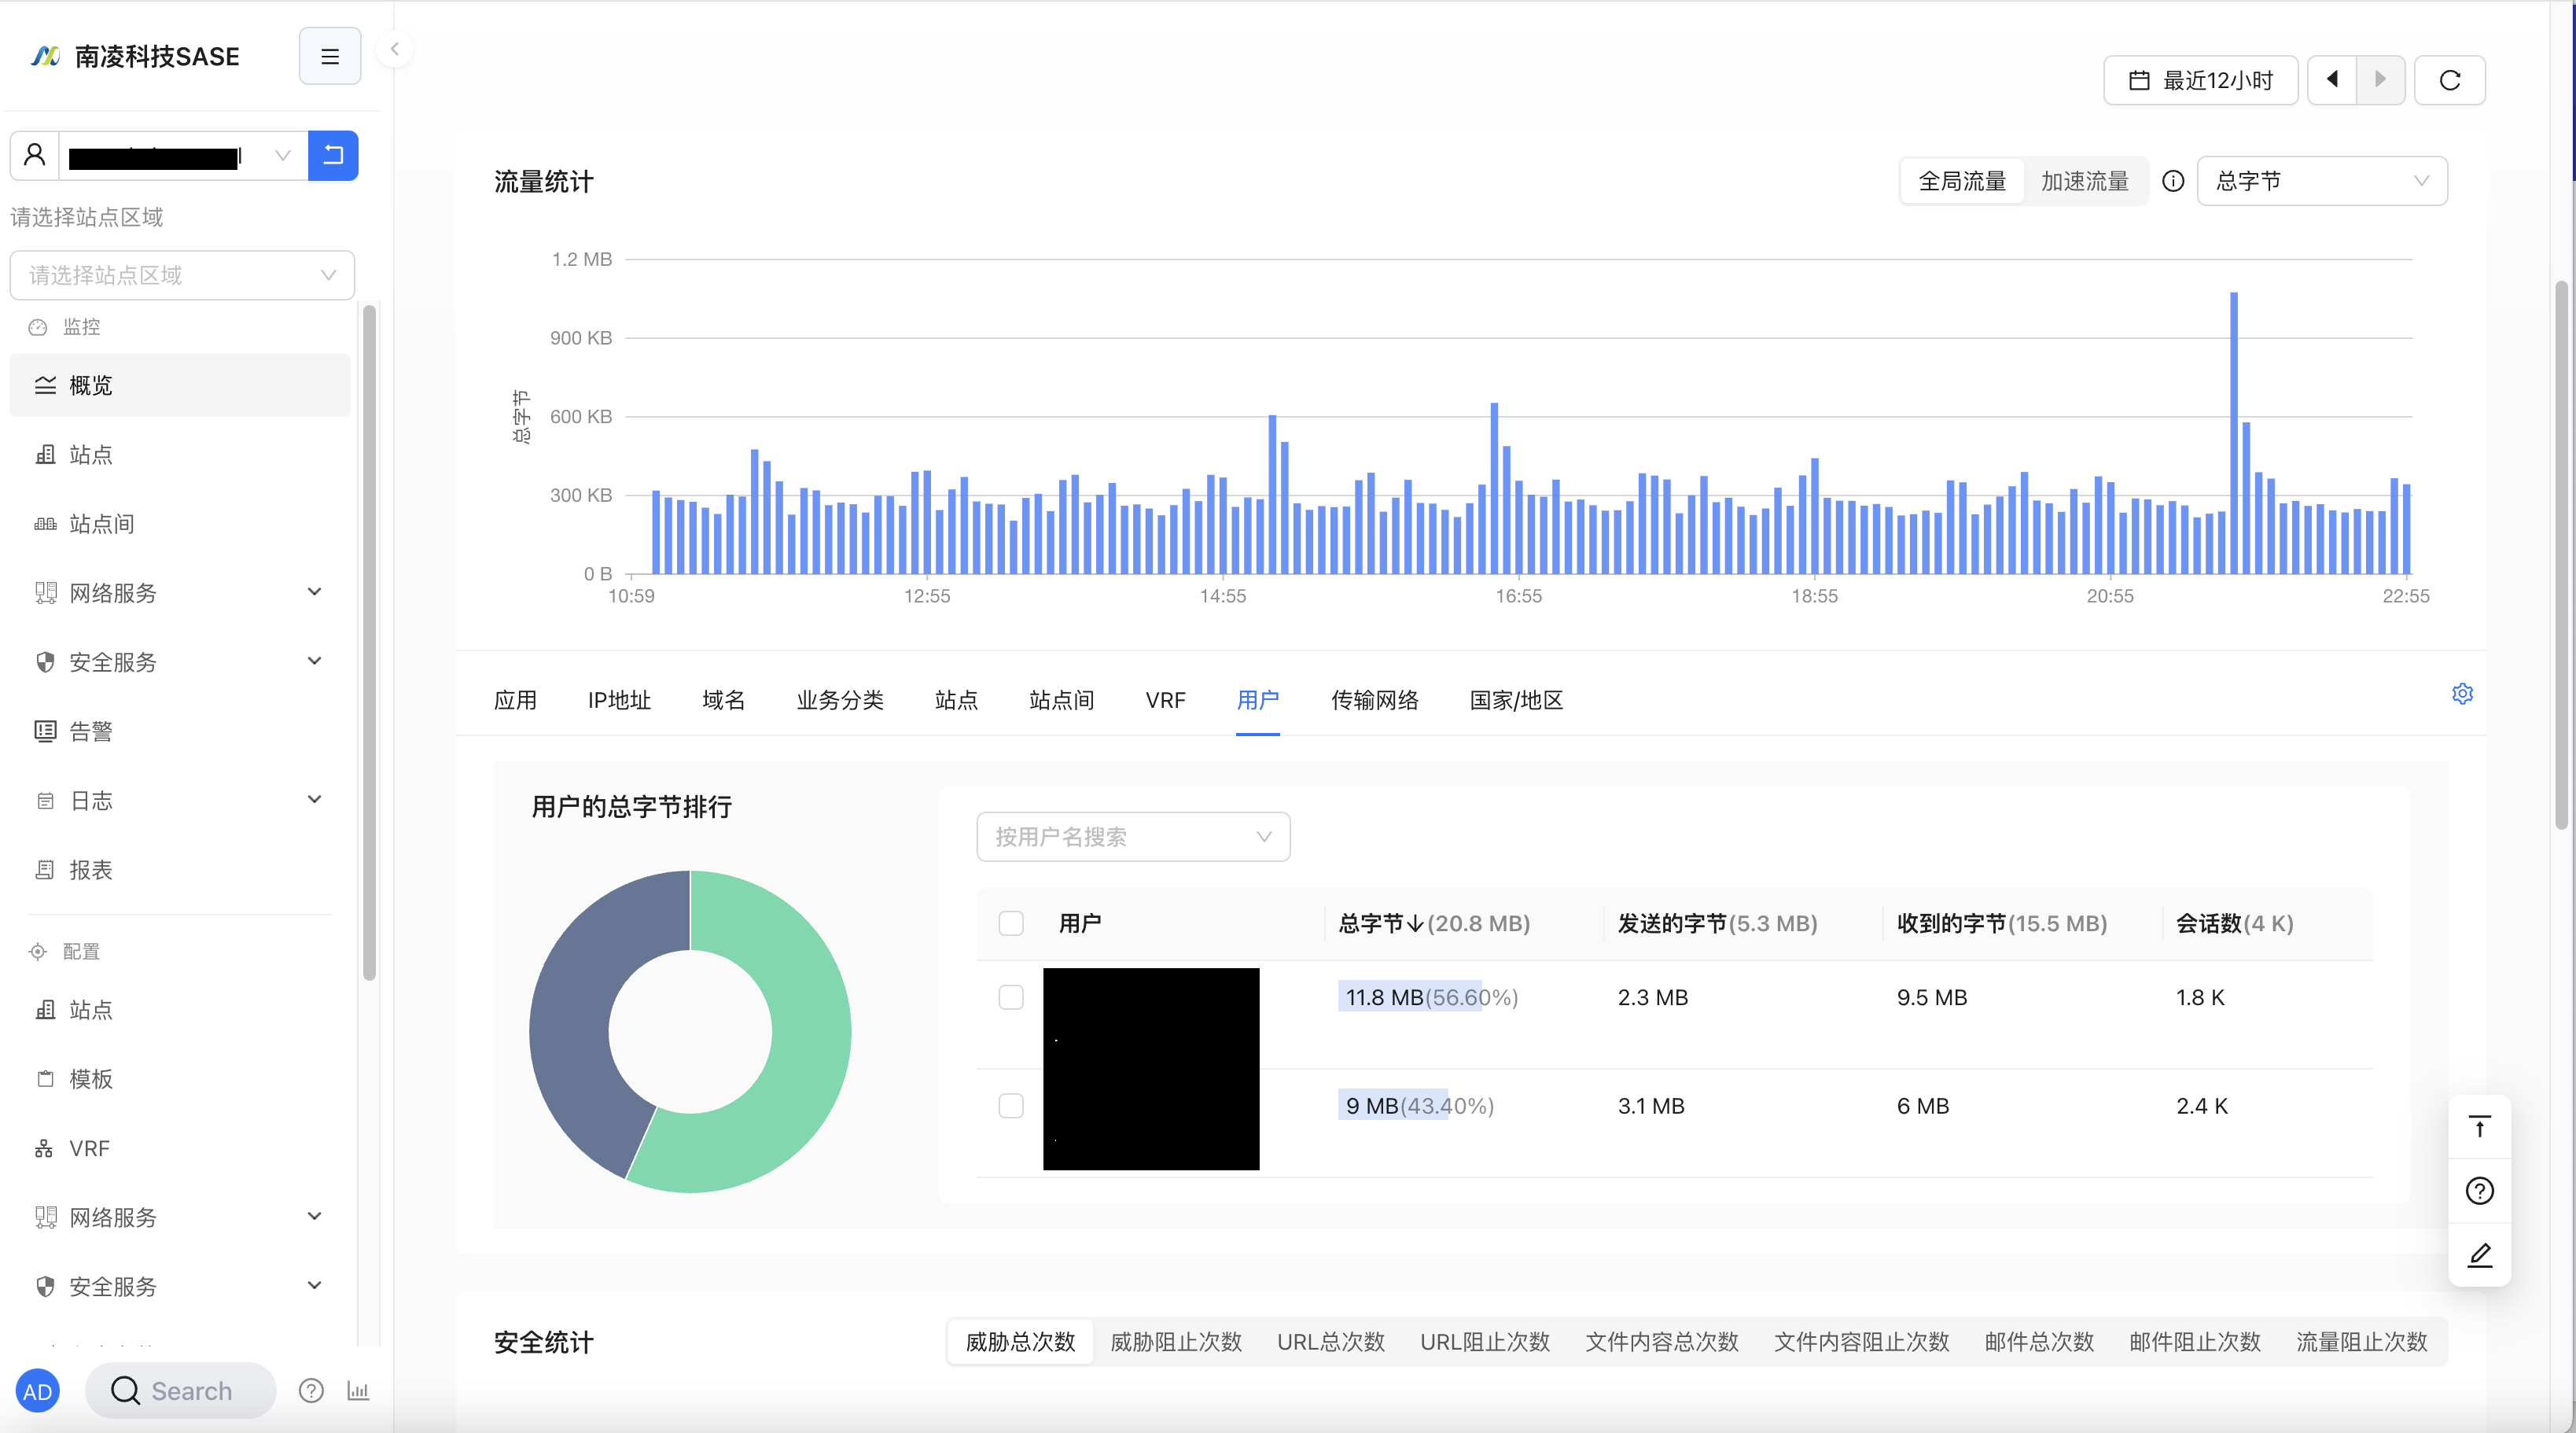
Traffic Monitoring
Security Monitoring